


A leaking garden hose doesn't mean it's time for the trash. Most common failures—split ends, punctures, worn couplings—are repairable in minutes with inexpensive parts. This guide covers diagnostics, repair methods, and a clever DIY connector hack using household items.
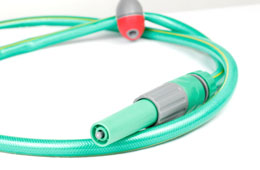
Uncoil the hose fully and inspect its entire length. Mark leaks with tape or marker. If damage is widespread (multiple splits, pervasive cracking, or brittle material), replacement is more economical. Localized damage—one or two leaks, a crushed end, a worn washer—is absolutely worth fixing.
Pro tip: Even a hose too far gone for pressure use can serve as a soaker/drip irrigation line—just lay it out, cap one end, and poke small holes along its length.
Find a rigid plastic cylinder (vitamin/pill bottle) with an OD matching your hose ID (typically ½″ or ⅝″). Cut off the closed end. Push the tube into both hose ends as a coupler. Secure with hose clamps or heavy zip ties if clamps aren't available. Works for low-pressure use; not a permanent high-pressure fix.
A $5–10 repair kit can add years to a good hose—saving money and keeping plastic out of the landfill.
Testing Soil pH for Blueberries and Estimating Yield from a Small Planting
Mothballs in the Garden: Not Labeled, Not Recommended
Choosing the Right Fertilizer: Time-Release vs. Water-Soluble for a Thriving Garden
Can You Plant a Vegetable Garden Over a Septic Leach Field?
Solving Wet Garden Areas: Drainage Solutions and Plant Choices
Tree Suggestions for a 15m Garden Divider: Rounded Canopy, ≤10m Height
Garden Cress: Growth Habits, Reproduction, and Culinary Uses
Organic Slug, Snail, and Centipede Control
Weed-and-Feed Accidentally Applied to Garden: Damage Control
Protecting Gardens from Bird Damage
Ants Destroying Vegetable Roots? Organic Controls That Work
What Can and Cannot Go in a Compost Pile from the Vegetable Garden
Garden Hose Buying Guide: 3 Essential Tips for the Perfect Hose
Copyright © www.100flowers.win Botanic Garden All Rights Reserved