

Growing aloes from seed can not only be fun, but a way of getting some rare species cheaply that might even not be available at all otherwise. This article will cover some of the ways to prepare and grow aloes from seed.
Though growing aloes from seed takes longer to have a mature plant than getting them as seedlings, there is some pride in successfully growing something from its most basic form (a seed) to a mature, flowering plant making its own seeds. And with many species of aloes, this can be done in an amazingly short time (4 to 6 years in many cases). And seeds are pretty cheap. But for me probably the most important reason for being able to grow aloes from seed is many species of aloe are only available as seed (or sometimes as very dinky seedlings, and the former is usually much cheaper and easier to get in larger numbers.) One can get seed of plant species one might not be able to find in other forms. The following is a discussion about growing these seeds up to stable, healthy seedlings.
Seeds:
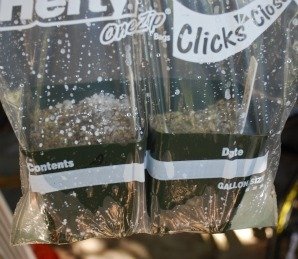
Where to get seeds? There are numerous sources on the internet for aloe seed, though most do not have super-rare species. For those, you usually have to contact a botanical garden or find someone with a large collection of rare plants and see if they are willing to part with some seeds. I have over 500 aloes in my yard so I simply collect seeds as they occur. For several years I only collected seeds and only planned on someday trying to germinate them. By the time I got around to trying to grow some, many seeds were over two years old. I stored these seeds in tiny paper envelopes and kept them in a shoe box. I do not know how long aloe seeds normally remain viable this way, but some of these two-year-old seeds germinated, though probably the majority did not. So I recommend either storing them in a cool, humidity controlled environment (eg. a cool basement), or use fresher seed. Keeping seeds in paper envelops ensures they won't rot from excessive humidity, though aloe seeds have very little moisture in them to begin with, so one might get away with storing them in plastic bags.
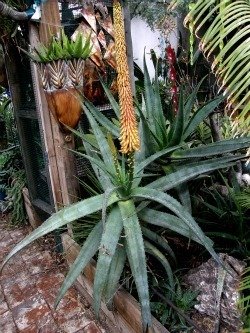
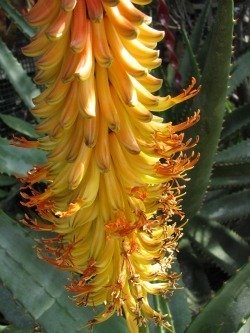
Aloe africana flowering in my yard (left); Flowers opening up right and ready to be pollinated by bees (right)

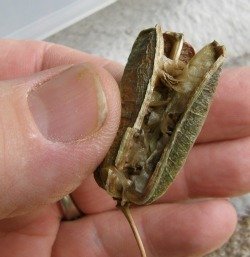
Aloe africana seed pods formed and starting to dehisce (left); seed from pods (right)
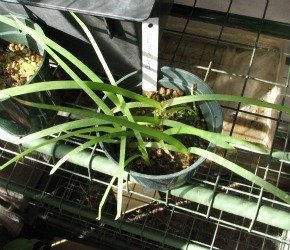
If all goes well, eventually one may end up with some seedlings of Aloe africana
The main problems with getting aloe seed is not knowing if these seeds are 1) from a plant that was correctly identified, or 2) are "true" seed. This latter problem is an extremely difficult one to work out. Obtaining seed the way I usually do certainly does not insure the seed will be "true." Gardens with numerous species of aloes growing near each other are likely to produce a lot of hybrid aloe seed as pollinators for aloes, primarily bees and hummingbirds, move easily from species to species. Most of the species I grow flower over a 3 to 4 month period so many of them are flowering at the same time. If you want "true" species, you should collect seed from gardens with only a few species of aloe, or collect aloe seed from plants that flower at less-common times of the year (most aloes bloom in winter), or obtain seeds from professional growers who know how to keep pollinators from moving between species, or who do their own pollinating (eg. greenhouse collections in which hand pollinating is the only way it's done).
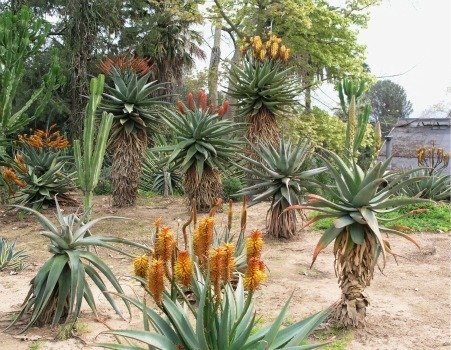
Aloes blooming at the Huntington in winter... all at the same time. Getting pure species from these plants will be difficult (particularly as several are already hybrids)
Another winter scene at the Huntington showing at least four species of aloe blooming at the same time
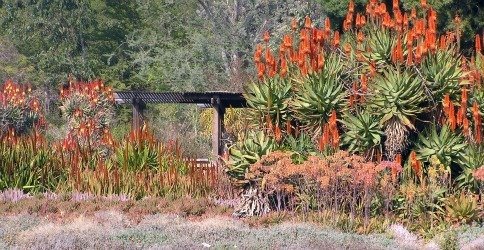
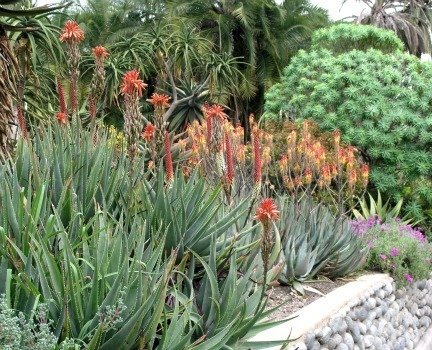
And here is a scene from Los Angeles arboretum in winter with lots of blooming aloes (including several hybrids)
Getting the seeds out of the seed pots is simple if you are paying close attention to your plants daily. Aloe fruits develop from the fertilized flowers and are usually a green color. But once they start to dry out or dehisce, you should be ready to harvest seed or the seed will all blow away. You can get seed out of these fruits just before they dry out, but only just before. Seed is black when ready, so if you cut into an aloe fruit and discover white seed inside, you cut into it too early. Timing is the key. I often end up cutting fruits open because my schedule does not allow me to observe the ripening fruit every day, and I may miss the dehiscence and lose all the seed.
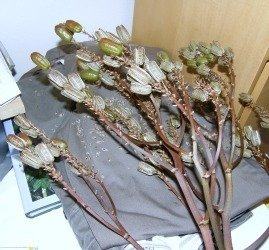
Aloe vaombe in the back fruits just ripening and splitting open (left); cut inflorescence with seeds falling onto a cloth (right)


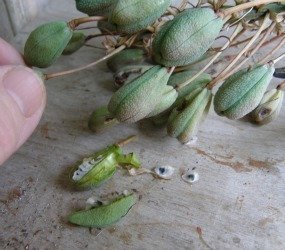
Several examples of seed pods opening up with seed inside

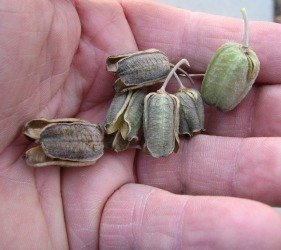
Aloe sinkatana seed pods on plant opening (left) and several in hand in various stages of aging (right)
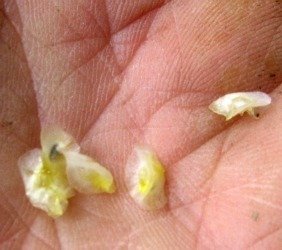
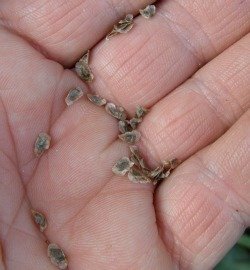
seed on left is not ripe yet (notice nearly white) while seeds on right, though clumping from juices of cut fruit, are nice and dark (ripe and ready to sow)
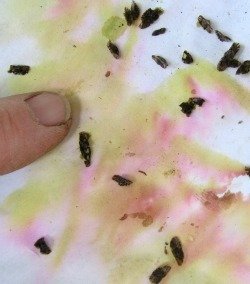
To cut open an aloe fruit, I make two to three cuts fairly deep and lengthwise with a razor-like knife and then gently dig out the seeds. The seeds are always in three longitudinal compartments (I have yet to discover an aloe fruit that had 2 or 4 compartments). Aloe seed is pretty tough once black and I rarely end up cutting any seeds in half this way. Some species have dozens and dozens of seed pre fruit, while others only have a few. A lot of that depends, too, on how well-pollinated the flowers were. Though I tend to do this outdoors (some aloe fruits are very juicy and the juices can stain everything from fingers to counter tops etc.), some aloes seeds have very large wings, which they have evolved so that the seed can be spread by the wind... and doing this on a breezy day can be very frustrating.
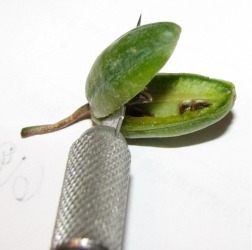

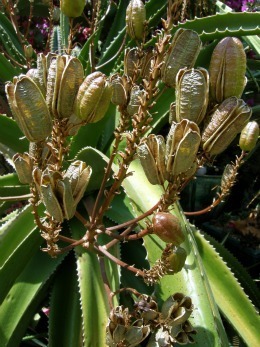
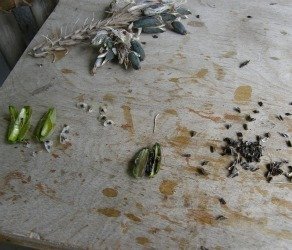
Seed pod cut in half (left) and one in third (right) showing seeds within.
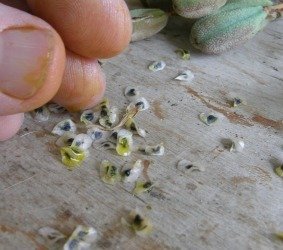
Aloe munchii (a rarer species) showing unique bumpy seed pods and one cut up with seed coming out (left); right shows seed and staining of finger from cut seed pods of Aloe munchii

left photo: Aloe munchii (left) and Aloe pretoriensis (right) showing some variety in appearance of cut pods and seeds; right photo shows a variety of seed pod appearances among various species of Aloe growing in my yard.
For more industrious aloe growers, putting mosquito-like netting around the inflorescences once the flowering is done allows one to be less observant and all the seed will end up in the bottom of the net instead of somewhere out in the garden. Still one needs to get this seed indoors before too long as seed sitting in the hot sun may not remain viable for too long.
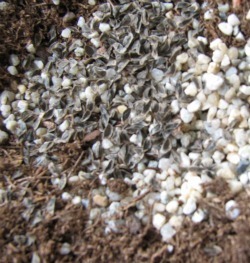
The seeds themselves require little species care or handling before planting. Most are quite drought tolerant and seem to have a pretty long ‘shelf life'. I keep mine in a cool dry place, but not refrigerated, and some have remained viable for over 2 years. Aloe seeds vary quite a bit from species to species in terms of size, ‘wings', quantity per seed pod and viability.
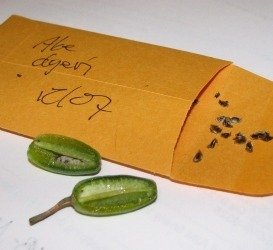
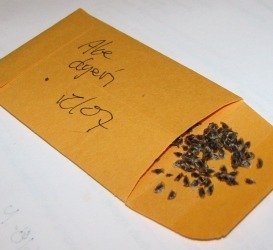
For example, this packet is going to be filled with Aloe deyeri seed. On the left is what I get out of a few seed pods and the right is the entire inflorescence (not really a great haul, but more than enough for me)
For example one of the best germinators I have grown is Aloe vaombe, a Madagascan tree aloe. Fortunately this is also one of my favorite aloes. This plant is not only a fast and reliable grower (in my climate of southern California) but it also is a "super" producer of seeds, cranking out thousands of good seed each flowering season. This plant has seeds about 2mm in diameter with another 2 to 3mm of film around it (called the wing in most plant species that have some similar accessory structure designed to allow seed dispersal by wind). Each seed pod/fruit contains 50 or more seed and my tree makes 50 or more seed pods per flower, with 2 to 4 flowers per season. That means there is a potential to grow 10,000 seedlings each year from a single aloe. Of course 100% germination is unlikely with any seed batch, and I cannot begin to grow even a small fraction of that many aloes. But this species in my experience has an excellent germination percentage with most of the seeds I plant turning into little baby aloes. Fresh seed germinates in just days, though year old seed takes up to a week and is less reliable.
Aloe vaombe flowering in my back yard (left) Aloe vaombe in full fruit in yard 2-3 weeks later (right)
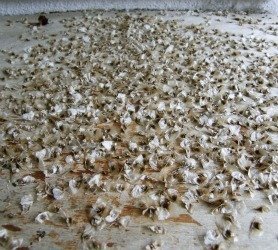
Here is just one Aloe vaombe seed pod with dozens of seed in it (left); and right is hundreds of seed just from a handfull of seed pods
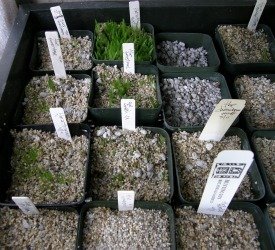
Growing containers:
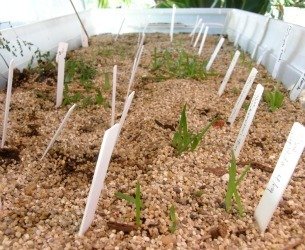
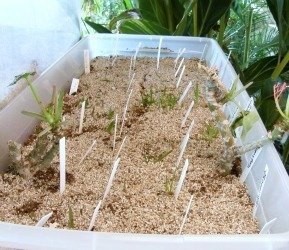
There are many ways to germinate seed and I cannot say one is better than another. Many experienced aloe growers grow their plants in baggies, finding this an excellent method to keep a humid environment that is both convenient and cheap. Note: though I have grown seed in baggies, it is better still to grow seeds in pots within the baggies, keeping the seeds in a stable substrate and easier to remove later, as well as keeping the seedlngs from sticking to the sides of the baggies and molding. I use large, shallow sweater boxes or plastic storage containers one can obtain cheaply from department stores. This way I use less soil and I have less damping off concerns since my plants are grown in a slightly lower humidity environment. And I can easily heat the entire container with heating pads if necessary (though it rarely is). Probably any container would work, however.
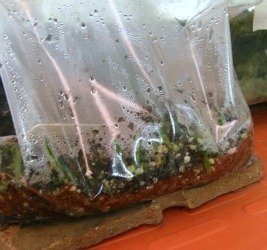

Aloes growing in a baggie (left)- best to put in pot in baggie!; right is one of my sweater box attempts
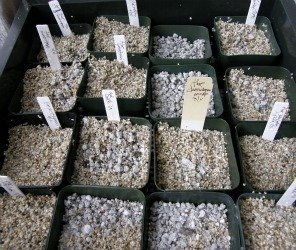
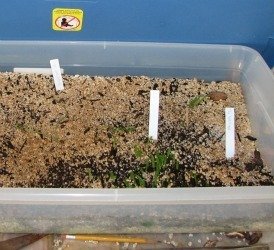
two of my more recent aloe seed set ups. Water tray under the pots on the left
Heat:
Most aloes bloom in winter so seed production tends to be heaviest in winter and early spring. What this tells me is that most aloe seed is probably evolutionarily designed to germinate and grow in relatively cool conditions so additional heat is probably not necessary if one lives in a similar climate. This means that the seedlings will have a full summer and fall to get sufficiently large that they can tolerate the coming winter. Of course many aloes do not live in a climate where there is much of a winter (temperature-wise) and many of these aloes flower at different times of the year (this is particularly true of many mid African and Saudi species). Still even in year round warm climates, most aloes flower in winter for some reason.
I rarely add heat when growing aloe seeds as they seem to germinate fine at our ambient temperatures in southern California, even in the cooler times of the year. But if you live in a place where it freezes, you will need to grow these indoors, either in a greenhouse or on a window ledge, etc. Indoor heat will probably be sufficient. I have tried growing aloes on heating pads/trays but I usually damaged the sensitive roots this way and no longer am trying that method. The added heat rarely seemed to improve germination. But I also try to grow all my aloe seed, no matter what time of year the plants normally flower, in the spring. This means there will be a hot summer for all the seedlings to grow in (and sometimes too much heat) and my big challenge then is keeping the delicate seedlings cool enough (or at least damp enough). I have grown some aloes at all times of the year and if anything, excessive summer heat is much more of a problem for me than insufficient winter heat.
Water:
I find it hard to overwater aloe seeds, at least if grown on a super-well-draining bed of pumice or perlite. In fact, desiccation is the big problem for me, so for species that are not fastidious and do not seem to rot as easily, I grow them on some soil and pumice combination just to keep them from drying out too fast. Of course, if I were more diligent and paid closer attention to my seedlings, and watered them daily as it got hotter and drier outside, I would have less seedling loss. This is why growing them in baggies or closed plastic containers often works out well- keeps them humid and you can leave them alone. But then battling fungus can be a problem (which is why many grow them in baked/sterilized soils or soiless media to keep fungus to a minimum... somehow it still seems to ‘sneak' in, though). Watering with an antifungal mixed in (very dilute) is not a bad idea, though some say this slows the seedlings down a bit.
Soil:
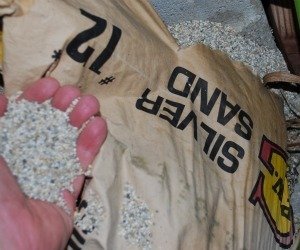
There are probably as many soil and soil combinations that would work as there are those that grow aloes. Many use some organic soil/ pumice/sand mixture. But most use some inorganic mixes or just perlite and/or pumice. I use perlite/pumice and some sand (to hold seed down), though I do not use a consistent mix of each. Sometimes I use seed starting soil, too, though only for species that seem to grow fast or desiccate too easily. One recipe a professional aloe grower uses is 40% organic material, 40% pumice and 20% sand (the less fine the sand, the better generally). I use #12 Silica Sand since I also use that sand in my general potting soil mixes for succulents. Playground sand is so fine it can make the mix drain a bit too slow.
left growing aloe seeds in cactus soil with added perlite; right growing seed in pure pumice with perlite (no soil at all)
If you are to grow aloes in a humid environment such as exists in a baggie or enclosed plastic container, you must try to grow them in as sterile a soil as possible. As mentioned above, some literally bake their soil to the point of sterility--not a bad suggestion--mainly to keep the fungal complications to a minimum. Then soaking the soil with an antifungal is recommended. Some add ‘friendly' fungi after their soils are sterilized. And some claim that if the substrates are inorganic, and the environment is well ventilated (not inside a baggie obviously then) they rarely run into problems.
Cover layer:
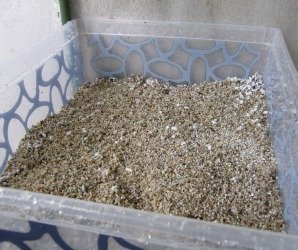
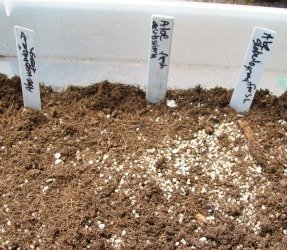
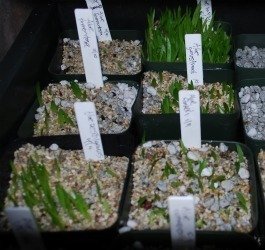
Once the soil is ready by being a bit dampened, the seeds are spread along the surface. There is no need to bury aloe seeds into the germinating soil. But after spreading them out, they do need to be covered by a thin layer of clean sand (again, larger sand is better) or fine gravel. This cover layer keeps the seeds in place so they don't blow away, dry up or get washed to one corner if you repeatedly water them.
Aloe seed set on substrate/soil (left); good choice for topdressing (#12 Silica Sand)

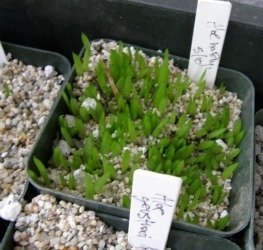
Sand covering seed sed on soil (can see the pumice in pots no seed put down yet- left); seed pushing up easily through top dressing of sand (right)
Water/Humidity:
Growing aloes in baggies or enclosed plastic containers has the advantage of having a constant humidity. Soil soaked thoroughly with an antifungal and then placed in one of these containers will probably supply all the water the seeds will need to germinate, as well as the young seedlings to survive on for at least several months.
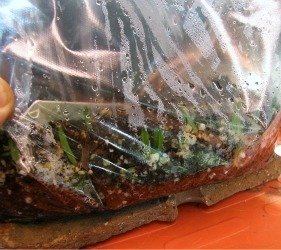
you can see how humid it is in the baggie method. No need to add water
Since I grow mine in open containers, I water them frequently (nearly every day if the weather is hot and dry), which is labor intensive, but keeps the fungal threat low. Plus this keeps me actively observing for problems and feeling like I am at least doing something. And I like to water: it gives me an excuse to look at the plants frequently. I find overwatering is difficult if the soil mix is extremely well draining (particularly if no soil at all, such as with seeds grown in pumice or perlite).
Fertilization:
Usually young seedlings do not need much fertilization, but if trying to raise aloe seedlings on perlite or pumice alone, a dilute mix of fertilizer (for example ¼ strength of what is recommended by the manufacturer) perhaps with each watering (which I usually am too lazy to follow through with) is a good idea. Some successful aloe growers do this.
Seedling Care:
Usually within days to weeks of sowing seeds, you will notice lime green, single succulent leaves sticking out of the soil up to one inch in length. These single leaf seedlings are extremely tender and do not tolerate handling well. And their root structure consists of a single, very fine, delicate hair or two. It is best not to touch or try to move aloe seedlings until they have developed 3 or 4 leaves (about 3 to 6 months old). Other than moisture and protection from fungus and soil gnats, or possibly fertilization if grown in pumice or perlite only, these plants need little care. Bright light is recommended but not any direct sunlight. Growing aloes in the dark makes for very weak, elongated plants that adjust poorly to movement and brighter light situations later. Etiolated seedlings also seem much more prone to rot, and low light situations are more apt to allow fungus to grow as well. Air flow also keeps fungus and fungal gnats to a minimum. One advantage to growing aloes in sealed baggies with sterile, anti-fungal-soaked soil is there is no reason to open the baggies or do anything with the seedlings for many months. And the baggies let in light sufficiently. Still, you need to put the bags near a light source, but obviously not in full sun. Baggies do not provide any airflow, but the hope is that in a sterile environment, that will not be an issue.
It is during this phase, from 1-2 leaf seedlings on up to the size where one can move them, that I have seen the most difficulty in terms of survival. In general, aloe seeds germinate pretty easily and predictably, but keeping the tender seedlings alive until they are ‘stable' enough to move up is a tricky thing (at least for me). One must battle desiccation, fungus, fungal gnats, nutritional balance, proper lighting and protection from any environmental trauma such as high winds, overheating, chill, something or some animal eating or crushing them, overcrowding etc. Once they have enough bulk, leaves and root to move up, they become much hardier and less apt to die for no apparent reason.
Damping off, from fungal invasion, is probably the main reasons for failure of getting your seedlings to adult-hood. Applying an antifungal regularly is one way, or presoaking a sterile (cooked) soil mix is another. I tend to grow my aloes in an open-air situation and have very little damping off. However, my primary problem is with desiccation, not fungus. An automated misting system would be ideal, but I do not have that in my operation. And here in Southern California things get pretty inhospitable for dinky aloe seedlings in summer (temps well into the hundreds) so growing these indoors would probably make a lot more sense. I personally would recommend doing as I say, not as I do.

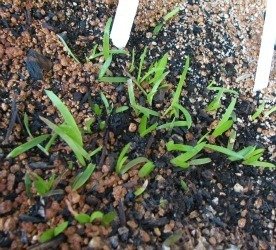
At first every thing looks great... aloes seelings pop up all over. This is the easy part
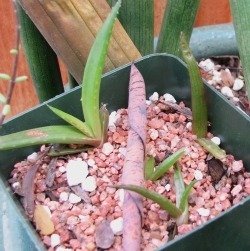
Had a pretty good turn out here in this pot this year.... but as weather heated up, things disappeared.
 Had one of the best years this year, but things still dried out on me
Still, got a lot of Aloe vaombe seedlings (left) and Aloe cooperi seedlings a few years ago (right)
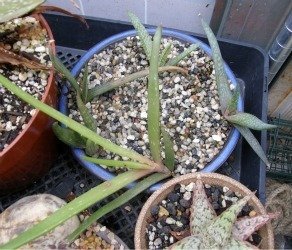
Once the seedlings get to this size, they suddenly become a lot hardier and getting them to survive is no longer that tricky
The following is a ‘recipe' example from a successful aloe grower that uses some of the above suggestions: 3 parts organic material, 3 parts pumice and 1 ½ parts coarse sand. Mix well. Moisten lightly. Put in baking pans and stick in oven on 325F for 50 minutes. Store cooked soil in clean buckets (preferably with lid). Put soil in pots (about 4" diameter- a commonly available size) and place pots in pan of diluted fungicide up to top of soil level and soak. Pull out of pan, apply seeds to top layer of soil and cover lightly with large grain cleaned sand. Put in gal ziplock bags and seal. Keep in bright light at room temperature until seedlings are about 4-5 months old and take out of baggies. Keep soil moist for another 4-5 months and be sure no direct sunlight. I haven't personally followed this recipe to the letter, but I have tried it half-heartedly and have say, the aloe seeds grow great in this sort of environment.
 pots in bags works a lot better than soil in bags
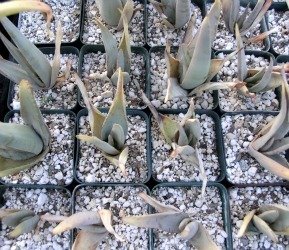
Once the seedlings are old enough, they are removed from the germination containers and put in single small pots (usually two inch) or they can be placed in larger group containers. Aloe roots are pretty small relative to the plant's overall size, so crowding of aloes rarely is a problem until they are getting fairly large (covering up each other's ability to get sufficient light). I use common potting soils or cactus soils with added pumice (often half and half) and continue to water frequently.
A few species are less tolerant of routine watering than others and you should learn a bit about each of the aloe species they are growing to learn which species are less tolerant of frequent summer watering (eg. most of the powdery-blue, thick, stiff-leaved plants from the super-arid climates are more likely to rot from excessive watering). These intolerances vary with the season with most blue plants seeming more intolerant to water the hotter it is. However, compared to their adult counterparts, seedlings seem more tolerant of excess water than the adults and you need to be less concerned about accidentally overwatering these seedlings.
Once your seedlings are about a year old, they can pretty much be treated a bit more harshly and grown somewhat as adult plants, letting them dry out more and perhaps see some direct sunlight in the mornings and evenings. Eventually all day sun will be possible for those species that like that sort of thing (many do not), as long as you don't live in a super harsh, dry, hot climate. If you do, be more selective about which species you bake in the sunlight. That is what shade cloth is
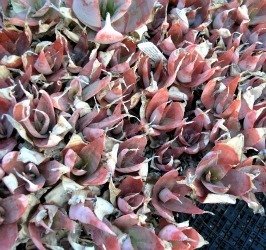
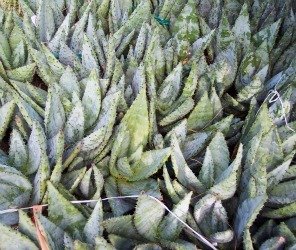
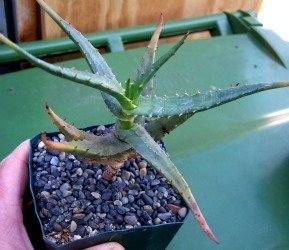
Once your seedlings get this large, they are tough little plants and ready to put in the ground, individual pots or sell them...
For example, this is a nice flat of Aloe viridifolia seelings that would each fetch a hefty price as these are pretty darn rare (sadly, these are not my seedlings... oh well)
Copyright © www.100flowers.win Botanic Garden All Rights Reserved