


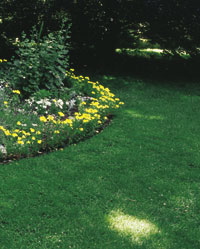
Laying sod provides an instant, lush lawn that, when installed correctly, eliminates soil erosion, mud, and weeds. You can lay sod almost any time during the growing season, making it a versatile option for quick results.
Professionally grown sod is dense, sturdy, and typically weed-free from the start. It's available in several common grass types suited to your region. While the upfront cost of sod is higher than seed—especially with professional installation—long-term expenses even out because seeded lawns require overseeding in spring and fall to achieve similar density.
Treat your lawn like a garden bed: prepare the soil thoroughly by incorporating ample organic matter to retain moisture while ensuring good drainage. Aerate to boost microbial activity. After laying sod, deep watering is critical—water must penetrate 6 inches below the sod to encourage roots to knit deeply into the soil. Pay special attention to seams between sod pieces and edges along hardscapes, as these dry out quickly.
Still deciding between sod and seed? Our grass seed calculator can help you estimate seed quantities.
Fresh, healthy sod is the foundation of a successful lawn. Commercial sod is grown in top-quality soil with regular fertilizing and watering, resulting in dense, weed-free grass.
Ideally, sod should be harvested within a day of delivery. Arrange delivery for immediately after soil preparation. Sod arrives on pallets as rolled or folded strips (1–2 feet wide, 4–10 feet long) with soil side exposed.
Inspect a strip before laying: grass should be at least 2 inches long, uniformly green. The soil underside should be dark, moist, about 1 inch thick, with a tight matrix of healthy roots.
Store pallets in shade, keep sod moist, and cover to prevent drying if delays occur.
Sod comes in many grass types. For patching, match the color and texture of existing grass. When in doubt, choose a mixture. Sodding also lets you introduce a blend suited to your site: tall fescue mixes withstand heavy foot traffic, while Kentucky bluegrass blends offer elegant display lawns.
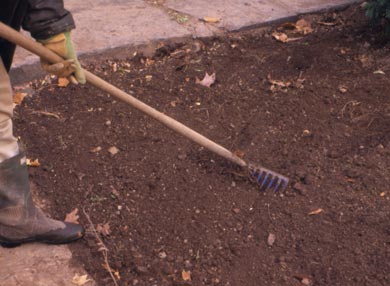
Establish the bed 1 inch below grade so the new lawn sits flush with walkways. Dig in organic material and slow-release granular fertilizer, then rake smooth and level.
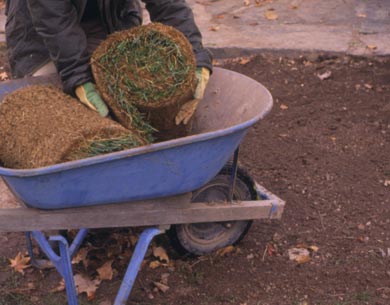
Store sod in shade, kept rolled and moist until use. Transport one or two rolls at a time via wheelbarrow. Lightly moisten the soil bed just before laying.
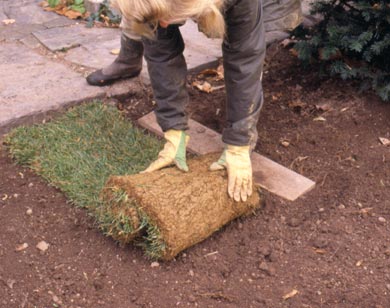
Start along a straight edge (sidewalk, driveway). Unroll gently, snug against the hardscape. Begin the second roll so its end abuts the first tightly.
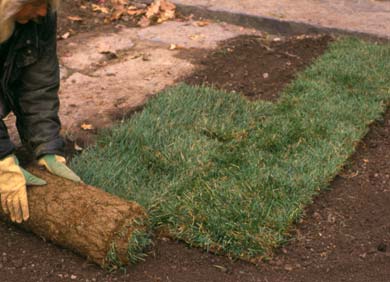
Lay rows in a brick-like pattern so end seams never align. Push edges close without stretching.
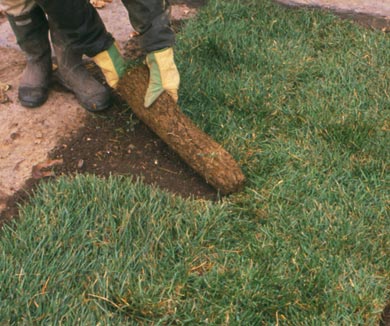
Use a kneeling board to avoid standing on new sod. Cut pieces with a sturdy knife for irregular spaces.
Step 6: Ensure Root Contact Lightly tamp or roll the sod to establish good soil contact. Fill any gaps with loose soil. Water the entire lawn generously.
Spring and fall are ideal, with natural rainfall aiding establishment. However, you can patch bare spots anytime the ground isn't frozen. In hot summer months, be prepared to water frequently.
Lawn Burned by Fertilizer on Yellow Spots: Diagnosis and Recovery
Fairy Ring in Lawns: Mycelium Mats Block Water and Require Aeration Plus Fungicide
Managing Spongy Bermuda Lawn on Sandy Soil
Midiron/Ryegrass Sod Under Standing Water: Will It Survive?
Saving Sod Left Overnight on Pallets: A Winnipeg Case Study
Choosing and Growing Lawn Grasses: Cool-Season vs. Warm-Season
DIY Sod Repair: Step-by-Step, Pricing, and Resources for a 60 sq ft Patch
Laying Sod in Late Fall: A Northeast Ohio Homeowner's Guide
Moss Control in Pennsylvania Lawns
Troubleshooting Grass Seed Failure in Tucson's Desert Climate
Reviving St. Augustine Sod That Dried Out After Installation
Year-Round St. Augustine Care in Southern California
Improving Hard, Uneven Malaysian Grass in Thailand for Barefoot Comfort
Copyright © www.100flowers.win Botanic Garden All Rights Reserved