

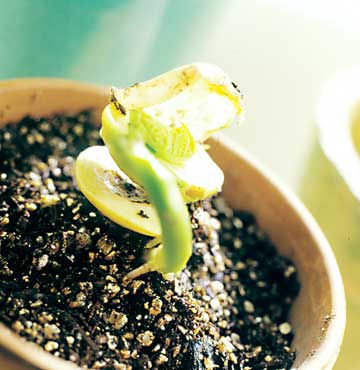
Starting plants from seed has many practical benefits: You save money, get a head start on the growing season, and choose from varieties far beyond those locally available. By starting seeds, you also get to experience the joy of watching a seemingly lifeless seed sprout into a living plant.
A seed is a plant embryo and its initial food supply is stored within a protective coating. Seeds remain dormant until a combination of moisture, temperature, air, and light triggers germination.
Seeds have different shelf lives. Some will remain viable for hundreds of years, whereas others may only store well for a couple of years.
Click here to learn how to transplant your healthy seedlings.
continue reading belowKnowing when to start seeds indoors takes some backward thinking. Find out the average date of the last frost in your area and the number of weeks before that date you should start a particular seed. (The number of weeks varies and is listed on the seed package.) Then count backward on the calendar from the average last frost date to know when you should begin starting seeds.
As a general rule, start most seeds six to eight weeks before your average last frost date. If you begin starting seeds too early, you'll have to keep the seedlings inside too long, and they will be weak by transplant time.
Find your area's average last spring frost date.
Ready to get starting seeds? Just add water. Water softens the seed coat and allows the food source stored within to nourish the emerging seedling. You must keep your seed-starting medium moist -- but not soggy -- until sprouts appear. Small containers dry out quickly, so check them often.
Seeds vary in the amount of light they need to germinate. Some must have lots of light, so they should not be covered with soil when you are starting seeds. Others do best with some light, requiring just a thin covering of soil. Still other seeds germinate best in darkness and should be covered with 1/4 inch of fine soil, firmed down. Check the recommendations on the seed packages.
After starting seeds and germination, light is essential for all seedlings, and it can be natural or artificial. If you have sunny windows in your home, take full advantage of them. You'll need to supplement sunlight with artificial light. Seedlings require 12 to 16 hours of light per day.
Temperature needs of starting seeds are different during and after germination. During germination, the warmer the soil, the better. The recommended soil temperature range for most seeds started indoors is 75˚to 90˚F.
If room temperature is about 70˚F, you may need to place containers in a warm spot, such as near a kitchen stove, heat vent, or on top of the refrigerator. After the seedlings are up, 60˚ to 70˚F is fine.
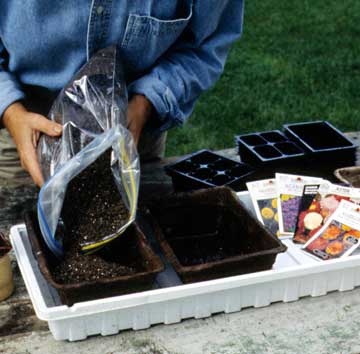
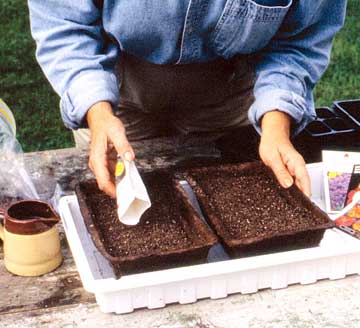
Fill your containers with moistened seed-starting mix.
Here's a hint: Many peat-based seed-starting mixes repel water when they dry out completely. Moisten the mix by putting some in a container or bag with a small amount of warm water and stirring it well.
What You'll Need
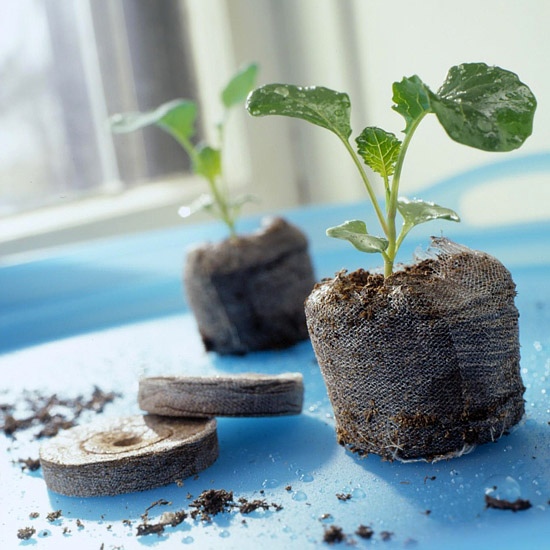
You can use pretty much anything you want for your containers. A cardboard egg carton makes an excellent biodegradable seed-starting flat, as do cut-down milk jugs, yogurt cups, nursery flats, and disposable aluminum pans. You can also purchase biodegradable peat pots that can be set in the ground when it's time to move seedlings outdoors. Whatever you choose, make sure the container has holes in the bottom for good drainage.
Seeds are a little fussier about what medium you start them in. Because seeds contain enough food to support the germinating seedlings in their first days, they don't need to start in an especially nutrient-rich medium. Use a sterile, weed-free seed-starting mix that holds water well. Good commercial seed-starting mixtures are available at nurseries and garden centers.
Many seedlings look alike, so labels are a good idea. Write the plant names on frozen-dessert sticks or other labels, and stick them in the soil. Keep your seed packages for reference.
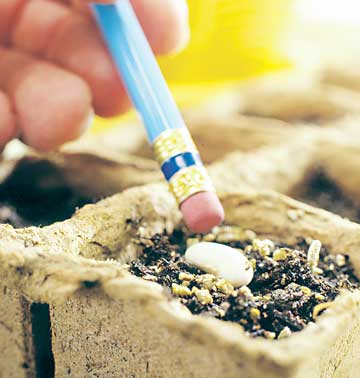
To start seeds, sow them by scattering them evenly over the surface of the seed-starting mix.
Here's a hint: If you have really small seeds that are difficult to sow evenly, mix them in a saltshaker filled with sand. Mix them up and shake the seeds out with the sand.
Note: Some types of seeds need to be covered by seed-starting mix to sprout. Others will not sprout if they're covered up. Check to see if your seeds have any special requirements when you sow them.

Use plant labels in your containers after you've started seeds. This will help you keep track of what your plants are as they begin to grow.
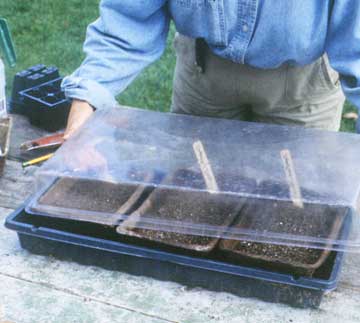
Most seeds sprout best in a warm, humid environment. So loosely cover your containers with clear plastic wrap or a clear plastic cover to help hold humidity.
Keep your containers out of direct sun, otherwise too much heat may build up and bake your seeds. Also: Don't wrap the plastic cover too tightly when you are starting seeds; your seedlings need fresh air, otherwise they'll rot.
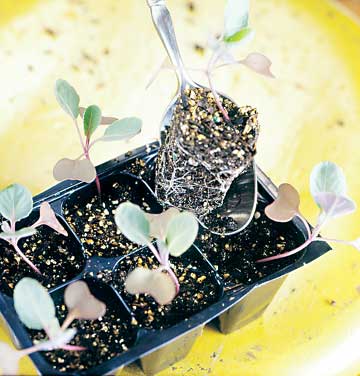
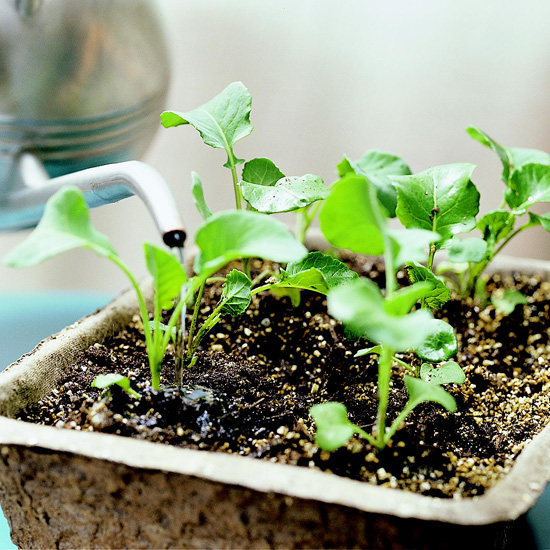
As seedlings develop their first set of true leaves (after the initial seed leaves), the containers will become crowded, and you'll need to thin them. It's hard to get rid of healthy plants, but if you let the crowding continue, all the plants will suffer and die.
Keep the largest, healthiest seedlings, and pull out unwanted plants or cut off their stems at soil level, leaving at least an inch of space between the remaining seedlings. As the survivors grow and outdoor temperatures reach the 50s and above, the seedlings are ready to harden off (get tough) by being set in a protected area outdoors, such as a garage or porch. After a day or two, they're ready for the garden.
Cool-season plants, such as pansy, cabbage, lettuce, and spinach, don't mind a bit of frost and can be planted before your area's average last spring frost date.
But heat-loving tropical varieties, such as tomatoes, peppers, eggplants, marigolds, petunias, and zinnias, may not sprout at all until soil temperatures reach 70˚F or so. Wait to plant them until the soil has warmed.
Loosen the soil by tilling or working it. This make it easier for the started seeds and seedlings' roots to grow.
Here's a hint: If your soil tends to crust or has a high clay or sand content, add a handful of organic matter, such as compost.
Sow seeds just as you would indoors, evenly scattering them over the soil surface. Try not to get them too close together so you don't have to thin them out later.
Cover most seeds with a light layer of soil, compost, or other material. This will help keep birds and other pests from eating them, as well as allow the soil to hold moisture better.
Water the seeds carefully with a sprinkler or watering can. Try not to apply too much water at once -- you don't want your seeds to wash away.
Mark the rows or areas where you've planted your seeds so you can more easily discern your seedlings from any emerging weeds. And so you know which varieties are planted where!
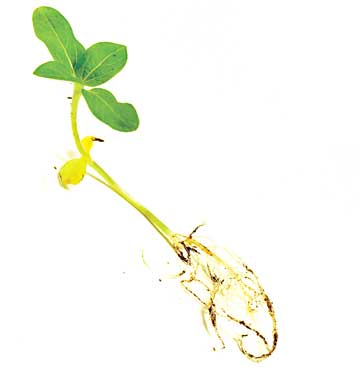
Seeds are fairly forgiving of variances in growing conditions, producing healthy plants like the one here, but things can go wrong, including:
Download our Easy Seeders Guide. (Downloading requires Adobe Acrobat.)
Download Easy Seeders
Download Adobe Acrobat
Copyright © www.100flowers.win Botanic Garden All Rights Reserved