Sure, hyacinths bloom naturally outdoors during springtime, but you can also trick them into blooming indoors in the dead of winter. Forcing bulbs isn't reserved for commercial growers. The casual indoor gardener can have a steady supply of gorgeous and fragrant blooming hyacinths from late December through April with just a little effort. Here's how.
Kaylovesvintage
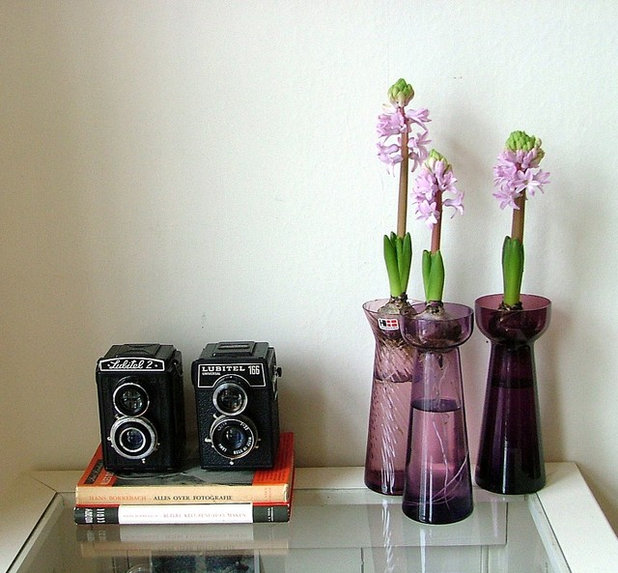
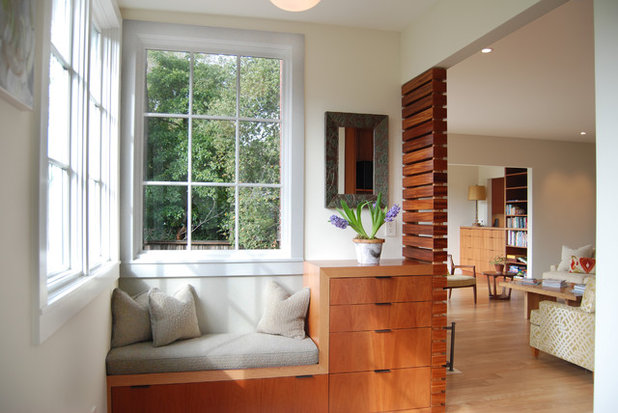
Hyacinths are characterized by clusters of tiny pastel blooms that emit a sweet fragrance. They have relatively short leaves and therefore can be placed in specialized forcing vases, like the ones shown here.
Sheila Rich Interiors, LLC
Choosing bulbs. By mid-October it's advised to purchase bulbs that are not prechilled. If you're starting in September or early October, purchase the best-quality prechilled (prepared) bulbs you can find that are large and blemish free. Make sure they're firm and free of mold.
Storing bulbs before potting. Handle bulbs carefully at all times. They should not be dropped or subjected to extremely high or low temperatures. While it is preferable to pot newly purchased bulbs right away (especially prechilled bulbs), bare bulbs can be stored for several weeks in cool, damp sand until you are ready to force them.
Keep the bulbs in a spot with temperatures between 45 and 50 degrees Fahrenheit
. Temperatures above 63 degrees should be avoided at all times before planting, so depending on your climate and time of year, refrigerator storage may be the best way to go.
Place the bulbs in a mesh or paper bag with holes for ventilation. You can store them in a vegetable or crisper drawer in your refrigerator, but don't store them in the same drawer as ripening fruit or vegetables, which give off ethylene gas that can harm the bulbs. Check them periodically to make sure they aren't molding or drying out.
Warning: Many bulbs, including hyacinth, are poisonous, so the refrigerator storage method is not recommended for households with young children. Also, hyacinths contain oxalic acid, which can cause skin irritation for some people. Before planting, be sure to thoroughly wet the bulbs to reduce the effect of the oxalic acid, and wear gloves for protection.
Gardening with Confidence®
How to Force Hyacinth BulbsThere are a few ways to force hyacinth bulbs. I'm going to tell you about the water method, the soil method and my easy (but not optimal) method. I prefer the latter, but some may find that the other two more traditional methods are more reliable.
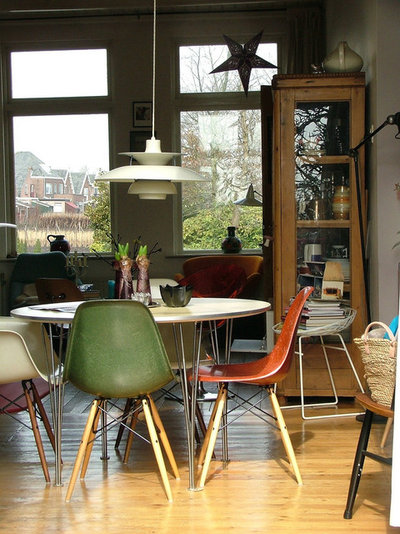
The easy (but not optimal) way. This is great for those who live in warm climates. It works best for Lady Derby or Gypsy Queen bulbs, both of which are known to force easily.
- Store the bulbs in a paper bag in your refrigerator for eight to 10 weeks (again, in a spot protected from ripening fruit).
- Place the bulbs in forcing vases or on a bed of stones in water, just as you would for other bulbs.
- Place the vases in a spot with bright indirect light and give the plants more light as they grow roots and leaves.
Though most experts will tell you that hyacinths won’t bloom indoors unless they root at 48 degrees or below during a chilling period of eight to 16 weeks, experience has taught me that this isn't necessarily the case. My results may have not been optimal — the flower stalks did tend to be short — but we enjoyed fragrant and beautiful flowers.
Note: One of the downsides to using forcing vases is that the stalks can weaken and fall over before the blooms have opened entirely. In the absence of soil, tie a flat bamboo skewer to the side of the forcing vase for support, or simply prop the plant against a wall.
Kaylovesvintage
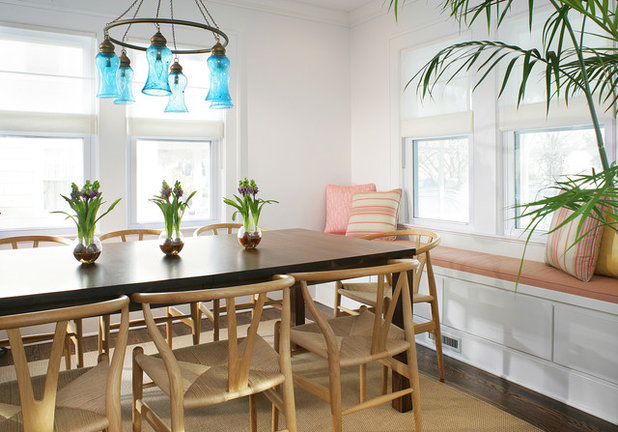
The water method.- Use forcing glasses, containers or vases that will hold the bulbs just above the water and allow room for root growth below. Pick vases that won't tip over when the large flowers bloom.
- Place a bulb in your vessel and add water until it just reaches the bottom of the bulb. Change the water once or twice a week by tipping the liquid out and replacing it with fresh, lukewarm water.
- Put the bulbs in a place that's cool (40 to 55 degrees) and dark until the roots develop and leaves begin to sprout. Bulbs that were prechilled will show growth in roughly three to four weeks, whereas regular bulbs take eight to 16 weeks.
Note: The temperature during this rooting period is critical: 40 to 48 degrees is ideal. You could theoretically root bulbs in your refrigerator if you have a thermometer. Basements and garages often provide the ideal conditions.
- Once the foliage begins to develop, move the bulbs to a warmer spot (65 degrees). Some growers recommend a sunny north-facing window, while others specify bright light but not direct sun.
- Turn the vases daily to prevent leaning, and change the water regularly. After about two additional weeks, you should have gorgeous, fragrant flowers that will last another two weeks or so in a cool spot.
- Once the blooms have browned and died, throw out the bulbs. Water forcing uses every scrap of energy a bulb has to offer, so the bulbs will not rebloom.
Rossington Architecture
The soil method. Use clean 4- to 8-inch diameter pots with adequate drainage holes. If they were previously used, scrub and rinse them thoroughly. Make sure that the holes in the bottom of new plastic pots are open. If you use clay pots, soak them overnight in a bucket of water so they will not draw moisture from the planting medium.
The planting medium anchors the bulbs and retains moisture. It must be well draining and yet retain sufficient moisture for growth. An example of a suitable planting medium is a sterilized mixture containing equal parts of loamy soil, peat and sand. Fertilizer should not be added to the mixture.
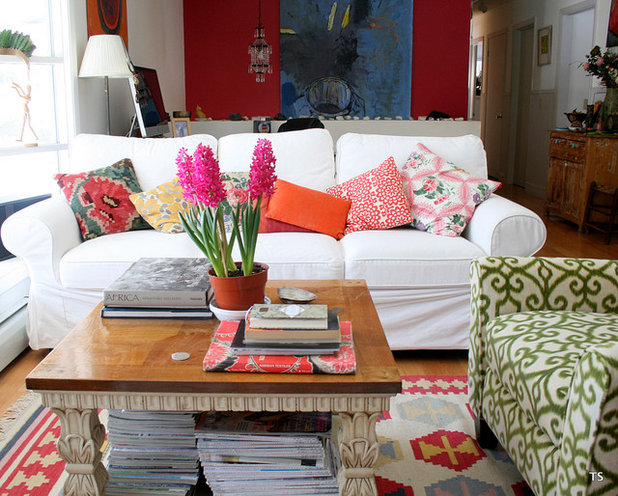
Tamar Schechner/Nest Pretty Things Inc
- Add soil to the bottom of the pot, then place three or four bulbs in a 7-inch pot, or plant one bulb in a 4-inch pot. The bulb tops should show above the soil. Do not press the bulbs into the planting medium; it should be loose so that rooting can take place quickly. Don't overfill the pot. Fill it only to within ½ inch of the top so the plants can be easily watered.
- After planting, water the pots thoroughly and place them in a refrigerator that's 35 to 45 degrees, or in a location with a similar temperature range. A cold, dark basement room, cellar or garage would work well. Keep the medium moist throughout the rooting and cooling period. After five to six weeks, roots should grow out of the holes of the containers, and shoots will begin to emerge from the top of the bulbs.
- After a minimum of 10 to 13 weeks of cold treatment, the first bulbs may be placed in the house. Longer cold storage will result in taller flowers, while storage periods shorter than 10 to 13 weeks will likely result in smaller plants and sometimes aborted or malformed flowers. For a continuous supply of blooming flowers, fill as many pots as you have room to store during cold treatment, then bring a few pots indoors at weekly intervals.
- Place the pots in a 60-degree spot with subdued lighting for a week or two until yellow sprouts at the top of the bulb turn green.
- Move the pots to a brighter, slightly warmer spot, like a windowsill, but avoid direct sun for best results. Continue to keep them in a relatively cool spot to mimic temperatures outdoors in early spring, and remember to turn the pots slightly every day so the stalks will grow straight.
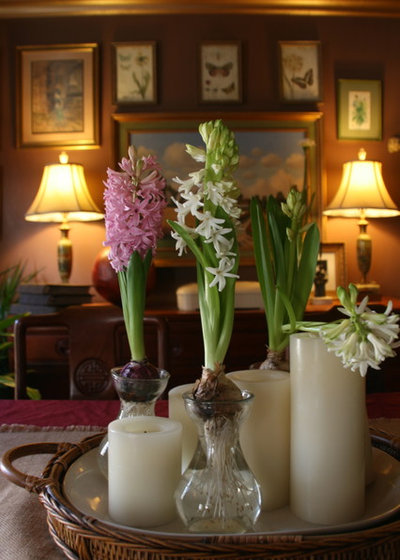
- Once the buds open and the plant is in full bloom, move it to a slightly colder spot without direct sunlight to prolong bloom life. Display blooming plants during the day when you can enjoy them, then move them into your coldest room at night to preserve the blooms.
sherry hart
Care of forced bulbs after blooming. As previously mentioned, bulbs forced in water will very rarely have the energy to bloom again. Bulbs forced in soil, however, can possibly bloom again, though the blooms will never match the beauty of the first ones, so most experienced gardeners choose to toss them. Or you can proceed as follows:
When the blooms turn brown and die, cut off the stalks at the base but continue to care for the plant with regular watering. Come spring, plant your bulbs outdoors, where they will usually recover and bloom again, though not necessarily the next year, and not with the same vigor. If you don't have space in your garden for your outcast hyacinth bulbs, or you don't have a garden, simply dispose of your bulbs and start again next year with new bulbs.
More: Learn how to force narcissus and amaryllis bulbs too.

