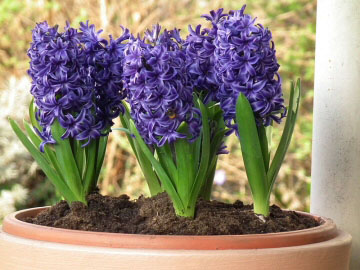


The Hyacinth or Dutch Hyacinth is my guilty Winter pleasure.  Over the last 5 or 10 years they have become very popular plants to pick up in pots of three from many supermarkets and so every week or so during the cold months of the year, I pop one of these little pots of promise into my trolley with the rest of the groceries.
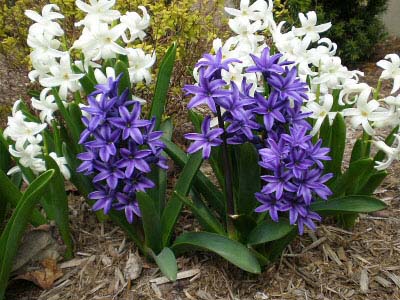
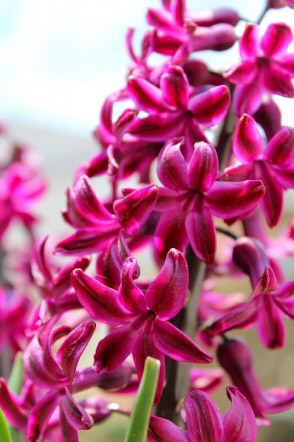
I must spend a small fortune on them as forced bulbs are available to buy from November to early April, but they are worth it. Of course they look beautiful when in flower, with each bulb producing one main leafless stalk (sometimes several if you get lucky) with 30 or more crowded bell like flowers. Coming in white, blue, pinks, reds and sometimes yellow, orange or purple you have your very own polite but "take that Winter" middle finger salute.
Although stunning and attractive to look at for several weeks, the true magnificence of the Hyacinth as a house plant is its smell. Thick, heady and intoxicating, filling the whole room with wonderful scent for days on end. Lots of house plants in flower "smell" but I think only Jasmine can rival the Hyacinth in its ability to create that fragrant wow factor.
Pot plant Hyacinths are always temporary guests in your home used to brighten rooms when it's dark and cold outside. In nature at this time of the year they belong outdoors buried in the garden waiting patiently to flower in the approaching Spring, therefore almost all Hyacinths you can buy out of "season" have been "forced" to flower at this time  . Forcing is basically a way to trick the bulbs into thinking Winter has come and gone.
Once forced however they can't be forced again. As a result of this many plant pot labels or common myths surrounding forced bulbs say after flowering has finished you should throw the bulbs away as they will be useless. This is absolute rubbish and all you need do is keep them indoors somewhere (cool or warm, just not exposed to frost) and well watered until Spring arrives, at which point you burry them in the garden where they will revert back to their natural growth cycle and should flower again the following Spring.
Light
Hyacinths need good light to bring into flower and to prevent the stems becoming leggy and top heavy. They will also need good light to build energy if you plan to keep the bulbs and plant them outside in Spring. If you are in a hurry to bring the flowers on, direct Winter sunlight will rapidly increase the speed of growth and flowering stem. Make sure you rotate the pot every couple of days to keep balance as the growth will lean towards the light source.
Watering
Hyacinths are thirsty plants so don't forget to water them frequently.
When growing, Hyacinths are thirsty plants, especially if you have several bulbs in a small pot. Just before and during flowering you must try to keep the soil moist at all times. If it dries out you run the risk of the flowers not opening at all or going over too quickly, if the soil is constantly very wet then the bulbs and flowers will rot.
Humidity
Unimportant.
Feeding
If you plan to keep the bulbs and plant them outside eventually then look to feed with a weak solution every third watering.
Temperature
Warm temperatures will bring the flowers on quicker than a cool room. When in flower though, cool temperatures will mean they will last much longer. Remembering this is the best tip we can give here, so with this in mind move the plant around to suit your needs.
Repotting
Even if you plan to use the bulbs in your garden you don't need to repot them. The pot is only temporary anyway, so a few weeks (or months) after flowering has finished and it's warm enough outside, transplant them directly into the garden soil.
Propagation
There is no point really worrying about this if treating your Hyacinths as house plants. (If you are a gardener too, then you can encourage offsets by scoring the bottom of the bulb's basal plate with a sharpe knife. Do it in a cross shape so you will have 4 quarters. Bury as you would normally and in a few years you will have increased your stock).
Speed of Growth
Fast OR Slow. In a cool room it could take a month to flower, in a warm place it will be half this.
Height / Spread
Expect between 6 - 8in / 15 - 20cm and spread should be no more than 5in / 12.5cm.
Flowers
It's only really the reliable Dutch Hyacinth (Hyacinthus orientalis) that is forced for use as an indoor pot plant, so although you can get them in many different colours they are generally all quite similar in appearance.  Leafless flower stalks which bears scores of clustered together star like flowers.
They will start smelling as soon as they open, however it is usually several days later before the fragrance starts to increase in potency. A week or so later the smell will fade and a few days or so after that the flowers themselves will follow. Cool rooms will prolong the flowering period though. Many commercially grown Dutch Hyacinths have been exceptionally grown and cared for, so the bulbs are of a good size. Bigger bulbs are bursting with energy and therefore may produce a bonus second (but smaller) flower stalk.
Anything Else?
Even if you provide everything the plant needs, when growing inside the flowering stem may still become unstable and fall over (the reason for this is explored in our Help section). As long as that happens gradually the stem shouldn't snap off, alternatively you can support it with canes or string to keep everything upright and neat.
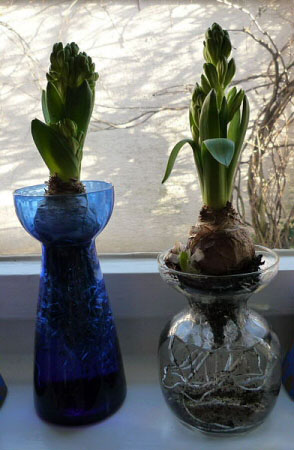
Forcing
Growing your own forced Hyacinths is easy and can be very rewarding, especially if you put children or grandchildren in the mix. If you want to give it a go follow these steps. Remember forced bulbs can't be reused or forced the year after so plant these outside and buy new bulbs if you try again the following year.
 enjoy.
 Copyright © www.100flowers.win Botanic Garden All Rights Reserved