A power dethatcher (vertical mower, power rake) uses engine-driven vertical blades to slice through thatch layers efficiently. Proper operation prevents lawn damage and maximizes debris removal. This guide covers pre-start checks, depth adjustment, operating patterns, debris management, and the composting bonus.
Before You Start: Critical Pre-Checks
- Clear the lawn: Remove rocks, sticks, toys, wire, sprinkler heads (mark with flags). Debris destroys blades and becomes projectiles.
- Check fluids: Oil level (4-stroke) or fuel mix (2-stroke). Fresh fuel < 30 days old.
- Inspect blades: Sharp, intact, securely bolted. Dull blades tear; loose blades eject.
- Verify safety features: Blade clutch engages/disengages cleanly. Kill switch functional. Belt guard in place.
- Moisture check: Soil moist (footprint holds 10 sec), not soggy. Wet soil = grass pulled out with thatch.
Starting Procedure (Typical Walk-Behind)
- Position at lawn edge, blades disengaged (clutch lever up).
- Fuel valve ON. Choke ON (cold engine). Throttle FAST.
- Pull recoil starter firmly. 1–3 pulls typical.
- Once running, gradually move choke to OFF. Warm 1–2 minutes.
- Engage blade clutch (lever down). Blades spin up.
Depth Adjustment: The Most Critical Setting
- Rear height lever/knob controls blade-to-soil clearance.
- Start high (blades just kiss thatch surface). Test 10 ft pass.
- Lower incrementally until blades tease thatch without gouging soil.
- Target: Thatch lifted, mineral soil barely scratched. Crowns intact.
- Species adjustment: Bluegrass (dense, rhizomatous) = shallower. Fescue/rye (bunch) = slightly deeper.
Golden rule: Better too shallow (second pass later) than too deep (crown damage = dead grass).
Operating Pattern for Complete Coverage
- Pass 1: Straight lines, N-S (or along longest dimension). Slight overlap (2–3″).
- Turn carefully: Disengage clutch OR lift front wheels (tilt handle) to pivot. Don't spin with blades in soil.
- Pass 2: Perpendicular (E-W). Cross-hatch pattern ensures uniform removal.
- Thick thatch (> 1″): Stop after 2 passes. Recover 2–3 weeks. Repeat if needed.
Debris Management: Volume Will Surprise You
- 1,000 sq ft with ¾″ thatch = 15–30 bushels of debris.
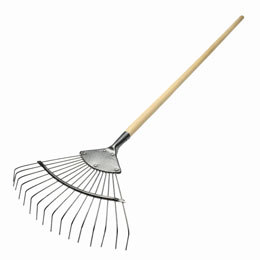
- Rake immediately (landscape rake) into windrows.
- Bag or vacuum (lawn sweeper, bagging mower, leaf vacuum).
- Compost it! Thatch = carbon-rich "brown" material. Layer with grass clippings/green waste. Turn monthly. Ready in 3–6 months.
- Don't leave on lawn—smothers grass, hosts fungi.
Post-Operation Care
- Disengage blades. Let engine idle 1 min. Shut off. Fuel valve OFF.
- Clean machine: brush debris from blades, belt, deck, air intake.
- Inspect blades for damage. Sharpen/file if needed.
- Follow recovery protocol: overseed, fertilize, water, mow high.
Rental vs. Buy vs. Hire
| Option | Cost | Best For |
|---|
| Rent (day) | $50–$80 | One-time, < 10,000 sq ft, DIY capable |
| Buy (consumer) | $300–$600 | Annual use, large property, storage space |
| Buy (pro) | $1,500–$3,000 | Commercial, weekly use |
| Hire pro | $150–$300/1,000 sq ft | No time, physical limits, want warranty |
Common Mistakes to Avoid
- Setting depth too deep on first pass → crown scalping → dead patches.
- Dethatching dormant grass (winter) or heat-stressed grass (July) → no recovery.
- Skipping debris removal → thatch mats reform, worse than before.
- Using dethatcher blades on rotary mower → ineffective, dangerous.
- Not marking irrigation heads → $200+ repair per head.
A power dethatcher is a surgical tool. Respect its aggression, prepare the patient, and the lawn comes back stronger.