


Rearranging the garden furniture is a snap with a wheelbarrow bench. Fancy antique benches with a wheel on one end are hard to find and expensive when they turn up. We took a standard garden bench and added a wheelbarrow wheel, sturdy handles, and a fresh coat of paint to make a good-looking bench that's ready to roll.
Wheelbarrow benches can be moved to suit the seasons and the views. You can park one on the patio for a party, move it to a shady spot under a tree when you're ready for a quiet retreat, or roll it out on the lawn for the croquet players. We asked Clay Lyon, a contractor in Kansas City, Missouri, to help us adapt our bench. Follow our step-by-step instructions; it's easy to adapt these plans to convert almost any garden bench.
continue reading below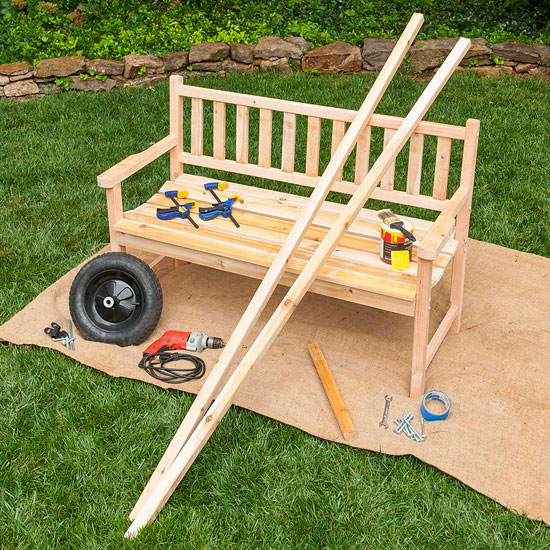
Here's what you'll need to make a wheelbarrow bench:
Getting Started
Before you start, figure out how long the 2x2s should be, and cut them to the proper length. Make sure to allow the 2x2s to extend far enough from one end of the bench to accommodate the wheel and the extra width of a supporting 2x2 crosspiece, and on the opposite end to make comfortable handles that do not stick out too far. Our 2x2s were each cut to 80 inches, allowing about 12 inches for the wheel and 22 inches for the handles on the opposite end. The crosspiece (measured to match the depth of the bench from front to back) is cut from the third 2x2; in our example, it is 18 inches long.
Note: Once you have your supplies and have cut the 2x2s, the project goes quickly. You'll mark the 2x2s for carriage bolts, drill holes, attach the wheel, and then attach the handles to the bench with the bolts.
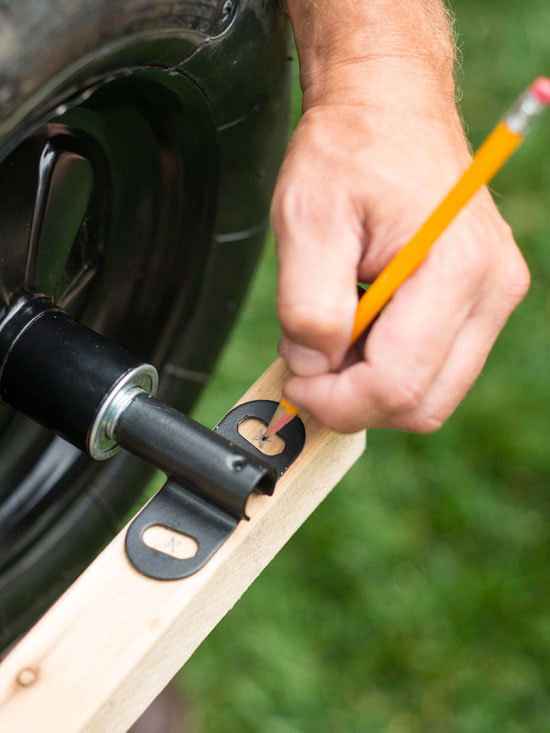
Mark the holes for the axle brackets at one end of each 2x2. Make your first mark 1-1/2 inches in from the end. Our brackets each have two holes for the carriage bolts that attach them to the 2x2s. Mark and drill all four holes.
Tip: A strip of painter's tape on the side of the 2x2 opposite the drill will help prevent the wood from splitting. When you drill, hold the drill at a right angle to the 2x2 and drill straight down through it. The bench itself can be used to support the work.
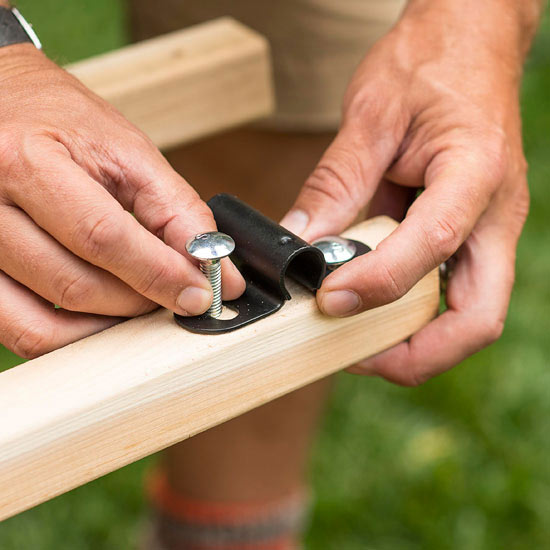
Attach the axle brackets with the four short carriage bolts. Fit the wheel and axle into the brackets. At this point, the 2x2s should be under the bench seat but above the spreader. The wheel should clear the bench. Then allow an extra 2 inches for the 2x2 crosspiece that you will be adding.
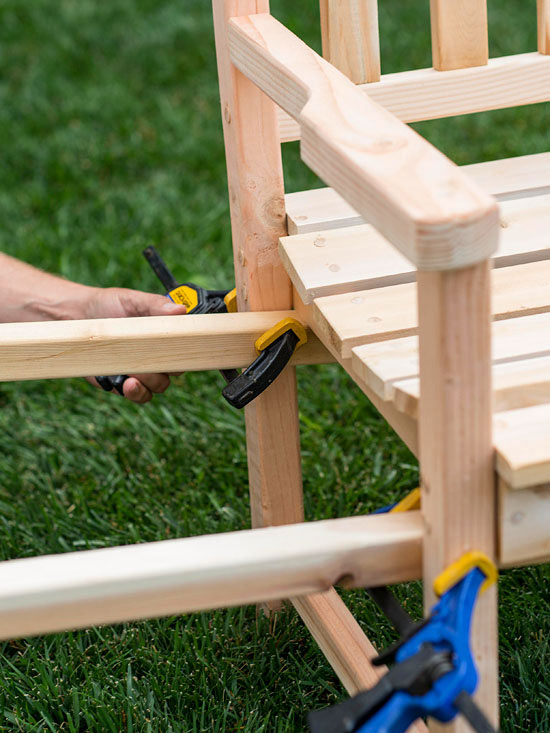
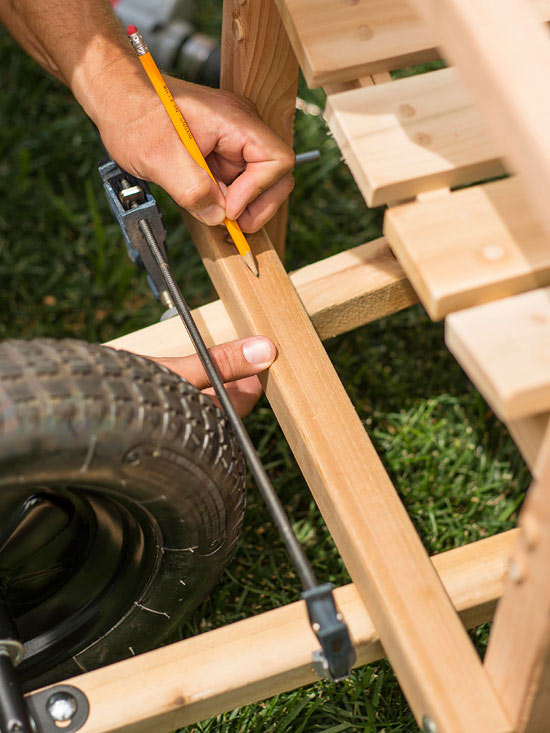
On the handle end of the bench, clamp the long 2x2s to the insides of the legs just under the seat.
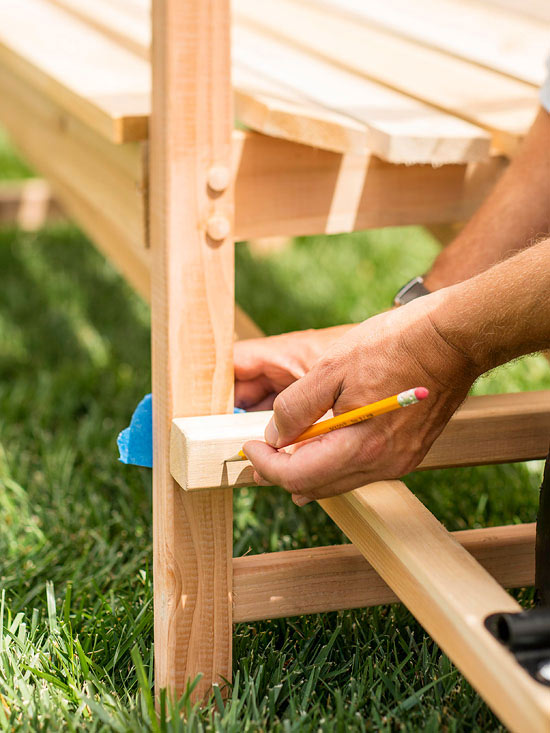
On the wheel end, set the short crosspiece across the long 2x2s, which are now supported by the wheel, and mark where the top of the crosspiece crosses the legs of the bench. Measure to make sure the crosspiece sits at the same height front and back.
Mark the spots where you'll drill at either end of the crosspiece; it should be right through the center of the crosspiece and the center of the bench legs. Drill through the 2x2 and the bench leg. Insert a carriage bolt. Tighten the nut with your fingers. Mark, drill, and attach the crosspiece to the other bench leg.
Tip: Don't tighten the first nut all the way until you have drilled both legs.
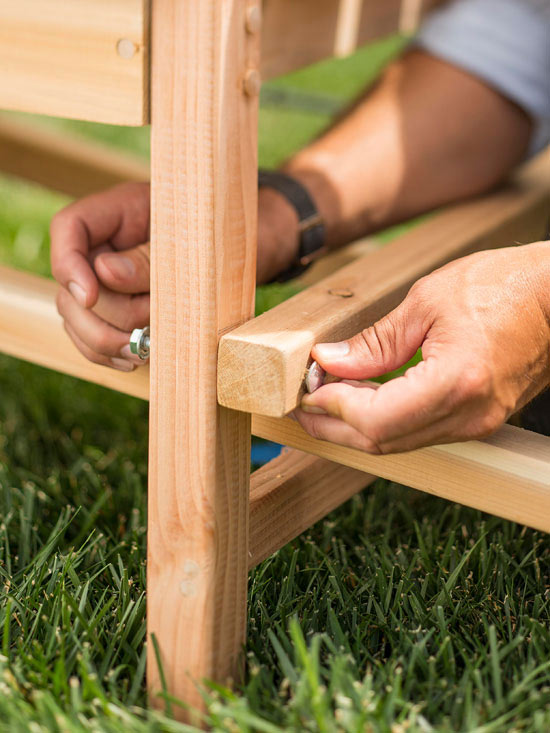
Clamp the handles at the wheel end with a bar clamp. Mark the top of the crosspiece for two carriage bolts down through the handles. Drill and insert a carriage bolt through each hole. Now tighten all these nuts.
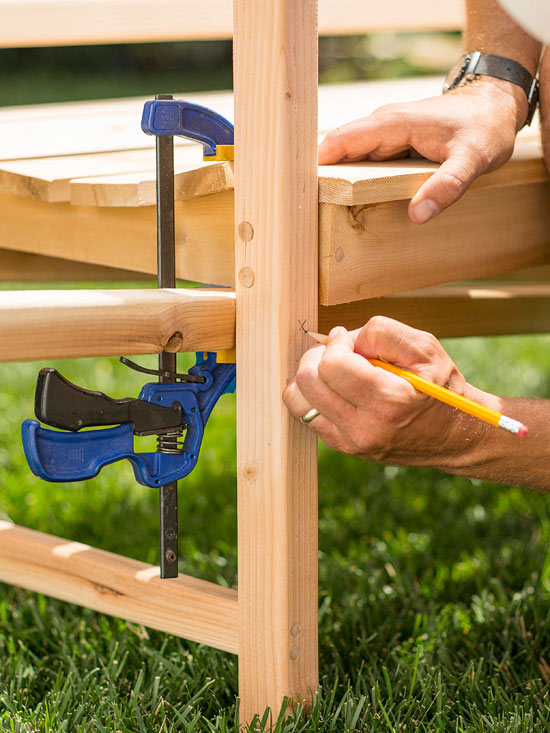
On the handle end of the bench, clamp one handle onto the bottom of the seat, right up against the inside of the bench leg, and mark for a hole through the leg and the handle. Drill the hole with the clamp in place and insert a bolt, tightening the nut with your fingers. Do the same on the other side, and then tighten everything.
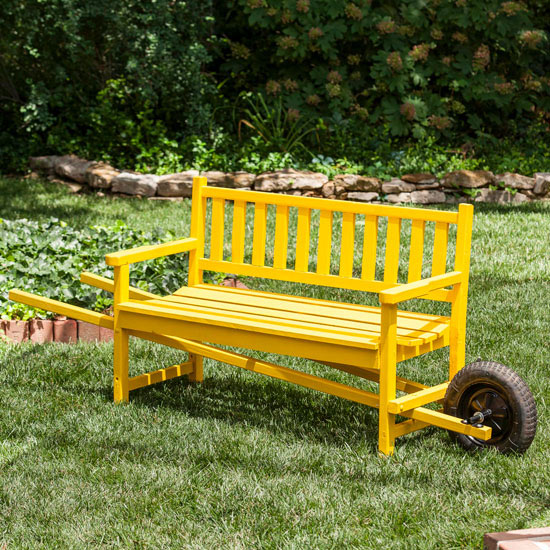
The finishing touch: If you like, paint the bench. Our bench is painted with two coats of bright-yellow Dutch Boy "Blooming Marigold" latex paint.
Copyright © www.100flowers.win Botanic Garden All Rights Reserved