

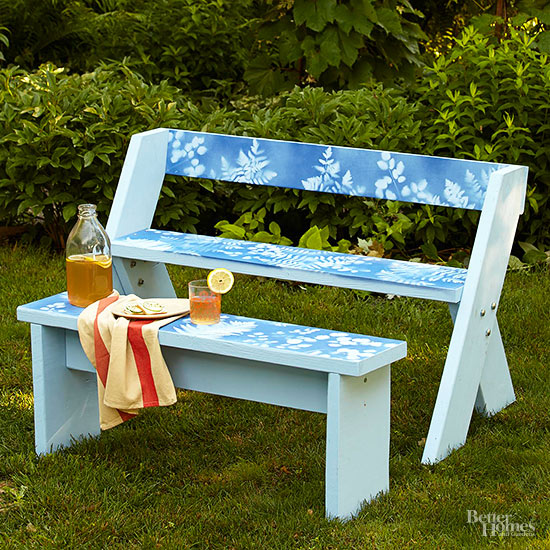
Build this fresh, serene version of the famous Aldo Leopold bench and matching table. This project requires basic woodworking skills, a few tools, and a helper to complete the assembly. All pieces of the project should be painted with two or three coats of self-priming paint and allowed to dry before stenciling. Let the pieces dry overnight before assembling. It's still a cinch to complete both the bench and table in a weekend!
continue reading below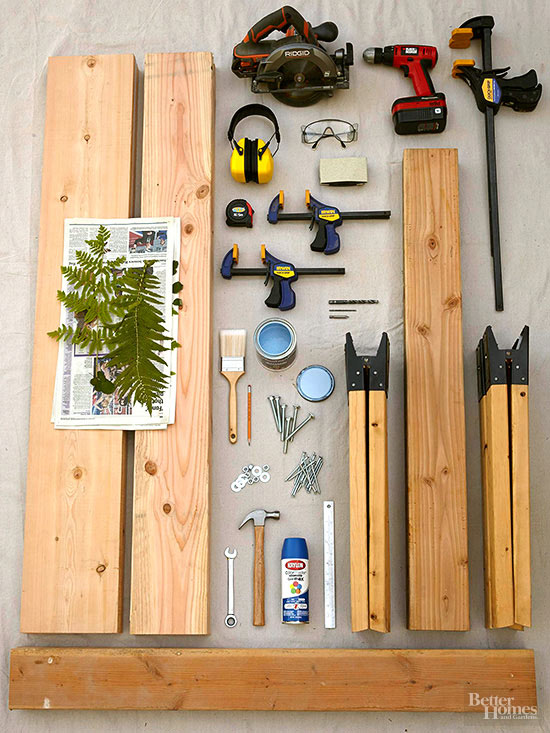
What you'll need:
Pine lumber:
Hardware:
Drill bits:
Download Board Measurements
download diagram
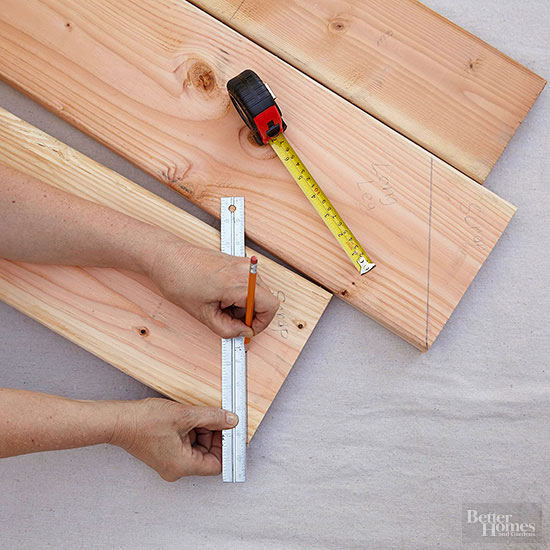
Download and print the bench and table plan and take it to the lumberyard. For easy transport, have the lumberyard cut each board in two pieces as follows: cut the 2x6 and 2x8 exactly in half, and cut the 2x10 at 4 feet 11-1⁄2 inches from one end. Lay the boards across the sawhorses and mark all the cut lines according to the plan. Label each piece.
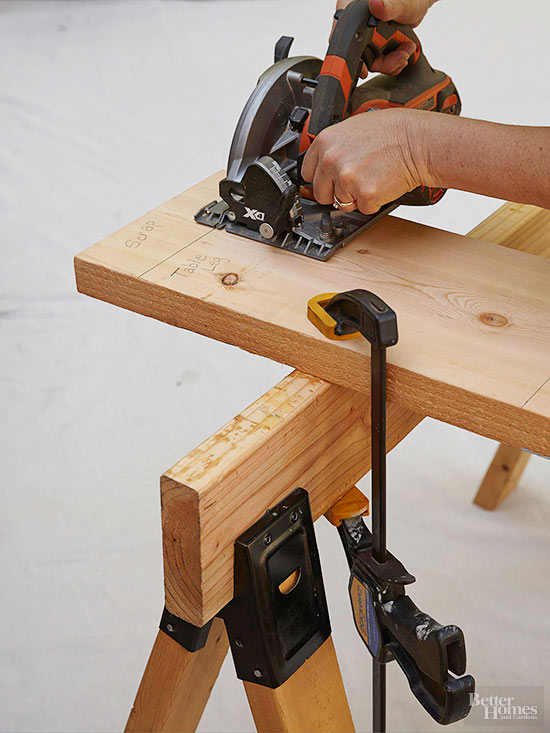
Don your eye and ear protection. Secure the boards to the sawhorses with the clamps before making cuts. After all the pieces are cut, review how they overlap and join, and mark the fronts and backs of each. Use the sanding block to smooth cut edges and to remove splinters and roughness. Reserve all scraps for use in Step 6.
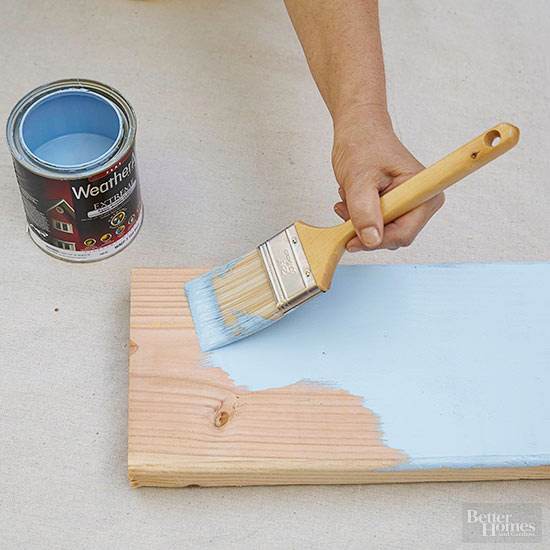
Apply two or three coats of self-priming exterior paint according to package directions, making sure to cover all cut edges, especially the feet of the bench and table.
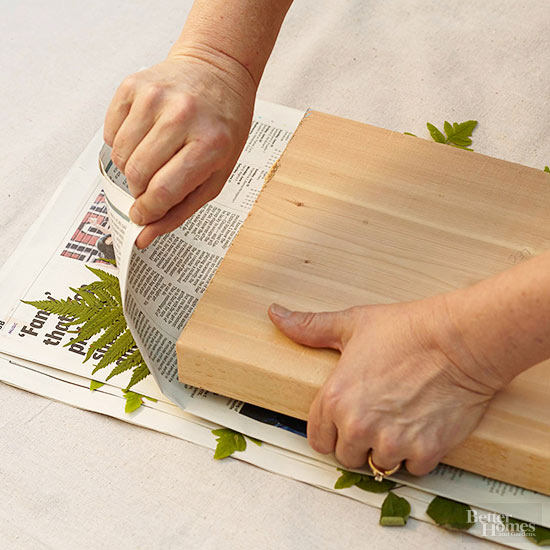
While the final coat of paint is drying, press ferns and foliage between sheets of newspaper on a hard, flat surface. Lay a spare board or several books on the top sheet of newspaper to flatten and smooth the leaves. Press leaves for two to three hours.
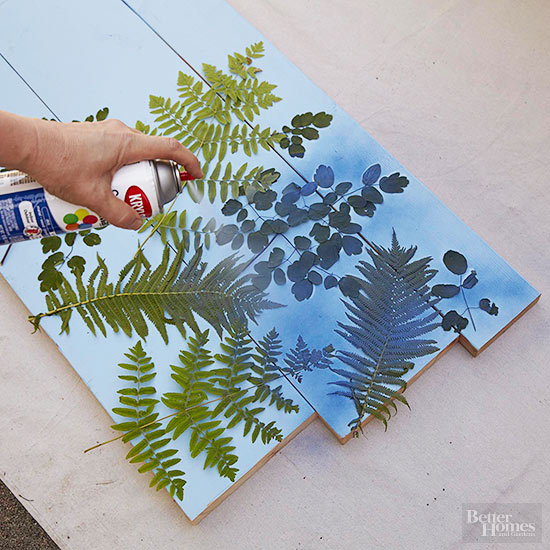
To spray-paint the leaf stencils, choose a work area that is well ventilated but out of the wind. Lay the bench back, bench seat, and tabletop pieces faceup in that order, from top to bottom, next to each other. Lift the pressed leaves from the newsprint and arrange them across all three pieces. Holding the spray can about 24 inches above the leaves, spray in one-second bursts, covering the whole surface one section at a time. Adjust your height and angle to avoid blowing the leaves away. Perfection is not the goal here -- you're creating a dappled light and shadow effect. Let paint dry, then discard the leaves.
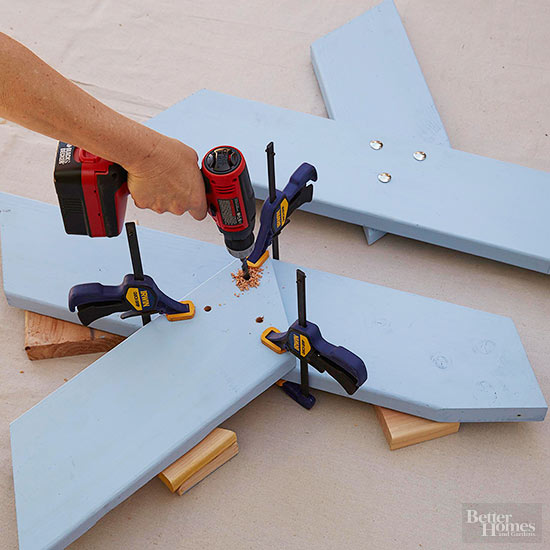
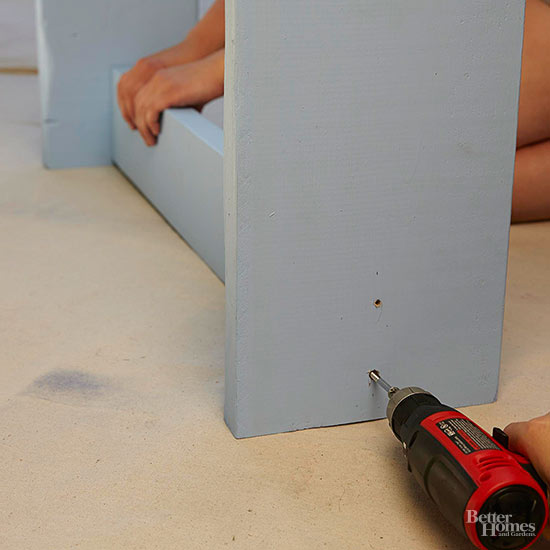
Working on the ground or a flat area, position one long leg board with one short leg board. Support the pieces with wood scraps to allow space for the clamps and to keep leg pieces lined up properly. Clamp the legs together. Make sure the bottom edges of both leg boards are flush and even by lining them up against a spare board -- you want to make sure the legs will sit flat on the ground after assembly. Adjust as needed and clamp firmly. Pencil in the placement of three holes for the carriage bolts, each about 2 inches apart. Use the 3/8-inch bit to drill the holes. Keep the clamps in place and insert the carriage bolts so the nuts will attach on the inside, under the seat. Hammer the bolts through, then attach the washers and nuts, tightening with the wrench. Assemble the remaining leg pieces to create a mirror image of the first leg. Be sure the short leg boards are on the inside; they will support the seat.
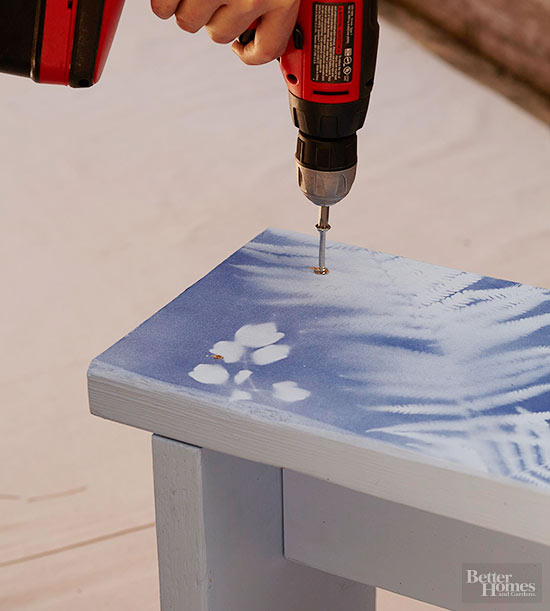
Stand the two leg assemblies upright, then set the bench seat in place. Have a helper hold the pieces firmly while you drill three evenly spaced pilot holes with the 1/8-inch bit in one end of the seat and into the leg assembly. Be sure not to drill into the carriage bolts. Drive the wood screws in on that end, then repeat the procedure with the other end of the bench seat.
Tip: It's important to press the drill bit very firmly against the screwhead until the screw is driven in so the screwheads don't become stripped by the bit.
Carefully tip the bench forward. Attach the back by drilling two pilot holes, then drive in the wood screws. Return the bench to its upright position.
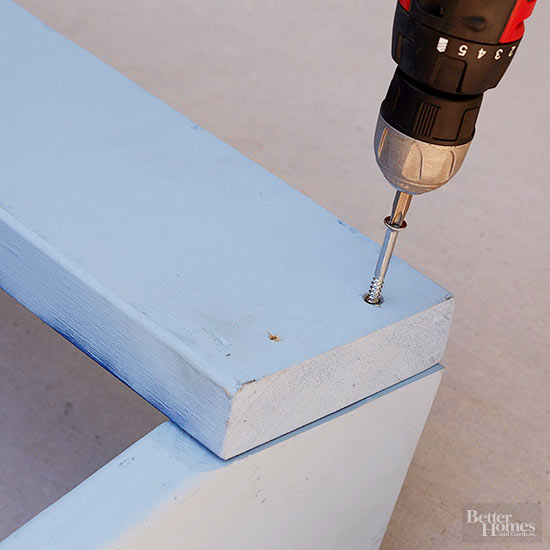
Measure and lightly pencil a centerline on both the inside and the outside of each table leg. Measure and mark the pilot hole placement at 1-1⁄2 inches from the top and at 4 inches from the top on the outside of each leg. Flip one leg onto its top, and put the table support piece in place on the inside of the leg, using the centerline as a guide. Have a helper hold the support in place while you drill pilot holes on the outside of the leg and into the support. Drive in the wood screws. Repeat with the other table leg. Return the table leg and support assembly to its upright position.
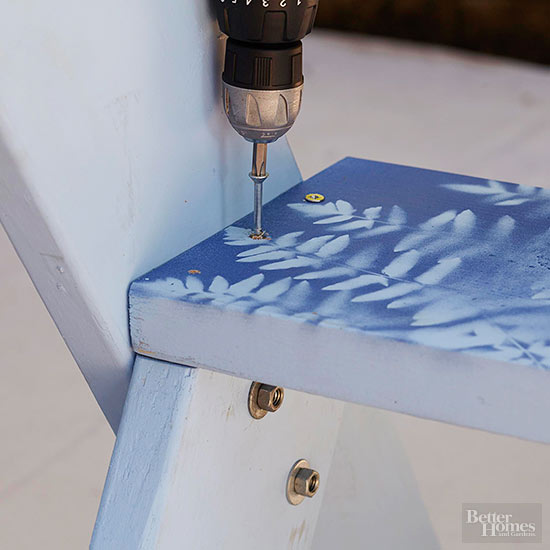
Place the tabletop on the table leg assembly. Line up the top so an even amount overhangs the legs at each end. Mark the center of each leg with a light pencil line across the tabletop, then make three evenly spaced marks for the pilot holes. Have your helper hold the tabletop firmly in place while you drill pilot holes in the marks you made on one end of the tabletop. Drive in the wood screws. Repeat at the other end. Carefully wipe or erase your pencil lines from the table legs and top. Touch up the screwheads with paint if desired.
Copyright © www.100flowers.win Botanic Garden All Rights Reserved