

Buy seed from a reputable company. For best germination, use fresh seed. If you have to store seed, keep it in dry containers in a cool, dark place.
Sow seeds when the seed packet directs. Plant on a small or large scale. A 6-inch pot easily accomodates from 1 to 100 seedlings, depending on the plant grown. Use trays or flats for large quantities.
continue reading below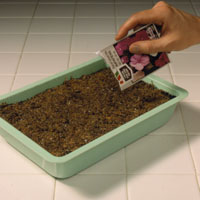 Step 1
1. Fill tray or pot with sterile medium, mist with water, then top with 1/4 inch of milled sphagnum moss. Press moss with book. Sprinkle seeds across moss surface or into shallow rows.
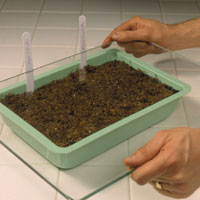 Step 2
2. Cover larger seeds with a sprinkling of moss. Pat small seeds into moss. Mist again. Cover tray with glass or plastic; place on heating pad or refrigerator. Place in light suggested on packet. Mist when moss begins to dry.
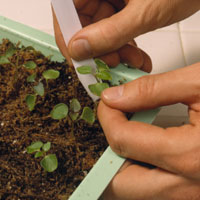 Step 3
3. Remove glass when seedlings pop through moss. Move seedlings to brighter light. Transplant when second set of leaves develops. Dig seedlings up gently, holding by one of the leaves, not the stem.
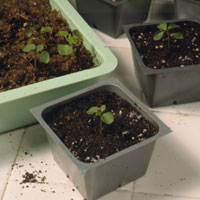 Step 4
4. Give each seedling its own small pot, filled to within 1/2 inch of top with light soil. Firm the soil around the base of each stem, making sure not to bury the leaves.Water immediately. Move plants steadily into brighter light.
Many plants produce several stems with roots attached to each stem. Each of these rooted stems can be divided from the parent plant to make a new plant.
1. Remove the plant from its pot. Early spring generally is the best time to divide plants. Press your thumbs into the middle of the plant, grab the plant with both hands, and tug it apart. If that fails, cut the plant with a knife.
2. Keep a large clump of roots with each division. Immediately pot the new plants in potting soil.
3. Keep the soil evenly moist the next few weeks to help heal the injured roots. Place plants out of direct light until they start to grow. Move them into brighter light over a period of 10 days.
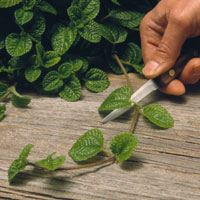
The growing tips of many plants will produce vigorous new plants when cut and rooted properly.
 Step 1
1. To propagate new plants from most multistemmed plants, try rooting tip cuttings. First, cut 4 to 6 inches from the tip of the main stem or side branch. Cut just below a node (where leaf and stem meet).
 Step 2
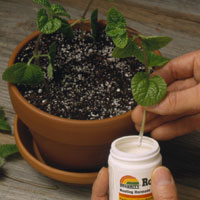
2. Remove the lower leaves and any flowers. Dust cut ends with rooting hormone powder, then plant in moist rooting medium (half peat moss, half perlite works well); keep leaves above soil. Or, skip powder and place in water.
 Step 3
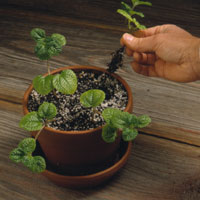
3. Provide indirect light and bottom heat. When cuttings resist tugs, they are taking root. Dig up gently, check root growth, and pot up. Move cuttings in water to another rooting medium as soon as roots sprout; pot up as above.
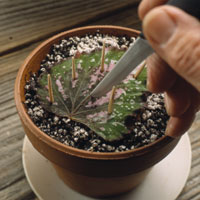
Leaf cuttings produce new plants much the same way stem cuttings do, except a leaf stalk rather than the central stem is used. Depending on the plant, use either the whole leaf or parts of the leaf. Generally, for small-leaved plants, use the entire leaf; for large-leaved plants, leaf sections.
 African violet
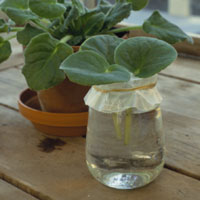
To propagate an African violet, take at least an inch of stem with each leaf. Insert the stems into water or a peat-based mix. Pot leaves that have been in water as soon as roots form. Pot others when roots are established.
 Rex begonia
To propagate a rex begonia, set a healthy leaf, top side up, on moist growing medium. Sever a few of the veins. Pin the leaf down so the cuts come in contact with the medium. Keep moist. Pot the plantlets that grow from each cut.
 Snake plant
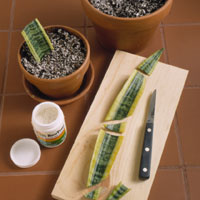
To propagate a snake plant, cut a leaf into sections; indicate with angled cuts which end is bottom. Dip bottom ends in rooting powder; insert in moist rooting medium. Pot new plants that form to sides of leaf sections.
Copyright © www.100flowers.win Botanic Garden All Rights Reserved