


Decomposed granite (DG) offers a permeable, natural-looking, affordable surfacing for paths, patios, and driveways. Its warm, reddish-tan hue complements most architectures, and installation is a manageable DIY project with professional results.
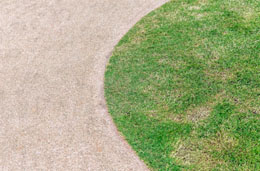
DG is granitic rock weathered into particles ranging from 3/8" down to fines. The fines bind when compacted, creating a stable yet permeable surface. Two main types:
Color varies by source: gold, tan, rose, gray, blue-gray. "Gold" is most common.
Mark path layout with paint or hose. Minimum widths: 3' (single), 4-5' (two abreast). Calculate material. Order 10-15% extra for settling and future touch-ups.
Remove all vegetation, roots, and organic matter. Excavate depth:
Grade for 1-2% cross-slope drainage.
Lay professional landscape fabric (spun-bonded polypropylene). Overlap seams 12". Secure with fabric staples every 3-4'. Extend under edging.
For clay, high traffic, or driveways: spread 3/4" minus crushed rock to required depth. Compact thoroughly with plate compactor. This prevents rutting and DG migration into subgrade.
Edging contains DG and defines clean lines. Options:
Set edging top 1/2" above finished DG grade.
Spread DG evenly to 2" depth (after compaction). Rake smooth. Use screed board on edges for consistent depth. Lightly mist with water—damp DG compacts better.
Critical step. Plate compactor (rental: $60-80/day) makes 2-3 passes. Hand tamper for small areas. Compact until surface rings underfoot and shows no footprints. Add DG to low spots; recompact.
Decomposed granite pathways age gracefully, developing character while remaining permeable and repairable. A well-installed DG path is a landscape investment that improves with time—unlike concrete that only cracks.
Alternative Permeable Path Surfaces for Arizona Public Art Project
Decomposed Granite Soil Prep for Lawn: Beyond Simple Tilling
Desert Landscaping: Drought-Tolerant Plants for Arid Climates
DIY Gutter Guard Installation: A Step-by-Step Guide
Designing an Automatic Irrigation System for Your Woking Lawn
DIY Aluminum Fence Installation: Tools, Timeline, and Pro Tips
How to Install a Drip Irrigation System: Save Water, Grow Better
Termite Control: Understanding Methods, Resistance, and Emerging Strategies
Vegetable Gardening for Beginners: From Soil to Harvest
Seed Starting Success: Selection, Viability, and Planting Techniques
How to Grow Orchids Successfully: Light, Types, and Core Needs
5 DIY Gazebo Installation Tips: Location, Size, Permits, and More
Planning the Perfect Garden Patio: Location, Size, and Design
Copyright © www.100flowers.win Botanic Garden All Rights Reserved