Drip irrigation is often the first choice for an edible garden. It provides slow and consistent water to the roots of each plant, where they need it the most, and prevents fungal diseases and weeds. It saves you water, because you measure the amount you use in gallons per hour rather than gallons per minute, and it practically eliminates water loss from overspray and evaporation. It’s also easier to install and more flexible than an inground sprinkler system and, once it’s in place, it requires less hands-on time during watering — a plus for those with larger gardens.
Before you rush out to get the parts, realize that it takes some time and a bit patience to install drip irrigation, though not as much as an inground system. Plan on a day for installation — or two, if you have a lot of ground to cover. Drip systems also require more upkeep throughout the growing season — emitters and water lines are easily dislodged, damaged and clogged. Fortunately, they’re also relatively easy to troubleshoot and repair.
 Basic components.
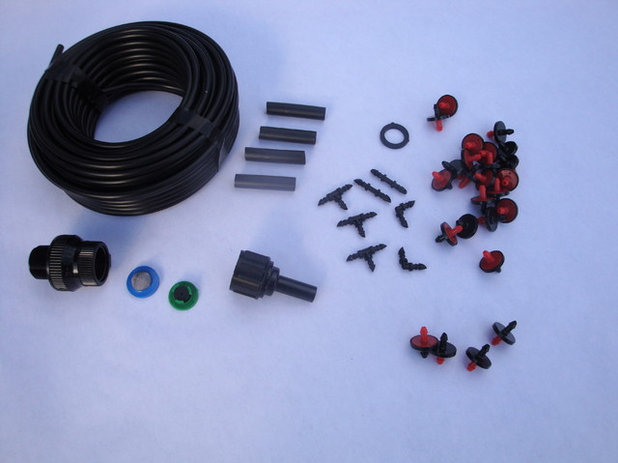
 The components of a drip system can be found at most home improvement stores, online and in catalogs. Your basic system will include:
- An antisiphon unit or a vacuum breaker that attaches to your water source, usually an outdoor faucet, but you can use an underground sprinkler antisiphon valve. Antisiphon units prevent water from entering your home’s plumbing system and are usually required by code.
- A filter or filters to prevent clogs that can plague the very small openings in a drip system. Choose between a larger Y- or T-filter for the entire system or smaller in-line filters.
- A pressure regulator to protect against too-high water pressure, which can cause drip lines to burst.
- A swivel adapter, also known as a thread-to-tubing compression adaptor, to tie the larger-diameter plumbing pipes into the smaller-diameter drip lines.
- Drip tubing for the water lines to the garden, generally made of polyethylene. The ½-inch tubing is best for the main line and larger branch lines. (Note: There are two types of ½-inch tubing, which are not the same size and don’t take the same-color fittings.)
The ⅜-inch-inch tubing can be used for smaller branch lines, and ¼-inch microtubing can be used to encircle plants off these other lines.
- Fittings to connect individual pieces of tubing. They can be straight coupling fittings, elbow joints, T-joints and four-way joints. You can also add shut-off valves. Green and blue fittings are for the two different types of ½-inch tubing; red fittings are for ⅜-inch tubing.
- Assembly tools, including punches, stakes, goof plugs and end caps or clamps.
- Emitters, which deliver water from the lines to the soil. They generally dispense ½ gallon, 1 gallon or 2 gallons per hour (gph). Emitters with different rates of delivery can be used in a single system. The slower the drip rate, the more emitters you can add to the line and the greater distance your drip lines can run.
Note: When planning for emitters, take your soil type into account. Use 1-gph emitters, either at each plant or, for closely spaced runs, spaced 1 foot apart. For clay soil use ½-gph emitters and space them farther apart. For sandy soil use 2-gph (or higher) emitters spaced somewhat closer together. Microsprayers also work well in sandy soil if you know that the foliage will dry quickly.
Additional components. Other options you might want to consider:
- A fertilizer injector. It allows you to incorporate nutrients into the water line.
- Emitter lines, similar to soaker hoses, with the emitters preinstalled; a ½-inch line is ideal for edible gardening.
- Specialty emitters for specific plants or situations, including adaptable-flow emitters, pressure-compensating emitters (good for sloped or large gardens) and nonplugging emitters.
- Sprayers and sprinklers that can deliver a slow stream of water in a variety of patterns, including a gentle mist. They’re not commonly used for edibles but can be a good choice for salad crops.
- A battery-powered timer to automate the system.
- A caddy or container to hold all the pieces, both for installation and later repairs.
Steve Masley Consulting and Design
Before You BuyIf your edible garden is relatively compact and level, your watering needs are fairly uniform and your water pressure isn’t too high, a prepackaged drip irrigation kit designed for vegetable gardens will probably have everything you need, including step-by-step instructions. It’s a good way to get started.
If things are a bit more complicated, you’ll need to do some preplanning before you head to the store. Don’t despair. It seems like a lot to do, but simply consider these guidelines for making the most of your system. It is possible to skip a step or two and chances are, things will be fine.
Again, the beauty of drip irrigation is that if what you put in doesn’t work, changing it is much easier than redoing an inground irrigation system.
 Start with the garden’s design
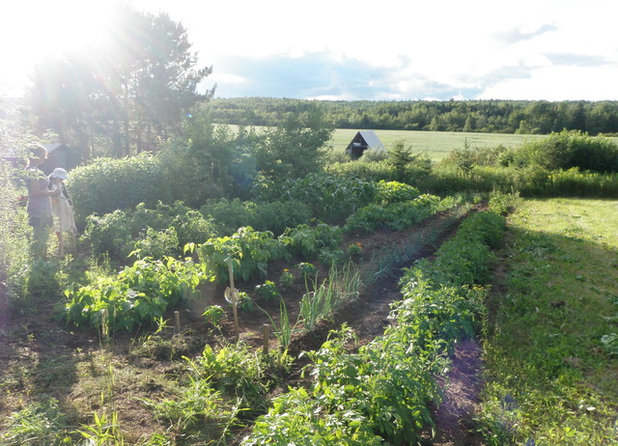
. There is always the familiar rectangle or square patch of ground, either small or large, with neat and tidy rows of plants, but before you commit to that, consider other options.
SURROUNDS Landscape Architecture + Construction
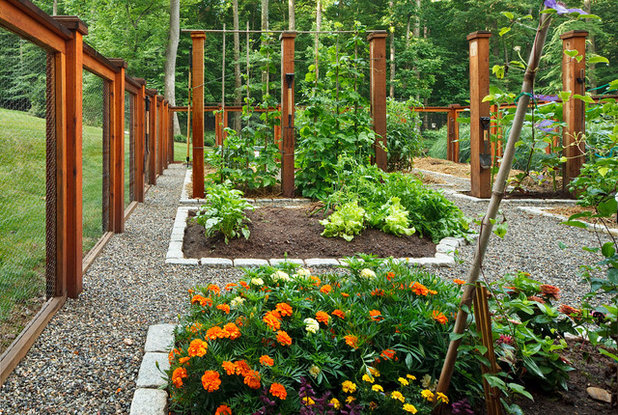
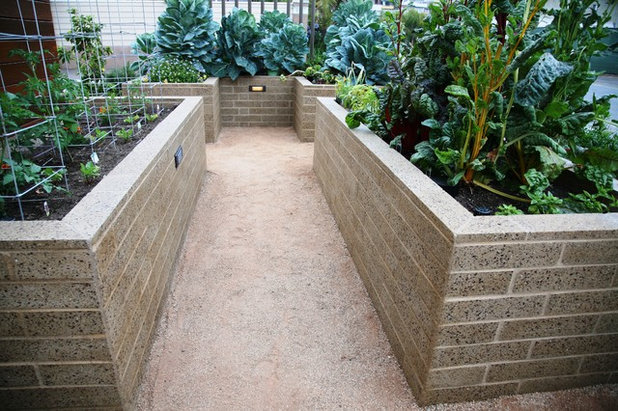
Densely packed spaces may be traditional, but access to the plants and the crops might be easier with smaller garden beds connected by walkways or perhaps with a U-shaped or keyhole design.
Gardenerd
A mature yard might mean your vegetable gardening space is limited to pockets of space among the ornamental plants, making your garden part of the growing movement toward edible landscaping. (Petunias and pole beans are a winning combination.)
debora carl landscape design
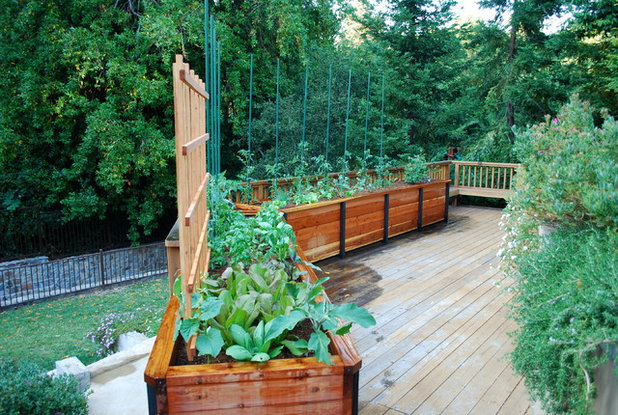
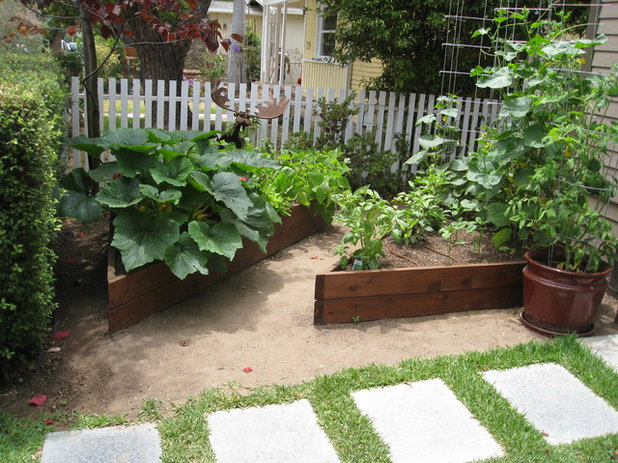
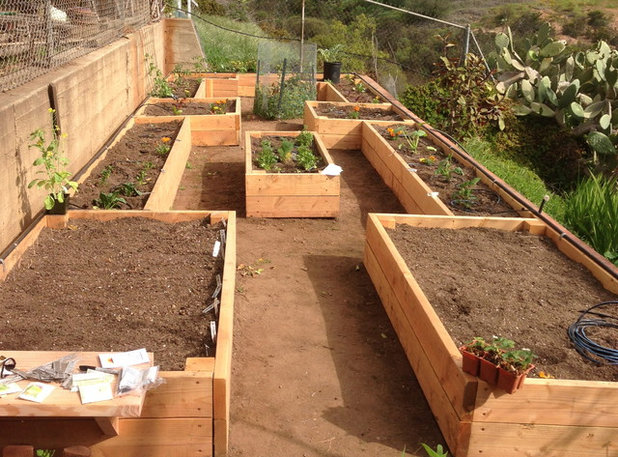
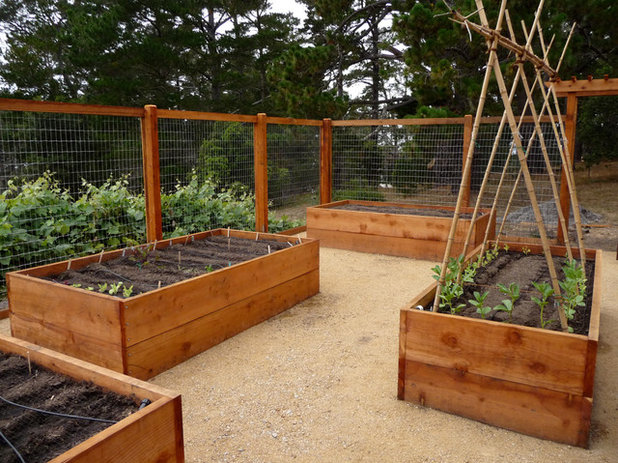
If your soil is problematic or if you just want easier access to crops, a series of raised beds, each with its own blend of plants, might be the way to go.
 Plan your drip system.
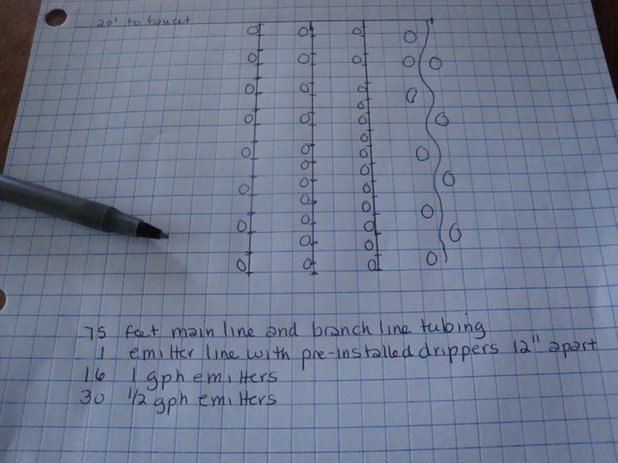
 Once you’ve laid out the design, do a rough draft showing the overall size of the garden(s) and where you’re planting what.
- Make a copy or two of your rough plan and then draw how the system will be set up. Draw the main line to the garden. This line, which has no emitters, should be no longer than 200 feet if you’re using ½-inch tubing and only 50 feet if you’re using ¼-inch tubing.
- Decide where to attach any branch lines, emitter lines and microtubing. The branch lines will most likely stretch down straight rows. Emitter lines, which are flexible, are good for spreading plants, such as strawberries, and for unusually shaped spaces. Microtubing can extend off the branch lines or main line to encircle individual plants or reach tight spaces.
- Add the emitters. Plan for each emitter to cover at least 60 percent of the root zone (the distance the roots spread). For closely spaced vegetables, place an emitter with a ½- to 1-gph output rate every foot; slightly farther apart for clay soil and slightly closer for sandy soil. If your vegetables will be farther apart, place an emitter with a 1- to 2-gph output rate at the base of each plant. You might want to add one on each side of the plant to be sure the root zone will be covered. The slower the drip rate, the more emitters you can install, though you may have to water longer.
Land Design, Inc.
Do the math. There is a limit to how much water the tubing can handle. Start by adding the total outflow of all the emitters you plan to use.
The maximum for ½-inch polyethylene tubing is 150 gph. That can mean 150 1-gph emitters, 300 ½-gph emitters or only 75 2-gph emitters. If you’re using ¼-inch tubing, the maximum is even smaller: 15 gph.
If your planned water flow exceeds the recommended maximum, you’ll need to either use larger tubing or add a second circuit to your system. You’ll also need a separate circuit for microsprinklers and sprayers.
San Diego Woodworks
Installing the SystemOnce the preliminary work is done, you can start installation.
1. Start at the water source, which for most systems will probably be an outdoor faucet. Before you start, be sure the polyethylene tubing has warmed up and softened to avoid kinks and difficulty snaking it where you want it to go.
2. The head assembly is all the pieces that sit between the faucet and the tubing itself. Start with a timer, if you want one, then add the antisiphon unit, fertilizer injector (if using), main filter, pressure regulator and swivel adapter.
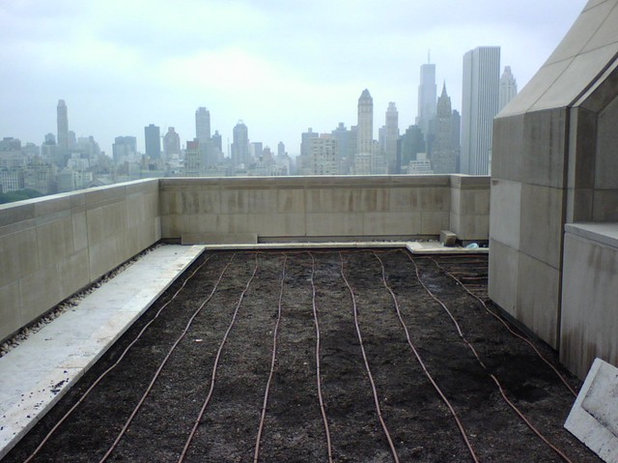
3. Insert the main-line tubing into the swivel adapter. Lay out the main line from the faucet to the garden, unrolling as you go and leaving some slack for adjustments. Stake periodically to hold it in place.
RR Irrigation
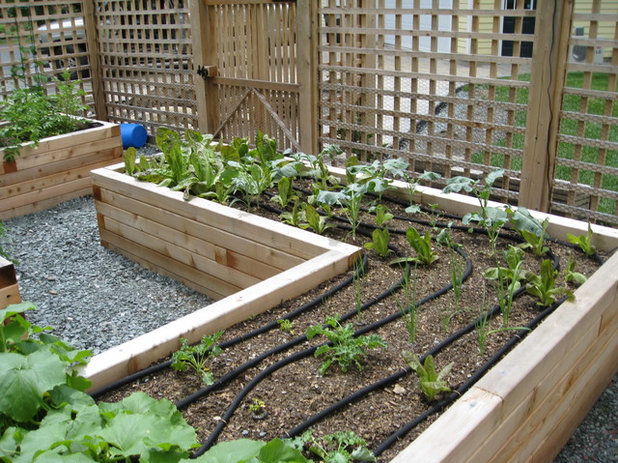
4. Add the branch lines past the individual plants and any emitter lines. Stake the end of the branch line in place, just past the main-line tubing (overlap the main line a bit). Continue to stake out the branch lines, keeping them a bit slack for fit.
5. Cut the main line to insert the branch lines. You can use a special tool, pruning shears or a sharp knife. Insert the fittings into the drip lines to form the connection. Use a combination of gentle pushing and twisting, and cover any barbed fittings completely. Don’t force anything. Instead use hot water (not soap or oil) to further soften the tubing if needed.
6. Once everything is laid out and connected, run water through the system to flush it out. When the water runs clear, turn off the water and close the ends of the lines with end caps or clamps.
San Diego Woodworks
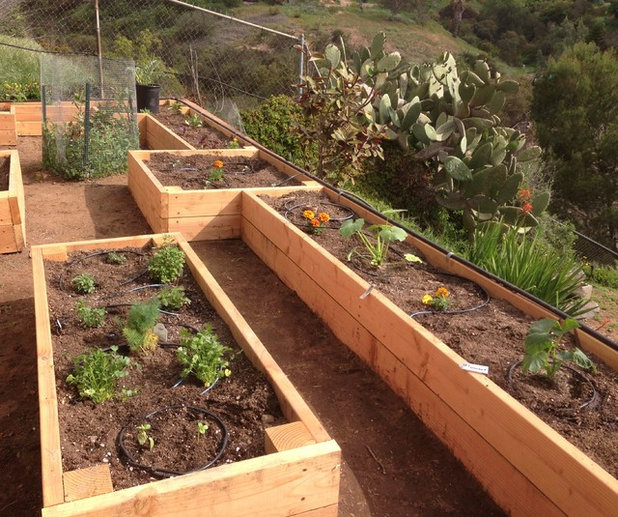
7. Add individual emitters and any microtubing to the branch lines. Make sure the tubing is lying straight, then hold the punch at a right angle and gently twist as you insert it. If you have a separate system with sprayers, set that up as well.
8. Check for leaks, clean any clogged emitters and reposition any wayward tubing or emitter lines.
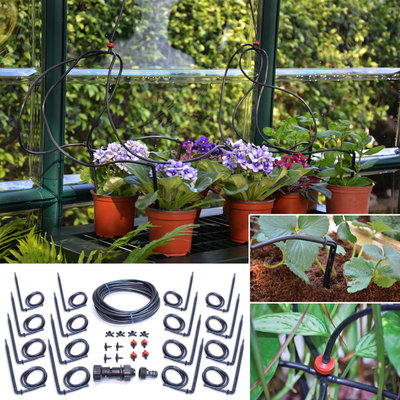
BuilderDepot, Inc.
Drip Irrigation Kit - $38.35
TroubleshootingIt’s fairly easy to determine what’s causing a problem and to fix it. Very little water getting to a plant usually means a clogged emitter. Clean it with a thin piece of wire. If that doesn’t work, simply replace it.
If there’s no water at all, and the emitter isn’t completely clogged, check for kinks in the line. If you suspect clogs, remove the end caps and flush the entire system. Taking out the emitter will let you check for a lack of overall pressure.
Water where there are no emitters, or puddles forming, generally means a hole or a leak. Use goof plugs to fix the former. For slits or cuts, make a clean cut on each side of the damage, then use a coupler to hold the two ends together. Flush out the system (remove the end caps) before using it again to clean out any dirt.
Popped emitters mean the pressure is too high. Install a pressure regulator that will lower the pressure.
Woolly Blue
Other maintenance. If you live in a cold-winter area, drain your system before the first hard frost or freeze. Disconnect the head assembly from the water source and store it indoors.
In spring, once the danger of frost and freezes has passed, flush the entire system, then check for any leaks or other damage. Repair or replace anything that is damaged.
More:Your guide to growing summer fruits and vegetables
Watering Tips Worth Soaking Up

