

Bonsai!!!
You will need.
Small containers. (I used plastic single serving applesauce containers)
Sandpaper. (Fine grit)
Clear Drying Glue. (I use Aleene's craft glue)
Sand. (I used the cheap play sand from Lowes)
Large Bowl.
Craft Paint. (Optional/Cheap kind from Walmart)
Small Jewels/Stones. (Optional)
Putting the "ingredients" together.
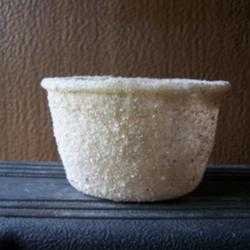
If using a plastic container make sure to first sand it with a fine grit sandpaper to "rough it up" so the glue adheres properly. After it's sanded and wiped clean paint it with a good thick layer of glue. Don't water the glue down, use it right from the bottle. Create a bead of glue along the top edge of your pot. As you press the sand down it will create a spill-over inside the pot. This helps keep the finish from peeling off. When potted up you won't see the mess.
Fill your bowl up halfway with sand (or whatever you want your pot covered with). Place the pot in the center of the bowl and firmly press down to get the sand stuck. Continue filling the bowl with the rest of your sand until you can't see the container. It will look like a large bowl full of sand. Tamp the sand down with your hands. Allow several hours for the glue to dry then fish it out of the sand. Brush off any loose particles. If you need a thicker layer simply paint it with more glue then redo the dipping step until you get the desired look.
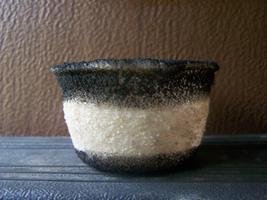
The pot below is painted as an example, I tend to lean towards a more natural finish with my pots.
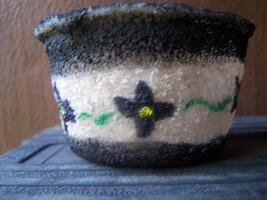
Dipped dried and ready for paint, I then added a couple simple black lines. Now it's time for some small and easy flowers... Fini'!
To paint the pot I used a soft watercolour brush and went around the edges. I didn't make it perfect, because nothing in nature is perfect. Just let the paint flow from the brush and don't worry about crisp lines... Unless you WANT crisp lines that is. Add flowers and fruit, even little songbirds! After the paint dries you can glue on whatever decorations you want too. It's your pot so make it look like what you want.
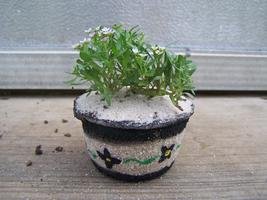
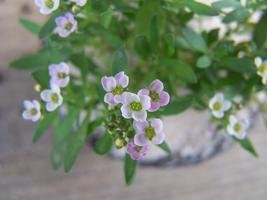
Planted with Alyssum, not your typical "bonsai". These tiny flowers are so perfect as or with bonsai.
For the most natural finish possible I will make a "Moss Paint" so the container takes on an aged hue as the mosses grow in. You really don't want your pot to compete with your bonsai. I will probably cover the above pot in this manner to tone down the paint job.
Some plants will require a drainage hole. Simply drill/poke an appropriately sized hole in the bottom of your container.
Do not let these pots sit in water. The glue can loosen and well, that would suck for you!
Pot ideas.
Plastic meat containers (CLEANED).
Tin cans.
Cheap bowls.
Anything really!
Moss Paint Recipe.
Blend pieces of dried moss or purchased moss spores into 2 cups of yogurt or buttermilk.
Paint onto your pot with a paintbrush.
Place your pot into a plastic bag to create a humid enough environment for the moss to develop.
Set the pot and bag in a cool, shady spot until the moss begins to form, which will be about 10 days.
Make sure to plant the container so you will be watering it regularly, which will keep the moss alive and growing.
Special thanks to www.weekendgardener.net for this simple recipe!
Until we talk again,
Jocie.
Copyright © www.100flowers.win Botanic Garden All Rights Reserved