

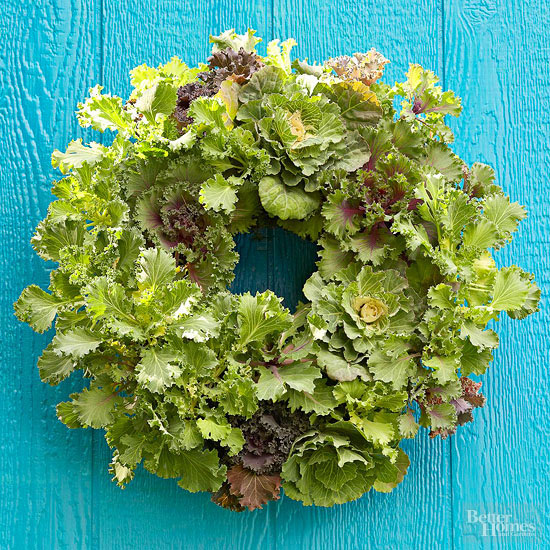
As showy as any of fall's foliage, ornamental kale grabs attention throughout the season with its bright colors and ruffled, fringed, or scalloped forms. Known also as flowering kale, the leafy annual develops into plump, open rosettes. The ornamental varieties are edible but not as delicious as their large family of Brassica oleracea cousins, including flat-leaf Russian kale, cabbage, and collards.
For an autumn wreath, look for ornamental kale seedlings at nurseries and garden centers in late summer and early fall. If you plan ahead and start seedlings from a packet of seeds, you can make a wreath for a fraction of the cost. Sow seeds about 10 weeks before your anticipated first frost date.
Plant different varieties to achieve special effects with contrasting colors. Transplant seedlings into a living wreath form before the root balls grow too large to fit through the openings of the wire frame. The plants' usual size -- 8-12 inches in diameter -- will be somewhat limited when grown in a wreath frame.
Hang your wreath in partial to full sun. Take it down weekly to water the base thoroughly, and let it drain before rehanging. A wreath also can be used as a centerpiece. At the end of the season, remove the plants from the wreath base, and save the base for replanting with pansies or violas in late winter or early spring.
continue reading below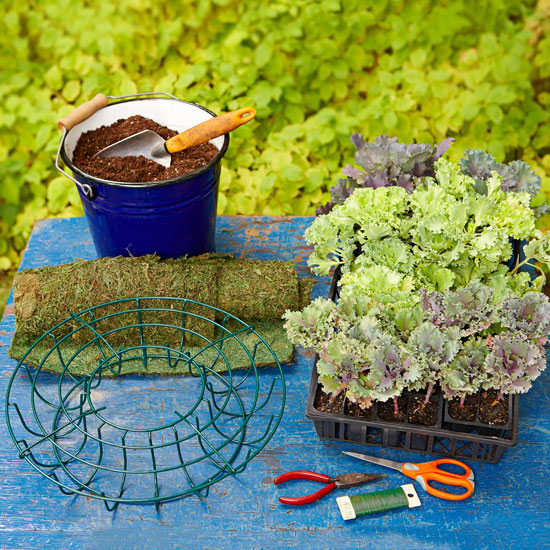

Remove the lid of your living wreath form and set it aside. Use scissors to cut the moss cloth into 6x18-inch strips. Line the wreath form with the strips facing the moss side out and overlapping the ends.
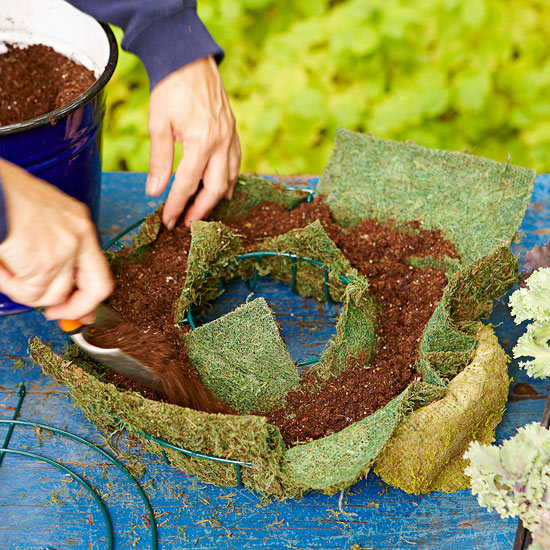
Moisten the plants' root balls and a bucket of potting mix. A moisture-retentive mix contains water-holding polymer crystals that help minimize watering. Fill the moss-lined wreath form with damp potting mix, mounding it. Fold the outer edges of the moss cloth over the mounded potting mix to cover. Add moss pieces as needed.
Reattach the lid of the wreath form. If you use a wreath form without a lid, wrap florist's wire around the outside of the moss and frame to hold everything in place.
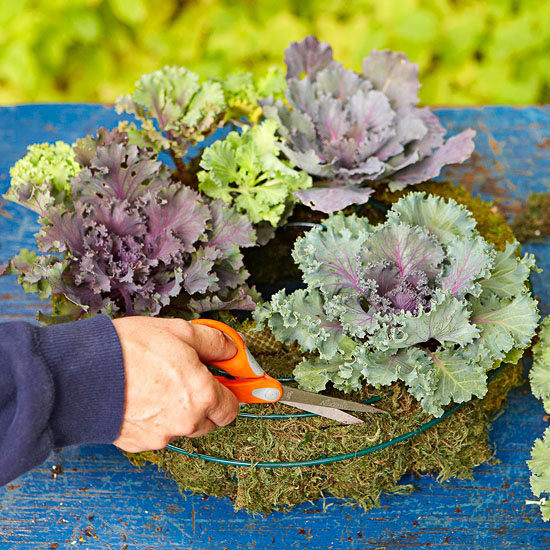
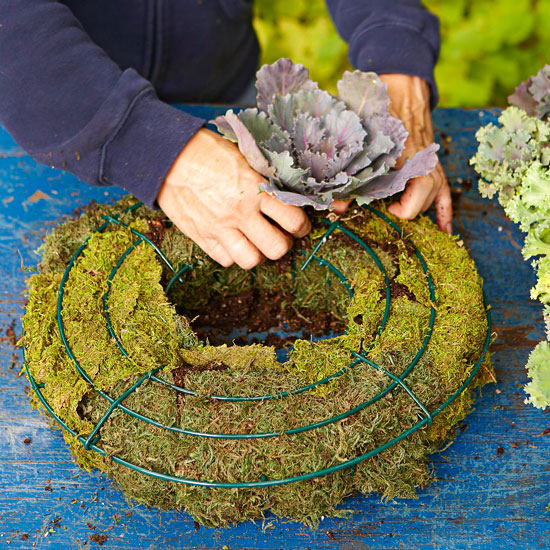
Use scissors to cut one opening at a time in the moss cloth for each plant's root ball. Remove a plant from its nursery pot, squeeze the root ball to compact it, and tuck it into the opening in the moss. Push the root ball down into the potting mix. Add potting mix and moss pieces if needed to fill openings.
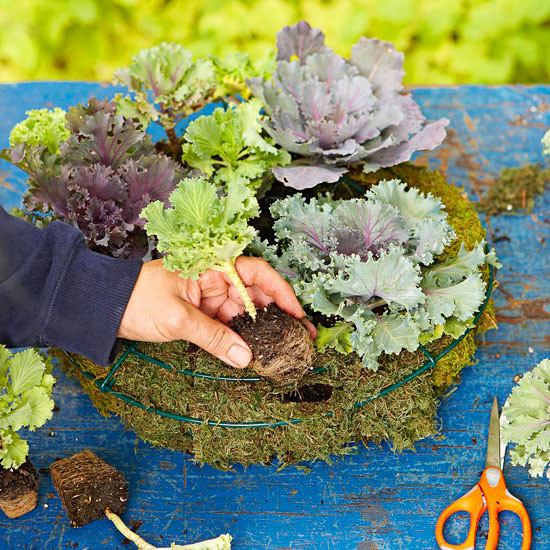
Plant the face of the wreath in a clockwise manner, staggering the plants, then plant the perimeter. Leave growing room between the root balls. The plants will fill out and over the gaps withing a few weeks.
Copyright © www.100flowers.win Botanic Garden All Rights Reserved