

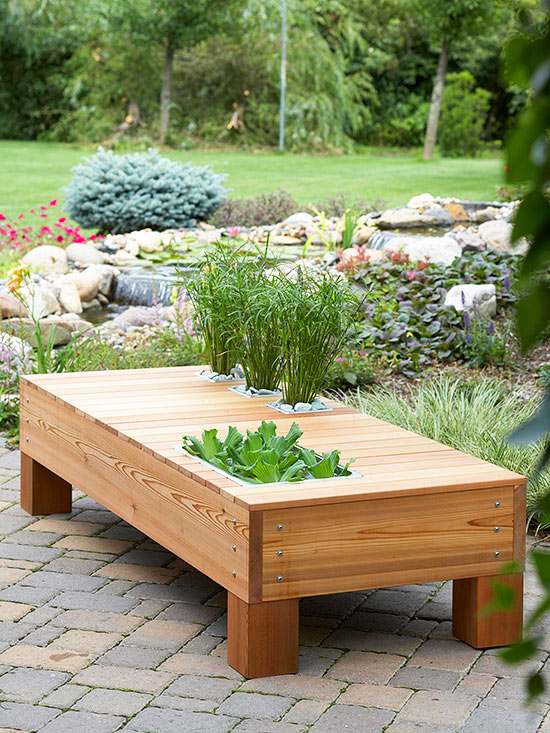
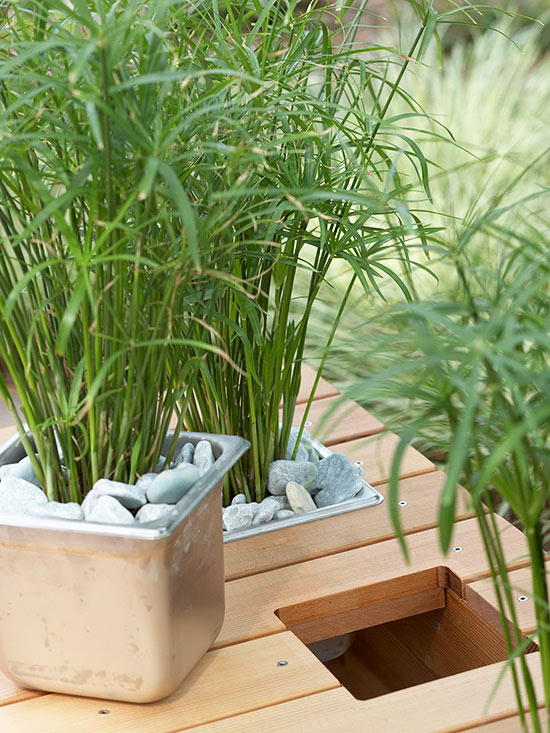
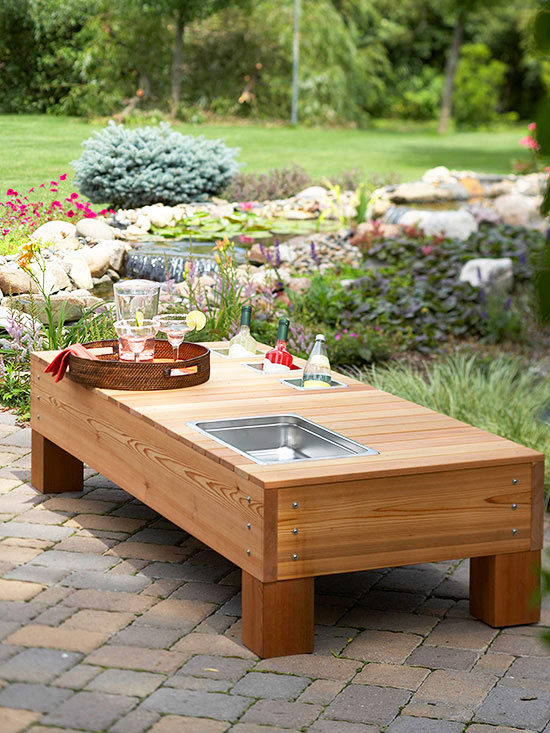
Generously proportioned, this hardworking table seats four adults while showcasing aquatic plants -- three potted papyrus and a floating colony of water lettuce -- in stainless steel restaurant pans. For entertaining, other metal pans swap in to serve snacks and drinks chilled on ice.
Time: 2 days
Cost: $$$
Skill: Level 4
Tools you'll need:
Materials you'll need (All lumber is Western red cedar):
Cuts you'll need to make (in inches):
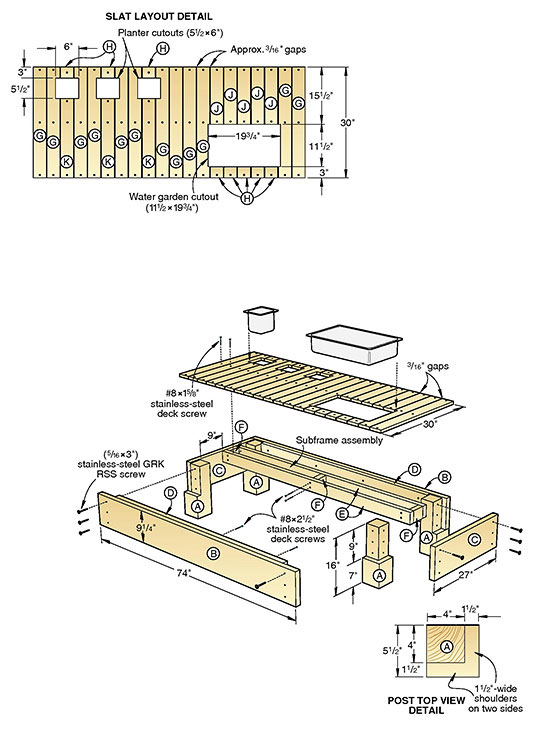
Cut 6×6 cedar to length for the four legs (A), making sure they are square and consistent in dimension. Notch each leg with a table saw or circular saw where it will fit inside the frame rails. Finish the cuts using a handsaw.
Cut the 2×10 cedar to length for the side and end rails (B, C). Drill holes for the GRK or lag screws as shown, then glue and clamp the corners together until the entire bench frame is assembled. Drive GRK screws through the rails and into the upper faces of the legs as shown to attach the legs.
Cut 2×4 cedar to length for the rail cleats (D). Use 2½-inch deck screws to attach them to the inside faces of the side rails, flush at the top edges.
Use glue and 2½-inch deck screws to attach the rails and blocks (E, F) as shown, then fit and screw the assembly to the inside of the main bench frame. Position the subframe for the correct spacing on both sides; this placement determines the cutout widths. Allow 5½ inches for the channel with the three narrow cutouts and 115/8 inches for the single wide cutout; if your pans are a different size, adjust the subframe accordingly.
Cut the 1×4 cedar to length for the full-length table slats (G) and partiallength slats (H, J, K). We used 20 slats with 3/16 inch between each. Start at the ends and fit the full and partial slats as shown; drill 3/16-inch holes for screws and attach the slats using 15/8-inch stainless-steel deck screws. Use one screw for each small slat block (H), putting a dab of glue underneath to prevent shifting. Follow the pattern shown to leave openings in the tabletop.
After slats are attached, use a jigsaw to enlarge the cutouts for the pans. If desired, route using a flush-trim bit. This will require additional guide cleats on the undersides of the slats.
Sand table. Finish with a clear exterior sealer. Some graying will occur over time, so if you want more color consistency, apply semitransparent or solid-color exterior stain. Paint is not recommended as it will require frequent maintenance.
Copyright © www.100flowers.win Botanic Garden All Rights Reserved