

With a site analysis and personal inventory in hand, you've already accomplished a large part of the design. Now take it a step further by thinking of your yard as a whole and drawing a conceptual plan. Using the process outlined below, you'll identify general use areas that you need or want.
continue reading belowFirst, make a list of the basic ways you use different parts of your property and the unique requirements of each. The following general use areas should spark your thinking:
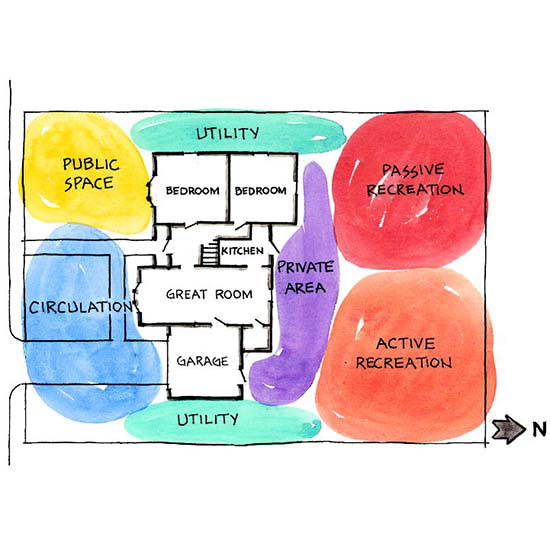
Look at your list of use areas and think about how the concepts relate. For example, you don't want to locate the garbage can near an entertainment area.
Lay tracing paper over your base map and shade rough areas -- or bubbles -- as shown in the illustration above. Within each bubble, note the parts of your personal inventory that could occur in that area. Draw as many of these rough, conceptual plans as you need to work out various scenarios until you find one that includes as many elements as you need.
Try out different designs now by using copies of your base map, or by laying tracing paper over it, to sketch out variations. Start comparing prices for materials, then start making decisions.
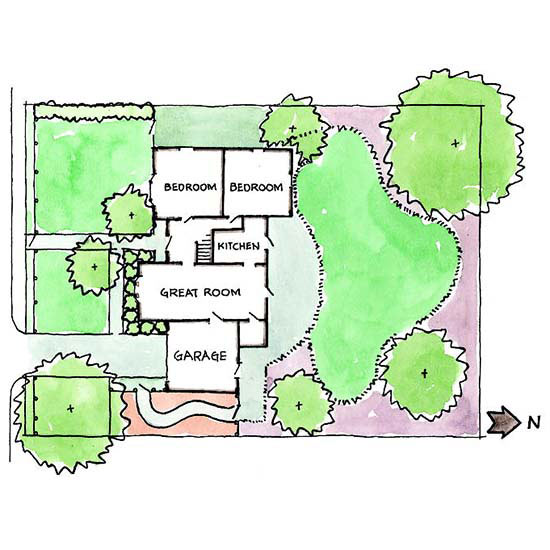
You needn't be an artist, but do draw to scale, making the relationships on paper as they will be in reality. Completing a perfect design will take more than one or two tries. Plan on doing at least three different preliminary plans, and enjoy developing the process.
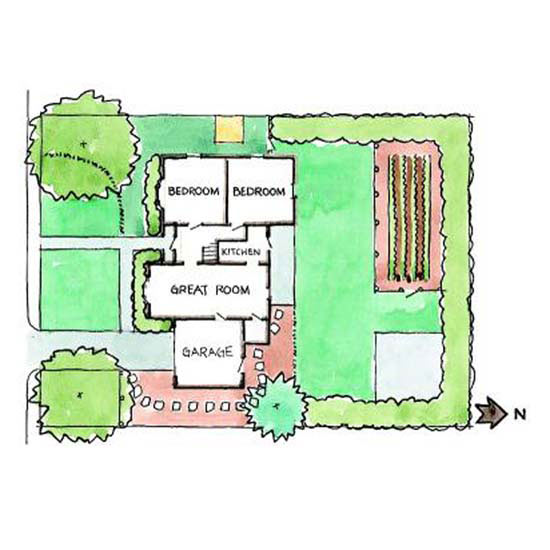
Each preliminary plan will bring you closer to the final design. With each scheme, you'll learn a little more about how all the pieces fit together and discover that there are many different ways to accomplish what you want.
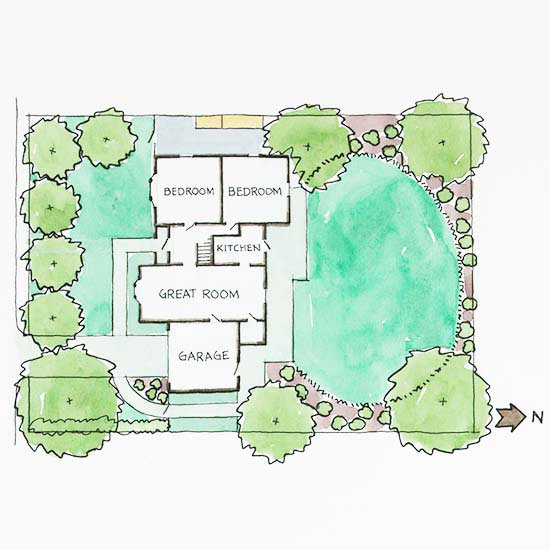
Fitting everything into a satisfying scheme takes patience. You may have to set the design aside and give it time to evolve. You'll jump-start the creative process by coming back to the design later with fresh ideas.
The beauty of having a plan is that you know where the project is going. Even if it takes years to get there, all of your work and expense will be taking you in the right direction. Savor the pleasure of this accomplishment and carry it with you as you build your dream landscape.
Review all your preliminary designs, pulling from each the components you like most and compromising if necessary. Make the final plan as accurate as possible. It will be the guide to determining costs. Make copies to give to the contractors you hire to do the work.
Finally, ask yourself: Have I resolved the existing problems? Does the plan meet building codes and easement restrictions? Have I provided for the use and pleasure of everyone in the family? Does the plan suit our lifestyle and our home's style? Is the plan realistic in terms of the time and cost needed to implement it? Will the landscape be pleasing, accessible, and safe year-round?
At this stage you don't have to be too specific about plant types, structure design, or materials. Employees at home and garden centers can help you make final choices.
Copyright © www.100flowers.win Botanic Garden All Rights Reserved