

Many succulents seem designed for pot life. These plants get lost in the garden, or they are too delicate or tender to make it outdoors... or they just seem happiest in a small, controlled environment where they can show off. Many succulents complement each other and look better in groups, rather than by themselves. If limited space is a problem, one solution is community pots. Here are some ideas and suggestions for creating community pots of succulents.
(Editor's Note: This article was originally published on September 19, 2008)
Since we have been collecting succulents obsessively for the least three to five years and have no room left to put them, one solution has been to stuff many of them in community pots. Now that we have been doing that for a few years, with very little thought behind it (at least about my own contributions) we have dozens of community pots; some we are quite proud of, and some we had to take apart almost immediately. The following is a discussion of some mistakes we have made (and keep making), and some things we have discovered that work. The reader must realize we live in southern California that has its own climatic limitations as well as some latitude; your results may vary.
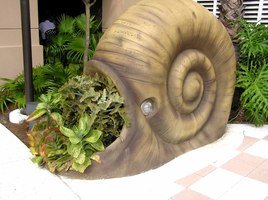
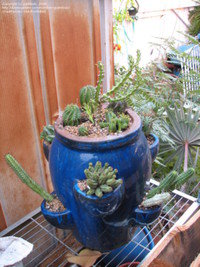
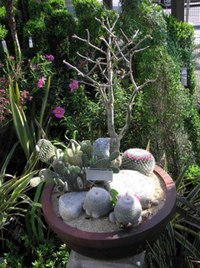
First thing is the pot. For a container to be a community pot, it has to be of some size or there will be no room for more than one plant in it. We have tried all different sizes, depths, shapes and materials and decided we like almost all of them. Variety is wonderful, even if it is one of the no-nos in ‘real' landscaping design, where repetition of shape and sizes is probably more important... but less interesting. The larger the pot, the more interesting scenes one can create... and it is impossible to move once it's finished. We have a number of large pots that we wish we could move, but we are pretty much stuck with where they are for now.
Though it worked as a cheap pot, this metal pail did not turn out to be the ideal pot... didn't breathe, retained too much moisture (even though we drilled a LOT of holes in it) and was not all that attractive. But it was easy to drill the holes in it... so I guess that was a plus.
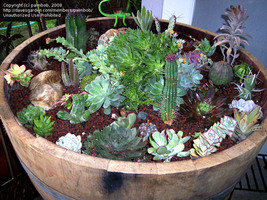
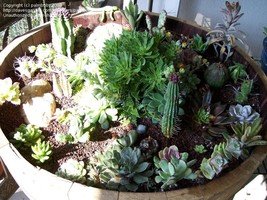
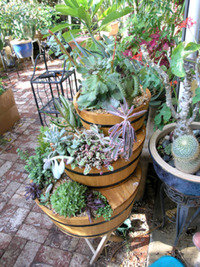
This wooden barrel ended up being much more attractive and the soil did dry out a lot faster in it. But it was too huge, and once the sun came in at a different angle, we found it too large to move easily (and didn't... and plants fried). This barrel now holds bamboo and other tropicals and is stuck in a dark shady corner... oh well.
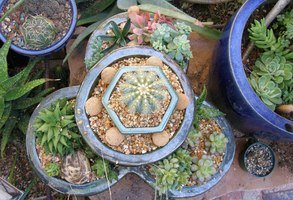
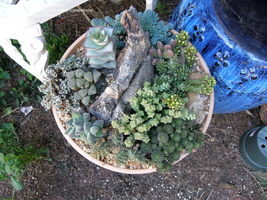
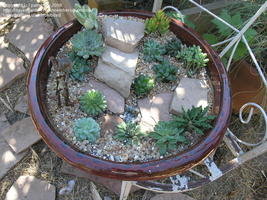
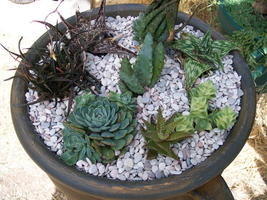
Early on, some of our favorite pots were large, circular shallow pots. Shallow is good for several reasons: looks, ease of moving when full, and less likely to retain excessive water that can lead to root rot (most of our succulents do not like sitting in soggy soil.) At least that was the theory. In reality the depth of the pot is far less important in terms of root rot and in fact, deeper pots are harder to keep moist enough. They are also much easier to move with a dolly than is a shallow pot. And the deep ones look great, too. Now we are not so picky when it comes to pot depth.
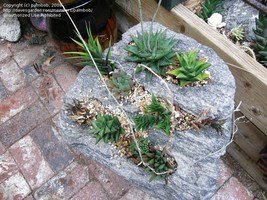
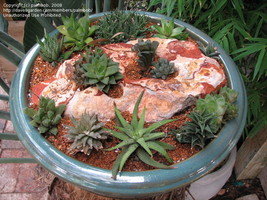
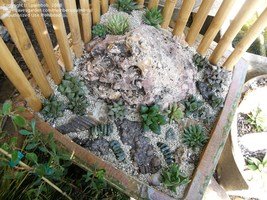
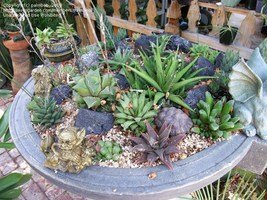
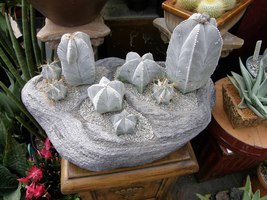
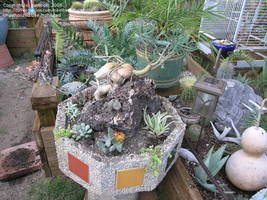
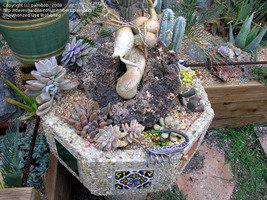
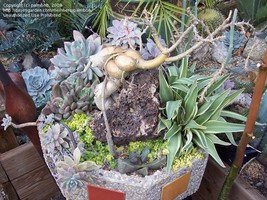
Pot made from large ceramic drainage basin (had to drill holes in it); pot made from metal bird bath (also needed holes drilled); and pot made from feather rock (pots and holes were drilled in this one)
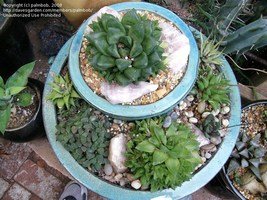
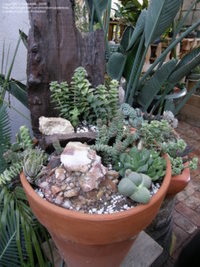
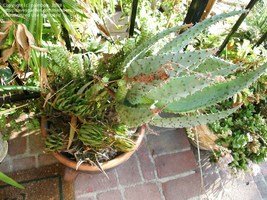
multi-sectional pot gives one several areas to work with; deeper pots are fine to use (Cal Cactus Center design); one can make a pot out of about anything
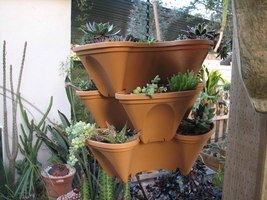

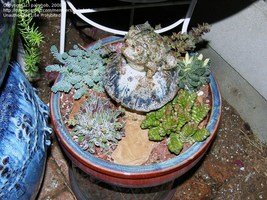
Hanging multilevel pots can work well as can a strawberry pot. Pots of various shapes are basically made for succulent communities
Soil is pretty important, only not nearly as much as I first thought. There are dozens of ‘recipes' for perfect succulent soils, but we have learned that most plants (with a few exceptions that we no longer try to grow) seem to perform well in most soil. We avoid potting soil mixes labeled as water-retentive, and find that most potting soils drain well, especially compared to the clay soil in our garden. In fact, drying out and dehydration sometimes is more of a problem for most of our succulents in this southern California's arid, hot climate. Growing succulents in a humid climate is probably much trickier and I have no comments to offer, as I have not done it. (I hope someone else will write an article about that.) But to be safe, I recommend adding perlite or--even better---pumice to all your soils. One experienced local grower here in southern California who often shows his plants (and usually wins) says the starter soil type hardly matters at all as long as you add 40% to 50% pumice to it... then it all works. I think he's right.
The plants: it's pretty hard to cover all the possible combinations or plants that go great together and which don't; and of course, these are only our opinions. You may have a completely opposite idea of what looks good in a pot. Frankly, I am not so sure I know what looks good, as I cannot usually get beyond the plants themselves. If I like a plant it looks good to me everywhere, unless I can't see it well. But my girlfriend truly has a great eye for balance and composition, so I trust her when she says something looks good and when it doesn't.
This pot started out looking great but eventually the Crassulas outcompeted all the other plants; Aloe brevifolia virtually crowded out the rest in this pot
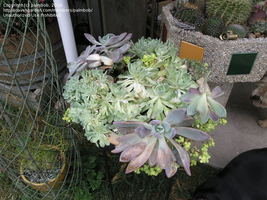
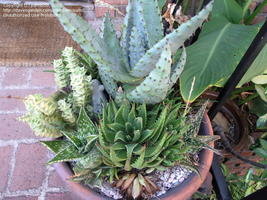
In general we like to use plants that not only look good by themselves but also look good with other plants. Some plants are too small, large or bizarre to work well in a community pot. Also, we try (often unsuccessfully) to pick plants that ‘behave'. This means they don't try to overtake the pot and outcompete everyone else, or plants that don't just sulk, rot and leave an ugly brown spot where they used to live. Lastly, and perhaps most importantly, these plants have to like similar situations. We have--through careless experimentation--discovered some plants just don't like hot, blazing summer sun, or months on end of full shade, or lots of water, or too little water... so we have to plant plants that have similar needs, which is easier said than done. Realistically speaking, we just tend to plant whatever is still on the shelf looking for a home.
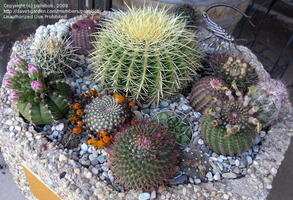
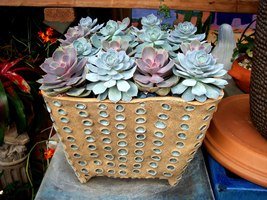
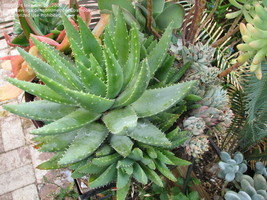
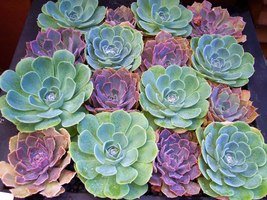
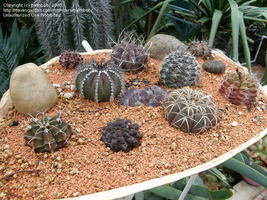
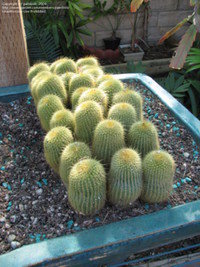
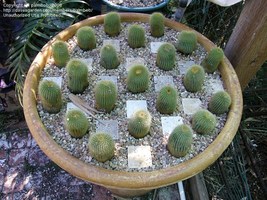
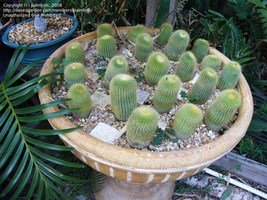
One of the obvious ways to be sure the plants will 'get along' and have similar needs is to fill the community pot with the same genus of plants (e.g., all Echeverias, all Haworthias, all cacti etc.). We do this a lot, but to me these aren't the most interesting pots. Still, some nice containers can be made this way.

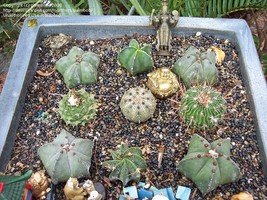
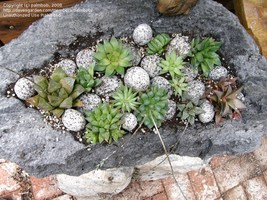
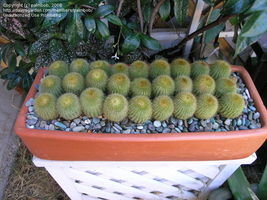
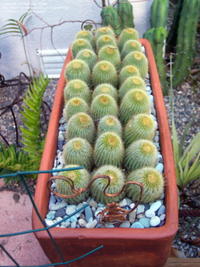
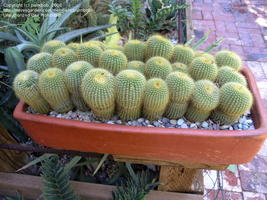
Sempervivum pots can be very attractive (but don't do well in our climate); there are all sorts of things you can do with globoid cacti; Haworthias are ideal plants for community pots
more Haworthia community pot ideas

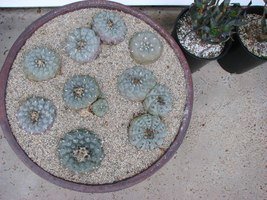
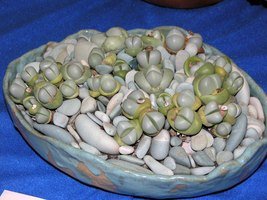
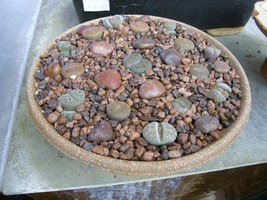
California Cactus Center Echeveria creation; Lithops pot in private collection Peyote pot also in private collection
We are not super fans of cactus in community pots with non-cacti. Cacti seem to have an aversion to being covered or snuggling with other succulents and complain by rotting and dying. Additionally we like to be able to weed our pots, and prune, move rocks about, and adjust things as necessary. And some cacti make that an unpleasant experience. My girlfriend is fearless when it comes to cactus spines, but I personally can't stand being poked over and over. Worse yet is having spines in my hands that are too small to find, or having a spine break off below the skin. So from now on we pretty much keep cacti with cacti and the more ‘user-friendly' plants together. Cactus community pots are great, but very difficult to weed, so we tend to use only cacti that like full hot blazing sun, which ends up killing all but the most resistant weeds.
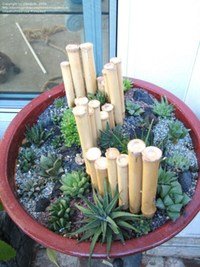
 Same pot as above but with 'hidden' cactus in it... and vicious!! Makes this pot hard to deal with
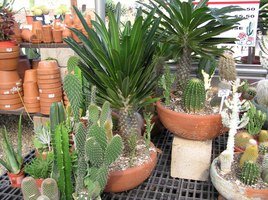
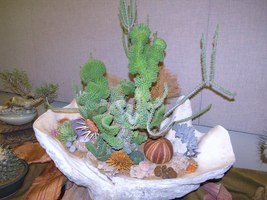
Two examples of community pots found in nurseries mixing cacti and other succulents. These two actually work because either the other succulents are cactus-like (spiny) or, as in the second, the non-cactus is separated and far above the evil cacti... additionally those cacti will never outgrow this pot or get in the way of taking care of it.
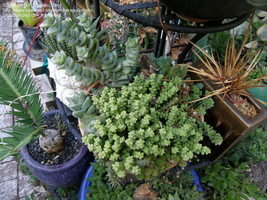
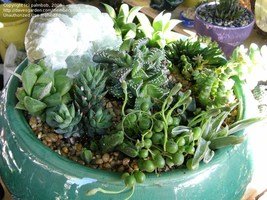
There are two basic approaches to designing a community pot. Planned arrangements, and the "cram-all-you-can-into-the-pot-so-there-will-be-no-annoying-empty-spaces" technique (this is done at the beginning, or planned so that in a short time the plants will do this themselves). The second approach takes the least amount of thought, other than trying not to put in plants that will vanish or rot when smothered. The plants sort of make the design themselves. Sometimes it works. Sometimes it doesn't. Sometimes it works at first... and then time makes a mess of things (this is the most common situation). And sometimes the pot seems to only get better and better (this is rare, but great when it happens). I cannot tell anyone how to do this properly; one just has to do it and hope for the best, which is one of the things that's so fun about community pots. I cannot tell you the number of communities we have thrown together... and then taken apart and put in different communities. Trial and error (nearly in equal numbers sadly) is what this style of planting is all about. Needless to say, this is my style.
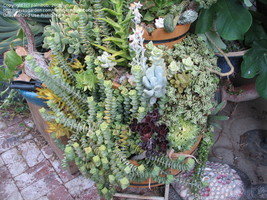
three layer multi-species pot crammed full... but mostly with plants that tolerate this sort of 'cramming' (those that didn't eventually died or were 'saved' and put elsewhere). One can see that over time, the crammed look gets even more and more crammed. This sort of works in this case, but often it doesn't.

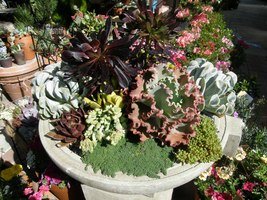
Examples of some 'crammed' pots. In the middle pot, this cramming quickly led to the demise of a few plants, but ther rest are still doing great to this day (a year later).
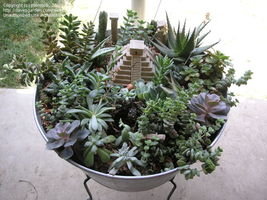
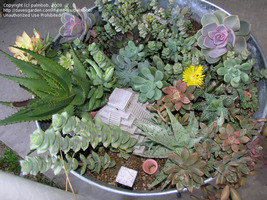
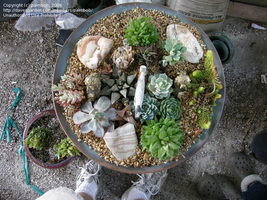
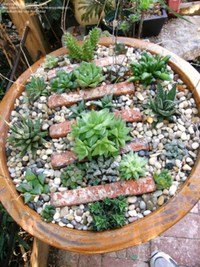
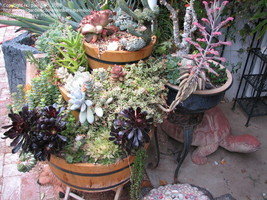
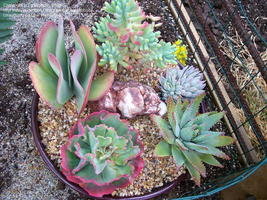
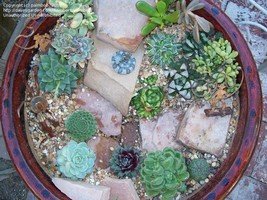
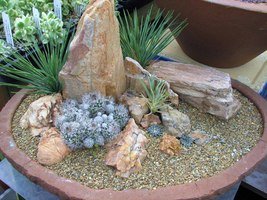
Three examples of pots with some spacing between the plants. In most cases, we use rocks or objects to add interest to the pot, but mostly to keep us from cramming things together
My girlfriend has a modicum of common sense and knows what looks good and what doesn't. She places things in a certain pattern, usually with some spacing, and then sees what happens. She does not let convention stop her, though. I have complained more than once that she's doing it all wrong only to be consistently proved wrong. When will I learn? (I am a man; I do not learn such things so I just submit after a while.) I should let her write this part on how she decides what to put where, but I seriously think she doesn't know either. She is just a natural.
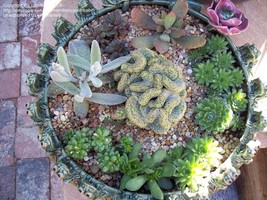
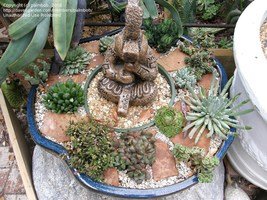
Seemingly random, these community pots were created in just minutes and they are some of her finest creations.
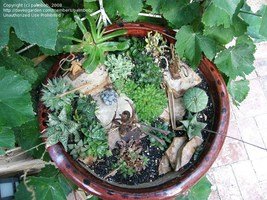
I tried to talk her out of making this pot since it sinks down in the middle--the opposite of how most pots are landscaped--but I should have shut my mouth. It works and is one of her most long-lived creations, going on four years (though a plant gets replaced here and there)
She does pay a lot of attention to community pots created by several nurseries we frequent; she sees what works there and what doesn't. What I hate about nursery community pots is they ALWAYS look great. When things go bad for a nursery pot--as they inevitably do--the nursery simply breaks down the design and makes a new one, tossing out the dead plants and pretending it never happened. So when we visit a nursery, we are only shown what is looking great that day. However, we find that many of their designs cannot possibly continue to look good. We have tried them, and found many include plants that eventually take over, die in winter, etc. This has forced us to forge ahead on our own, and when we lose a plant, we feel guilty and stupid. I seriously doubt a nursery cares a whole lot if some plants die; they just get replaced.
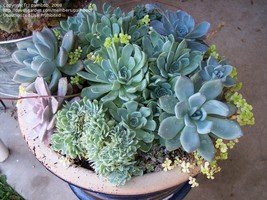
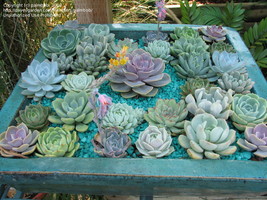
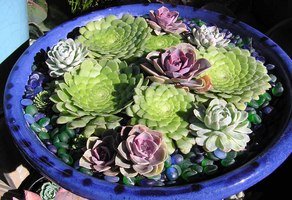
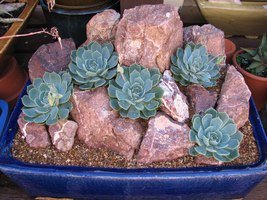
Girlfriend's 'blue Echeveria' pot looked great until I decided it needed a bit more sun. I hate it when that happens. I see community pots at nurseries in disarray and with dead plants often in the back areas that I was admiring only months earlier... so it happens to them, too
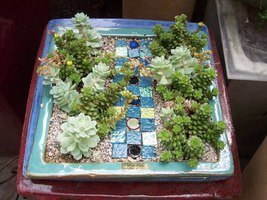
She got this idea from seeing the plants in a nusery coming in in flats with the plants basically touching... so we bought 1/3 of a flat and kept it that way. Looked good for 2 years, but then the plants started to get too large and had to be moved.
So the plants were moved to another pot... but the 'square' pattern was getting old. So she put them in a round pot instead, and they should be good now for at least another 2-4 years.
All the above are more ideas from nurseries or private collections (not ours)
Just remember, community pots age. And like us, they don't tend to get better looking with age. They evolve with time; and more often than not, they become less attractive as some plants become overgrown, others die, pots are moved and plants fry in the sun etc. Once one comes to terms with a community pot's limited life span, one is less apt to be crushed by the disappointment that nearly always comes with time. What we try to do is approach this 'problem' philosophically and see it as an opportunity to make a new artistic composition--and save money on a pot at the same time. And, if we're really lucky, we'll get to even reuse a few plants that aren't too large or leggy (or dead) from the original pot.
Cute little aloe pot (one of my first attempts) day 1, 2 years later, and 4 years later... time to take it apart and start over...
 Following a pot over time (3 years)
Copyright © www.100flowers.win Botanic Garden All Rights Reserved