

This article is an introduction on how to do some watercolor paintings of some of the simpler succulents (aloes, agaves etc.). Some painting tips will be mentioned and some sample paintings will be shown as they develop from start to finish.
This article is an introduction on how to do some watercolor paintings of some of the simpler succulents (Aloes, Agaves etc.). Some painting tips will be mentioned and some sample paintings will be shown as they develop from the start to finish.
To me painting is no substitute for photography, either in terms of accuracy, or even color or form. But sometimes painting can add things impossible to create with simple photography. And though photographs themselves can certainly be art, there is something satisfyingly ‘artistic' about making a painting of a plant, even if it's directly from a photograph, no matter how formulaic this might sound. One can add a lot or take away a lot from the original image by painting, exaggerate or alter the colors, blur or simplify the background, simplify or alter the form, add objects (I usually add lizards) and basically change a ‘factual' photograph into one's own interpretation of the ‘facts'. Paintings do not have to be accurate, or even duplicate reality in the least. In fact, one has nearly infinite freedom when painting. But in this article I use traced images to simplify the process, speed things up a great deal and preserve some accuracy. I find the wonderful symmetries of some of the plants I paint are difficult to reproduce without tracing. What one does from there is totally up to each individual, but at least this will give the reader/painter a start.
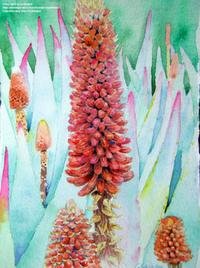
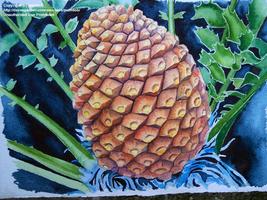 Painting of a cycad cone that I probably could not have done accurately without tracing
Painting from a photograph has always seemed to me a form of cheating and certainly without many of the challenges and satisfaction of plein air painting (painting from real life out in nature). I love painting and drawing from real life, but it is a very time-consuming effort. One does not always have the time to sit outdoors and paint while the light is right and the plant is right. In fact I never have time for this anymore. A photograph can capture a plant in the proper light or position forever and allow one an indefinite amount of time to paint... so this is what I do.
Watercolors are an ideal medium for me in that they take up very little room, so are easy to transport and set up anywhere (work or home). The paintings themselves are easy to keep, store, move about and work on whenever (compare this to oil, pastel, or to a lesser degree, acrylic painting - all messy, difficult to transport and easy to damage). And though there are certainly limitations to watercolors along with a degree of ‘unforgivability' not inherent with the other painting forms, there is more latitude and flexibility to watercolors than many may realize. Watercolors can be tight (controlled) or loose -wild and crazy, impressionistic, cartoon-like or whatever- there is definitely a lot of freedom as well as convenience with this medium.
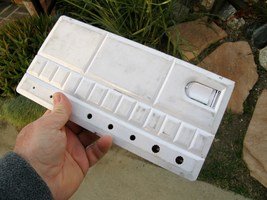
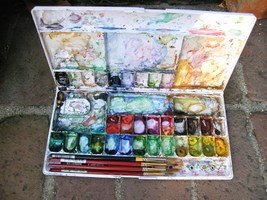
This is all the room the whole kit takes up... other than the painting itself and a cup of water
Why succulents? Most botanical artists paint flowers, or scenery or perhaps even do scientific illustration. I find succulents an ideal model for me because I don't have much interest in painting flowers, scenery is too complex for my skill level, and scientific illustrations are too exacting and time-consuming. Most succulents grow well in pots and can be moved to different lighting arrangements easily. Many succulents are small and simple enough that one can enjoy painting them in entirety without sweating the details. And many have symmetry that makes painting them akin to coloring in a coloring book... just get the shapes close and fill in the spaces, and you have a painting of a succulent! Painting succulents can make one seem like a skillful artist while one is still learning (good boost to one's ego- just what one needs to encourage one to keep painting!). Agaves and Aloes are particularly ideal subjects having few annoying details but wonderful shapes and symmetry that are both fun and easy to paint.
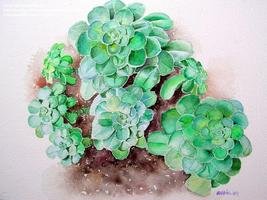
One of my first watercolor attempts- Aeonium (no idea what species) partially from real life, partially from photo (no tracing with this one)
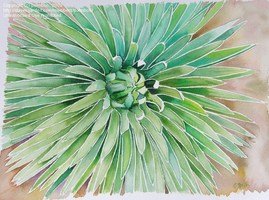
This first painting I show here is of an Agave parryi I have in the front yard I photographed from above. Though I like to draw from my photographs by just looking at them, this often results in somewhat lopsided drawings (if you're good, that doesn't happen... oh well). But when painting something with wonderful symmetry or annoying details, tracing the original photograph saves me both time and frustration. To copy a photo I just print it out on an 8x11 sheet of paper and cover the back side with graphite (#2 pencil is perfect, though slightly softer pencils work well, too... very dark/soft pencils or charcoal make too dark and image and one that smears too easily, too). Then I transfer the painting onto watercolor paper by tracing the outlines of the photograph. Be sure to tape the photo onto the watercolor paper somewhat securely or the drawing may not transfer accurately (shifting a bit side to side as one traces), and/or the graphite might smear all over making it hard to see the transferred drawing. I find scotch tape works fine and doesn't stick so well to watercolor paper that it damages it pulling it off later. But you can use masking tape or drafting tape (made specifically for this purpose). Duct tape sticks too well and will damage the watercolor paper. Trace the major shapes on the photo using a ball-point pen or strong but somewhat dull pencil to be sure the transferred image is dark enough to see once you're done. I prefer a pen for this as it rarely tears the paper and I can then see what shapes I have traced and which ones I still have yet to do. It is not usually essential to trace every little detail- it is probably best to deal with those, if at all, once you start actually painting. Tracing details will usually complicate the final drawing too much and make it difficult to tell what's what after you take the photo away.
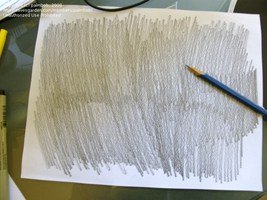
Number 2 pencil on back of photograph (another Agave parryi photo) and the subsequent tracing next to the photo
Larger paintings from tracings require special printing abilities (my printer does not print paper larger than 8x11) or other copying equipment (camera lucida or some sort of projector). I find that though the larger the painting, the more impressive once finished, 8x11 keeps the painting size to a ‘doable' one (large paintings take a lot longer and I get bored quickly) and easier to store, too. This does tend to make all my paintings about the same size, which is both convenient (for matting purposes) but less interesting if one plans to sell/show ones paintings (not me).
I like rough or cold-press watercolor paper, the thicker the better (thicker papers warp less and tolerate a lot more abuse... but can be really expensive!). These papers are not very smooth surfaced, but that makes the watercolor painting process itself more interesting, and the water doesn't dry too fast. Hot press watercolor paper is nice and smooth, but to me it tends to dry so fast that blending colors is difficult. However hot press is better if you want a really detailed painting in the end. I use dry paper. Some like to do watercolors on soaking wet paper but this technique not only offers one little control of details, but makes it harder to see the faint penciled image. Also, wet paper requires a board to staple the paper onto, and is messy and time consuming anyway. However it is generally considered more ‘artsy'. I like ease and simplicity of dry paper, though. Since I rarely get to finish a painting at one sitting, I like the freedom of being able to toss my painting into the car and take with me wherever I go, and if some free time comes up, I can paint a little more. All I need is the original photograph I used for the transfer, the painting and my little portable watercolor palette with a few brushes. I use fairly cheap and small watercolor brushes (if I were a professional, or a lot better at this, I might care more about costly brushes, but I have used some pretty nice brushes and in most instances have not benefited from the higher quality, so the quality was lost on my skill level and the excess cost was not worth it).
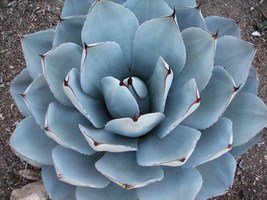 original photo of solitary Agave parryi painted below
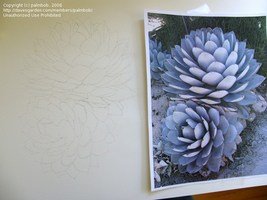
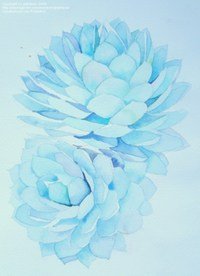
Once I have the photograph transferred onto the paper, I usually paint the plant, leaf by leaf, worrying little about details of color and shading. I like to get the shapes blocked in for two reasons... it gives me a feeling I have gotten somewhere (this is important as starting a painting is always the hardest part to me), and it keeps the pencil from smearing. Painting over the pencil rarely is a problem in terms of the final image, as the transferred image rarely is dark enough to show through the painting, or at least not enough to annoy me. And one can actually erase some pencil right through the watercolor afterwards (I do not understand how that is possible, but it is).
Here I am working on two differnt paintings at the same time (that way while one is drying I can paint on the other... plus it saves on paper)
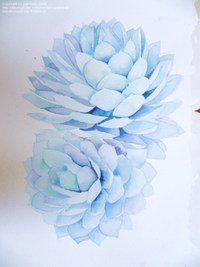
Once the basic shape is on paper in watercolor, the fun part begins. Up to now it has just been painting like a child colors a coloring book. The hard part- the shapes- are taken care of thanks to tracing the image. Now it is time to ‘sculpt' the painting. I am sure that is not the right term, but that is sort of how it feels as I go back over and over and over again, adding a bit more paint each time, layer after layer, slowly getting the colors darker and richer, and creating the shading and details that make the painting interesting. It reminds me of slowly sculpting a piece of wood or marble, only this is an additive process, not one where one takes a bit away.
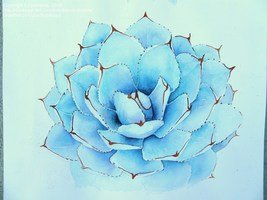
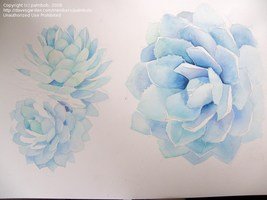
After the leaves are painted to my satisfaction, then I add some details, then more dark, and finally, just to make it look finished, some background color
http://davesgarden.com/tools/blog/viewimage.php?did=41017
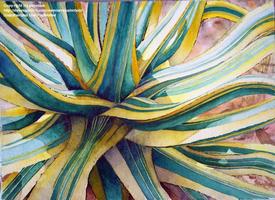
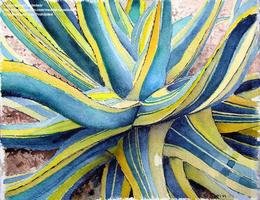
There is no ‘teaching' this part, but if one just goes slowly and uses a small brush, one will find soon enough that it is not that difficult. Once I have a leaf shape painted a certain color (color accuracy is not too important to me- see the bizarrely colored agave painting below) I try to get the ‘tone' right. Tone is far more important than color for making a painting work. In fact, one could probably pick any color one likes as long as the tone is right. Tone is basically the relative amount of light or dark one is left with if the painting is reduced to just the darks and lights (or black and white). I can see tones best if I squint at the photo or painting to the point I can't see the color anymore (my way of seeing a photo/painting in just the darks and lights). Then one can see how dark or light the area is one's working on and compare it to the original photograph. Watercolors are naturally fairly transparent. But they don't have to be. As one adds more and more layers they become less and less transparent, the tones/shades get richer and more interesting. The reason I use a small brush is to force me to add these layers slowly. One thing watercolors are not, compared to other media I have used (paints, pencil and pastel), is overly forgiving. Too much and too dark a paint is hard to do much about. One can take up some watercolor paint from a painting with water and a sponge but this can damage the paper, make a huge smudge and smear nearby lines and shapes. There is really no way to cover up a bad mistake or correct way too much paint like one can with pastel or oil/acrylic paint. So, being a chicken watercolorer, I proceed tentatively and build up to the darkest shades slowly. If one is an oil painter or using pastels, one probably is used to starting with the darkest shades first and adding the light ones later as highlights. This won't work with watercolors- just the opposite. The highlights have to be done first and left alone after that, slowly making the rest darker and darker. It took me a while to get used to this after years of the opposite process doing pastels. Basically work on the lightest areas first, then leave them alone, concentrating on the darkest areas last.
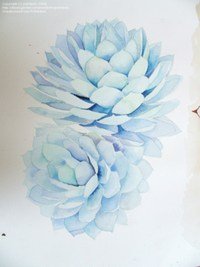
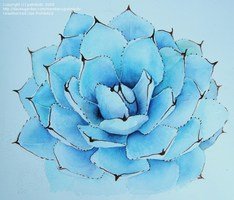
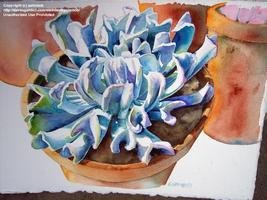
after all the underpainting is done, darks are slowly added until the painting sort of looks like the photo when one squints at each
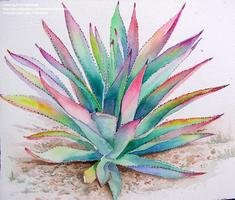
These are two Agave paintings done with less than realistic colors, yet they can still be recognized as Agaves
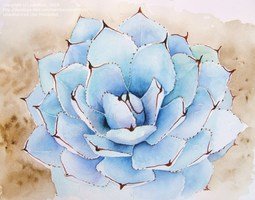
The final touches are added with dark paint (indigo or some dark brown works best... I never use black as black seems so black it looks weird- few plants in nature have truly black color or shadows). These final dark additions should be minimal so they don't overpower the painting, and they will also stand out better. But I am hardly one to tell you what to do- for all I know huge areas of dark could look really great- just not in my paintings. Details like these are totally up the artist. I am just explaining how I do them.
 And again, some abstract background color is added to make the project look completed
http://davesgarden.com/tools/blog/viewimage.php?did=42001
Like I said, this is only how I do things... there are as many ways to paint as there are people. Experiment, don't worry about the end product at first (usually my best paintings are the ones I worried the least about and had the most fun with) and don't get too frustrated. Good luck and have fun!

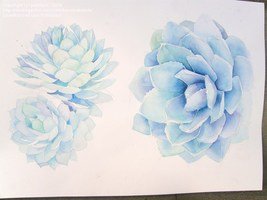
These are some other Agaves I have painted... the two variegated Agaves were simple enough to be painted free hand while the Agave margarita in the middle was traced
http://davesgarden.com/tools/blog/viewimage.php?did=1504 http://davesgarden.com/tools/blog/viewimage.php?did=1501 http://davesgarden.com/tools/blog/viewimage.php?did=1503
A traced Agave ocahui painting, and free-hand Aloe petricola painting, and another traced painting of an Echeveria runyonii 'Topsy Turvy'
http://davesgarden.com/tools/blog/viewimage.php?did=42002 http://davesgarden.com/tools/blog/viewimage.php?did=1506 http://davesgarden.com/tools/blog/viewimage.php?did=1705
Copyright © www.100flowers.win Botanic Garden All Rights Reserved