Buying and Planting Hyacinths
With little effort or gardening skill, you can have a pot of these perfumed lovelies in every room. The stocky hyacinth is the only bulb other than the amaryllis that looks as good planted singly as it does in a group.
continue reading below
Tips for Choosing Hyacinths
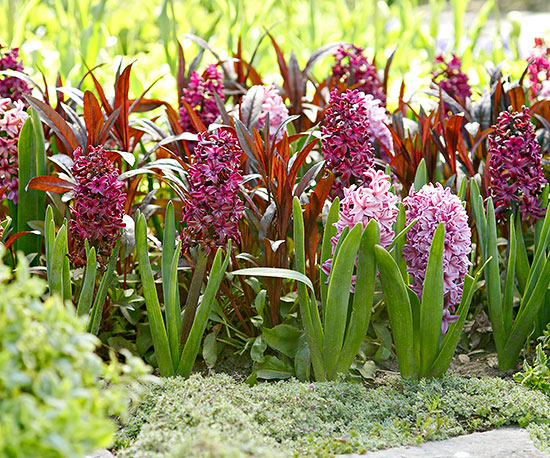
- The most popular hyacinth for forcing is Hyacinthus orientalis, commonly known as a Dutch hyacinth. Growing 8 to 12 inches tall, the spiky hyacinth is available in a wide variety of colors.
- A good white hyacinth is 'Carnegie.'
- Try any of these blue-hued hyacinths for forcing: 'Delft Blue,' 'Blue Jacket,' and 'Ostara.'
- Red varieties include the double-flowered 'Hollyhock' and 'Jan Bos.'
- The lovely pink variety 'Anna-Marie' and the orange 'Gypsy Queen' are brilliant indoor bloomers.
Browse top hyacinth varieties for your garden.
Forcing Hyacinths
Hyacinths bloom 14 to 18 weeks after planting. They are easy to force, because they bloom in a variety of media -- in pebbles, soil, or water. Hyacinths can also be forced in hourglass-shape vases that allow the roots to be exposed to water while the bulb is kept dry and protected from rotting. To force hyacinths in a hyacinth glass (any narrow-necked jar will do fine as long as the bulb is not immersed in water), place a bulb, roots down, on top of a water-filled container so the bottom of the bulb is in water. Make sure the base of the bulb just barely touches the surface of the water. Place in a dark, cool location until the bottom of the glass fills with roots. Then, move into the warmth and sunlight to activate the bloom process. Some garden centers sell prechilled hyacinth bulbs, which are quicker to bloom.
- Select a container or bulb pan about 6 inches deep, preferably with a hole for drainage in the bottom. Dress up garden pots by inserting them later in a cachepot (a decorative container), or by wrapping pots in foil (pierce at the drain hole).
- Choose the plumpest, best-quality bulbs you can find, either from a local nursery or garden center, or by mail order from a reliable source.
- Fill the pot about three-fourths full with free-draining container potting soil. Some gardeners mix about half orchid potting mix to improve drainage; others find perlite works well. Don't use garden dirt, which is too dense. Tamp the soil lightly and set the bulbs nose up and almost touching each other, nestling them gently. Cover with more soil, leaving the bulb tips showing.
- Water from the top with a fine spray until water runs out the bottom, or set in a water bath for an hour and allow the soil to take up moisture. Drain.
- Chill the pots in a dark, cool (35–45°F) spot in a basement, cool garage, or refrigerator for about 10 weeks. Unless the soil surface remains moist, water lightly. Check the pots from time to time to see if they are sprouting and/or white roots are starting to grow out the bottom.
- Move the pots to a cool, out-of-the-sun spot in the house for a couple of weeks to acclimate, before displaying them in brighter light. Once buds are showing, flowers will open in a week or so. The cooler you keep them, the longer the flowers will last.
- When the flowers are past, continue to water the pots but remove them to a cooler out-of-the-way spot. The bulbs will not force reliably another year but can be planted in the garden as soon as spring comes.

