

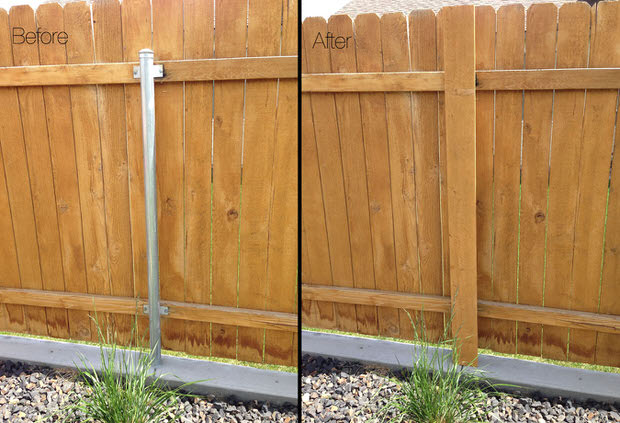
Many areas of the country use metal fence posts in building back yard fences to provide a strong, long lasting barrier that stands up to wind and sun rot. The only problem with that solution is that they are just, plain, ugly. Here at TGG, we have a great yard and garden, but I couldn’t stand to look out of the window each day at those ugly metal fence posts! So if you have this problem, here is the DIY cure, step by step! (Did I forget to mention? It’s easy!)
Supplies

Step One:
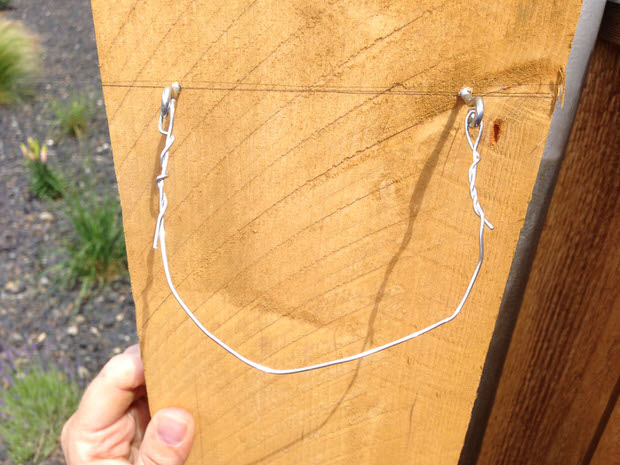
We are going to be creating a wire loop on the back of the wooden board, to hang over the top of the metal fence post, which will in turn cover the metal post with the wood. I suggest you read through the whole post, and check out the photos, and it will all become clear on how simple it is!
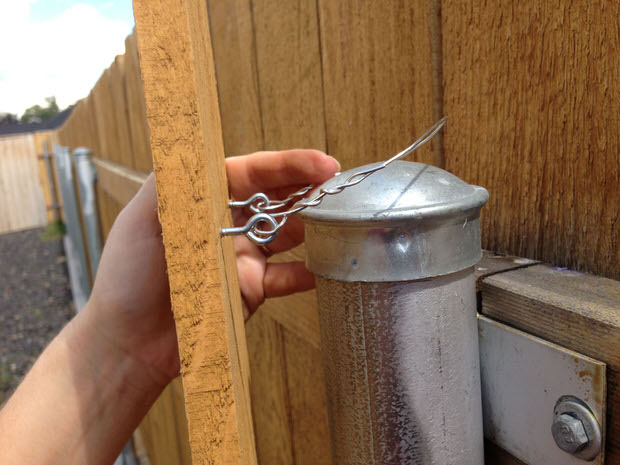
Here is an example of what the wire loop will look like when finished, to help you wrap your head around what we’re up to.
Hold your wood board in front of your metal post, and determine how close to the ground you would like it to hang. Make sure it covers the top of the ugly metal fence post. The loop will hang off of the top bracket or fence line. Measure 2 ½ inches below the spot where the wire will hang off of. Might help to have an extra hand to hold the board in place as you mark the measurements.

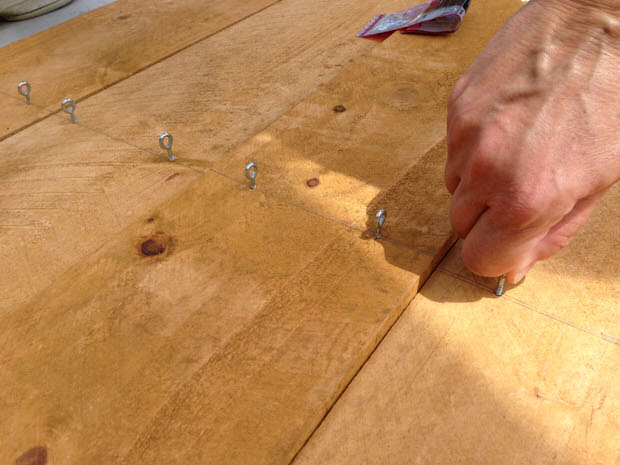
Step Two:
Now lay out all you boards, and assembly line style, mark all your boards at that same measurement, and one inch in on both sides of the board. This is where you will insert the screw eyes. Make sure you don’t screw them so far that you poke thru the front (exposed) side of the fence board.
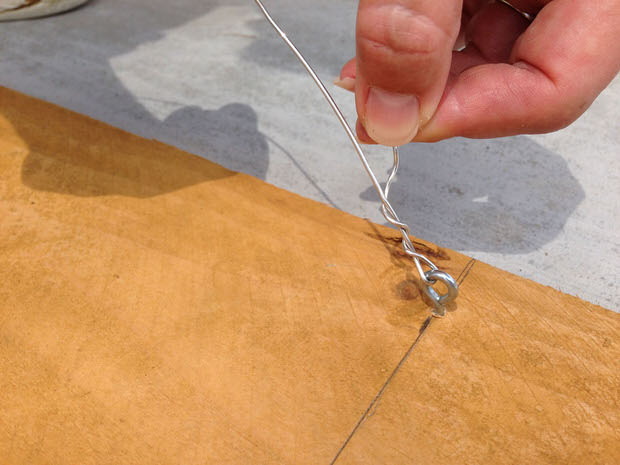
Step Three:
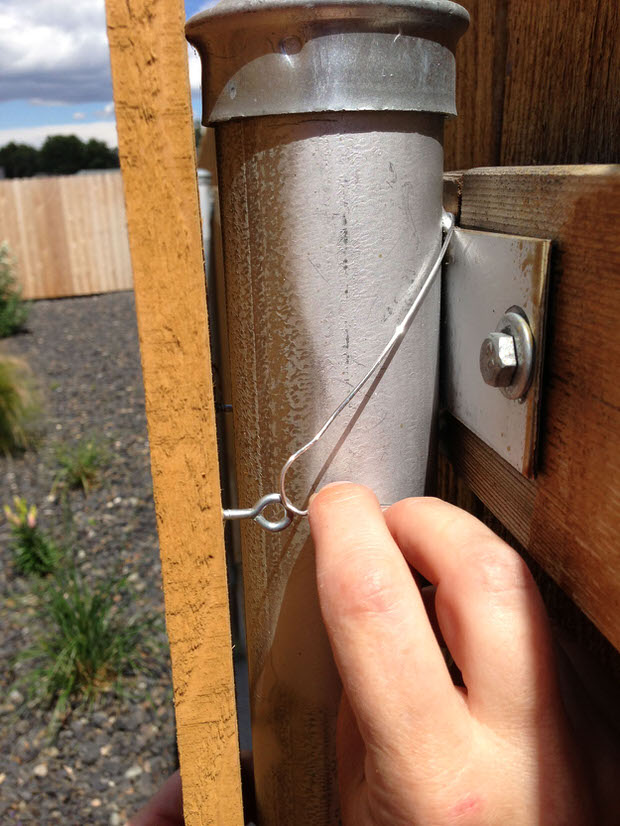
Cut a 15 inch long piece of wire for each board. We used the wire cutter that came on the package of our wire, but you should be able to use scissors with this gauge pretty easily. Slip through one screw hook, bend off about 1 ½ inches and wrap it tight.
Step Four:
Hold the board in place, and wrap the wire around the top of the metal post and through the other screw eye. Bend to mark, then remove the board from the post. (This is to make it easier to wind the wire). Insert the free end of the wire back through the screw eye to the bend point you marked, then twist the wire closed. You now have your wire loop.
Step Five:
Hang the wire loop over the top of the fence post. You can unwind the wire from one screw eye and tighten it or loosen it if you need to adjust.
Repeat for all fence posts! If your wood boards jut too far above the top of the fence and it bothers you, feel free to trim the boards down. Just be sure to trim them all down to the same height. This likely won’t be a problem for most of us, as fence boards are pretty standard in most parts of the country.
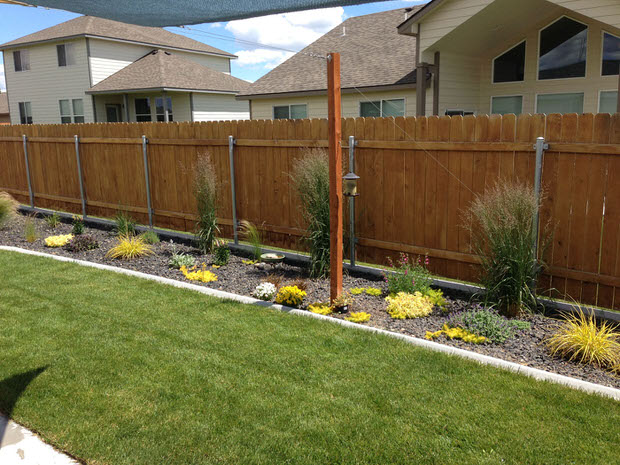
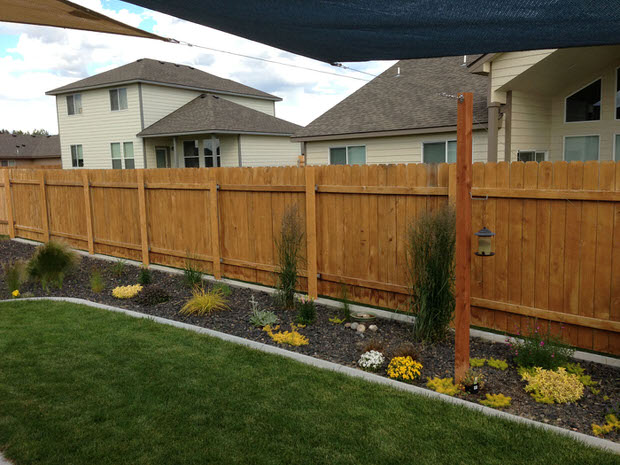
Look at the difference!
If you live in a windy or stormy area, you can repeat the process on the lower end of the board as well and secure the bottom in the same way.
Great cure for those ugly metal fence posts, and it’s and easy and inexpensive DIY garden project. Our total?
Grand total for our entire fence line, $24.00!
What kind of camouflage projects are you facing in your yard or garden? Comment and let us know, maybe it will be in our upcoming posts!
Copyright © www.100flowers.win Botanic Garden All Rights Reserved