

Visit any nursery, and most of them have special sections now just for lovers of water gardens. It is fast becoming a very popular garden design element in many back yards! But you don’t need to build a pond, or to install an expensive fountain in order to enjoy water, and the water plants. Here is an easy step by step tutorial on making a container water garden that is simple, inexpensive and a easy DIY garden project.
Supplies:
Container that holds water
Water Plants
Rocks or Bricks
Oh yea, water!
Choosing a Container
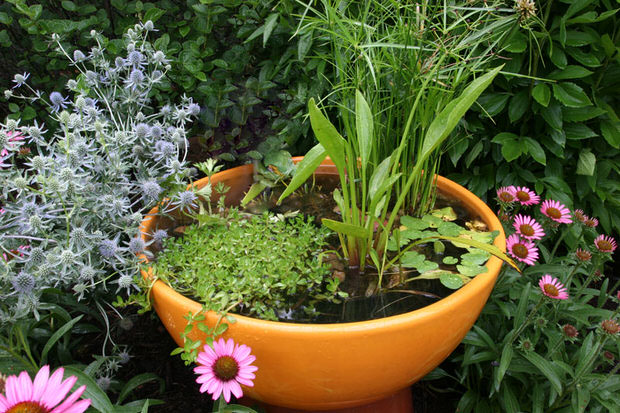
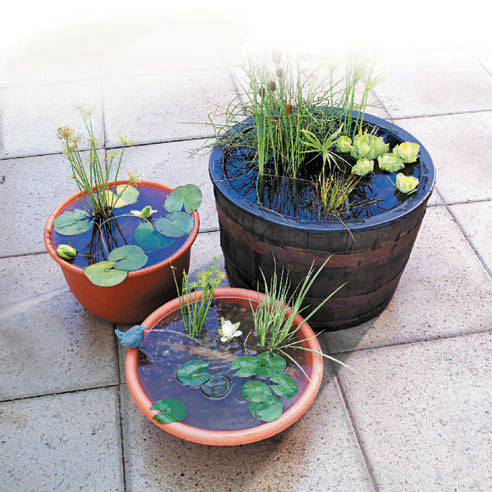
When choosing a container for your water garden, keep in mind that technically, anything that holds water will work. If you choose a porous container such as Terracotta or wood, make sure you give it at least two coats of a water proof sealer. Otherwise, water will evaporate from the container too quickly. Choose a container large enough to comfortably hold at least three or four water plants. A 24 inch wide container will be a perfect start to your foray into water gardens. And once you get comfortable with a small garden, you may want to move onto to bigger things!
Choosing Plants
When choosing water plants for your container, keep in mind to choose based on the scale of your container. Huge plants in a tiny container will just look like a wet jungle. As too many tiny plants in a large container will just look like clutter.
Choose your types of plants much the same way you would design a regular garden bed. Use different shapes and textures of plants to add contrast, and to set each plant apart. I like using at least three. First a tall spiky plant, such as one of the many rushes available. Then a broader leaved plant, and finally, a floating option such as water hyacinths, or even a single water lily.
Arranging Your Water Garden
Arranging the plants in your water garden is easier than planting a garden bed. If you don’t like the arrangement, you just pick them up and move them, because you never remove the water plants from the nursery pot.
Fill your container half full with water, then start setting in plants. Use rocks or bricks to raise up the height of any plant that needs to be more of a focal point. Most water plants do just fine with the tops of their pots 6-12 inches under water, so don’t worry about having to have them all at the same water level.
Place your tallest plant in the back, or in the center, if the garden will be viewed from all angles.
Then add your smaller plants until you like the composition. Fill the container the rest of the way with water, then add your floating plants last.
Place your water garden where it gets at least 6 hours of sun every day. Make sure the water level is topped up on a regular basis… If the roots are exposed for any length of time, you will likely damage, if not lose the plant. I like to overflow the top of the container with water every couple of days, just to make sure no mosquitoes are using your new garden as a baby factory. That’s it!
Some water plants are winter hardy, but you will likely have to wrap them and bring them into a garage or basement for the winter if you want to try to use them again next year.
Enjoy making your own container water garden! Water is a restful element to add to any garden, and they can potentially attract birds, frogs and butterflies as well. Not to mention, water plants themselves are beautiful, and can be fragrant in addition to being low maintenance. Have fun with your water garden! Have any questions? Comment and let us know!
Copyright © www.100flowers.win Botanic Garden All Rights Reserved