


Trees are landscape powerhouses—providing beauty, shade, cleaner air, lower energy bills, wildlife habitat, and even higher property values. But planting a tree is a long-term commitment. Before heading to the nursery, understand the best timing and techniques for success.

Noelle Johnson Landscape Consulting
Beyond curb appeal, trees offer practical benefits:
Aesthetically, trees soften architecture, screen views, frame vistas, and add seasonal color, texture, and structure. They can boost property values up to 20% (Arbor Day Foundation).

Pearson Landscape Services: A large tree shades this seating area.

Noelle Johnson Landscape Consulting
Match the tree to your goals:

Simmonds & Associates, Inc.: Olive tree (Olea europaea) in a Mediterranean courtyard.
Plant during dormancy: fall after leaf drop, or late winter/early spring before bud swell. This gives roots a head start before top growth demands. Trees can be planted year-round with extra care (especially watering in summer).
Container types vary—wooden boxes, plastic pots, burlap, wire baskets, or bare-root. Only bare-root trees must be planted late fall through early spring.

Noelle Johnson Landscape Consulting: Possumhaw (Ilex decidua) fall color.

Noelle Johnson Landscape Consulting

Noelle Johnson Landscape Consulting: Palo brea trees (Parkinsonia praecox) in wooden boxes.

Noelle Johnson Landscape Consulting: Purple-leaf plums (Prunus cerasifera) in wire baskets.

Noelle Johnson Landscape Consulting: Bare-root fruit trees in compost-filled boxes.
Research shows hole size significantly affects establishment speed. Dig a saucer-shaped hole three times wider than the root ball and the same depth (or slightly shallower). Most roots grow outward in the top foot of soil where oxygen is abundant. Deep planting starves roots of oxygen; trees also settle slightly after planting.
If using an auger, scrape the hole edges to break up "glazing" that impedes water and root penetration.

Noelle Johnson Landscape Consulting

Noelle Johnson Landscape Consulting: Too narrow and deep—slow growth results.
Remove excess soil atop the root ball to expose the root flare (where major roots meet trunk). Trees often arrive with 2–3 inches of extra soil/mulch covering this critical zone.
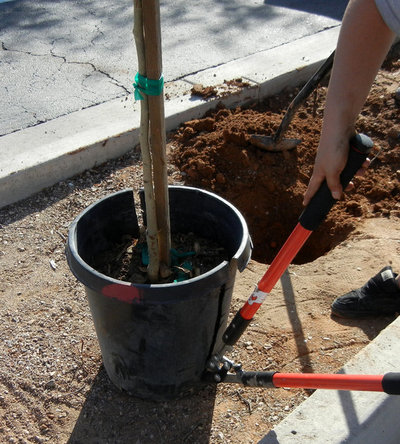
Center the tree. The root flare must sit above grade. Inspect roots—if circling, shave the outer inch of soil/roots with a pruning saw to redirect growth outward.
Noelle Johnson Landscape Consulting

Noelle Johnson Landscape Consulting
Use only the soil you excavated—no amendments. Studies show amended soil discourages roots from venturing outward, stunting growth and causing water retention and settling issues. Break up large clods, firm soil around roots, and build a berm to create a watering basin. Water thoroughly to settle soil and eliminate air pockets.

Peter D'Aprix Photography: Palo verde (Parkinsonia sp.) canopy.
New trees need consistent moisture for the first year—especially the first few weeks. Avoid overwatering (yellowing leaves). Consult your local extension or nursery for a region-specific schedule.
Apply 2–4 inches of mulch (shredded bark, compost, wood chips) over the planting area, keeping it 6 inches from the trunk to prevent disease. Mulch moderates soil temperature, suppresses weeds, retains moisture, and improves soil as it decomposes.
No fertilizer for the first year—it burns young roots and forces top growth before roots can support it.
California pepper trees (Schinus molle) form a tunnel.
Timber Growth Rates: Factors Affecting Tree Maturity for Harvest
Pruning Schefflera: Aesthetics, Not Health
Why We Prune Trees: Aesthetics, Health, and Storm Resistance
Creating a Jade Plant Bonsai: Indoor Cultivation Masterclass
Planting and Caring for a Cedar Tree: 9‑Step Establishment Guide
Plant a Tree Today: An Urgent Call for Greener Homes and a Healthier Planet
Tree Roots: The Hidden Threat to Pipes, Foundations, and Pavement
Growing Apple Trees from Seed: Grafting, Rootstock, and Overwintering Seedlings
Planting Colorado Blue Spruce in Northern Illinois: Timing and Techniques
Best Time to Plant Oak Trees in Austin, Texas
Jasmine Vine and Tree: Bloom Cycle and Pest Control
How to Plant a Mulberry Tree: Step-by-Step Guide
Plant Supports: Choosing and Using Stakes, Cages, Trellises & More
Copyright © www.100flowers.win Botanic Garden All Rights Reserved