

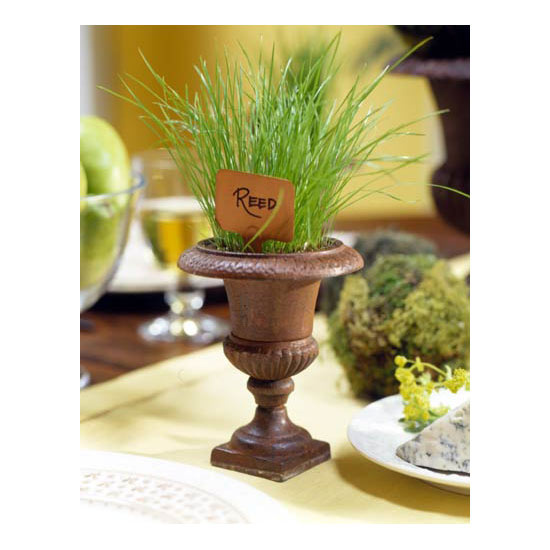
Make a bunch of these place markers in an afternoon to give your dining table a fresh face fast.
continue reading below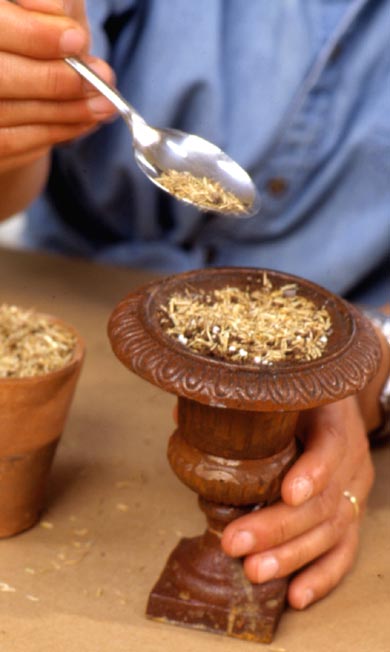
1. Place potting soil inside each urn (fill to about 1/2 inch from the top to give the seeds enough growing room). If you're planning a dinner party or other important event, plant the seeds about two weeks ahead to ensure enough growing time.
2. Sprinkle seeds on soil until they completely cover the top of the dirt. Press the seeds gently into the soil, or cover with a light layer of soil. Water well.
3. Place urns in an east- or west-facing window (or any window with medium-bright light) or under an indoor grow light. Use a spray bottle to water the urns every other day so soil stays moist. Seeds will take about seven to 10 days to germinate. (Kids get a kick out of keeping track of the seeds' progress.) Keep the sprouts away from the family cat, who may mistake the slender stalks for catnip.
4. To make the place cards, write each person's name on a copper plant marker using a permanent marking pen. Gently push each marker into a grass-filled urn, taking care not to smudge the name. (Nail polish remover will erase the names if you make a mistake or want to reuse the place markers for another event.)
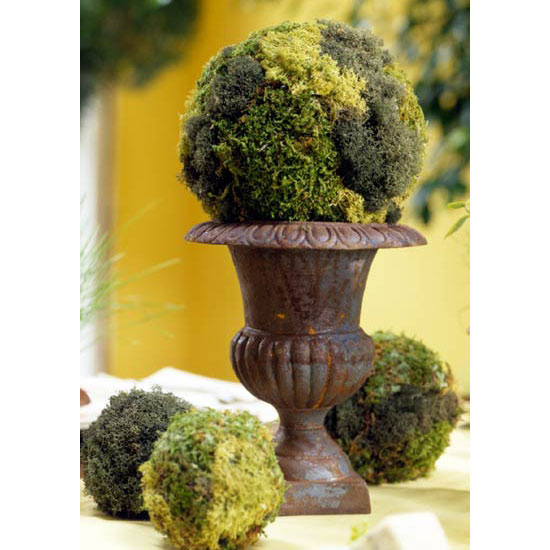
Grouped together on a side or dining table, moss-covered spheres make an especially sophisticated statement. Varying the sizes adds visual variety.
 Step 1
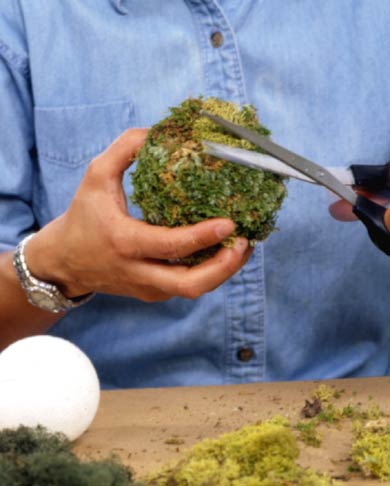
1. Use a hot-glue gun to apply glue to back of small piece of light reindeer moss. The size of the piece depends on the sphere size; you want the result to be a patchwork of different-tone mosses. Because reindeer moss is pricier than sheet moss, use it sparingly. Press moss firmly onto sphere, using a cotton cloth to protect your hands and arms from burns. Keep a bowl of ice water handy in case of any mishaps.
 Step 3
2. Repeat Step 1 using a small piece of dark reindeer moss, then repeat the process with a larger piece of sheet moss.
3. Continue to apply alternating types of reindeer and sheet moss until the sphere is covered with an even patchwork. Trim loose pieces with scissors.
4. Repeat with other spheres; place an appropriate-size sphere gently atop urn. Keep them out of direct sunlight and spritz them occasionally, using a spray bottle that contains water and six drops of green food coloring.

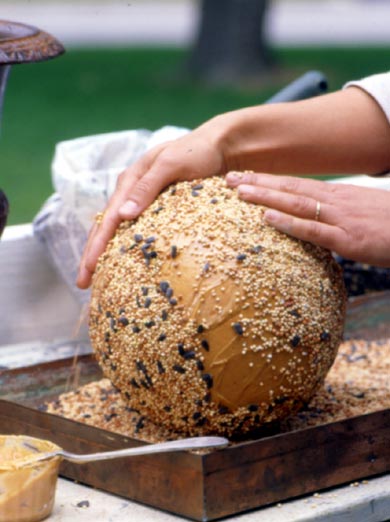
The plastic-foam spheres pose no danger to birds. When you notice the sphere showing through the seed, it's time to put another layer of peanut butter and seed on it.
 Step 1
1. Fill one of the pans with enough seed to evenly cover the bottom. Set aside.
2. Place a plastic-foam sphere on a table covered with waxed paper (or another protected surface). Using a butter knife or frosting spatula, smoothly spread peanut butter onto the sphere until it's completely covered. To make the job easier, insert a chopstick or tree branch 1/2 inch into the sphere and use it as a handle to turn the sphere as you spread.
 Step 3
3. When the sphere is covered in peanut butter, roll it in the seed-filled pan. Use your hands to press birdseed firmly into place. Continue rolling, as needed, until entire surface is covered.
4. Repeat for other spheres. Place completed spheres on another tray lined with waxed paper. Place in refrigerator for six to eight hours or until set.
5. Remove spheres from refrigerator; set larger ones on urns. Place the urns or the small spheres on an outdoor tabletop or in your garden. Beware: Birds love these creations so much that you'll need to refresh them with more peanut butter and seeds often.
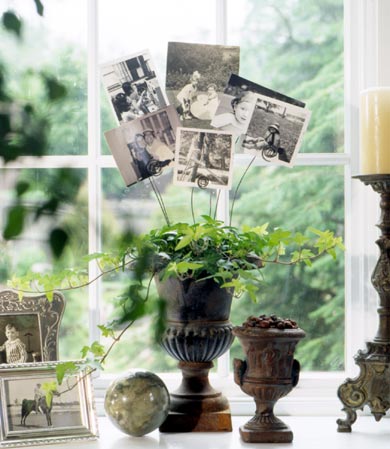
Personalize your collage to addsparkle to a special event.
Consider using old high school portraits, black-and-white family prints, or candid snapshots of parties to give your sofa table, mantel, or dinner table a "photo finish."
 Step 2
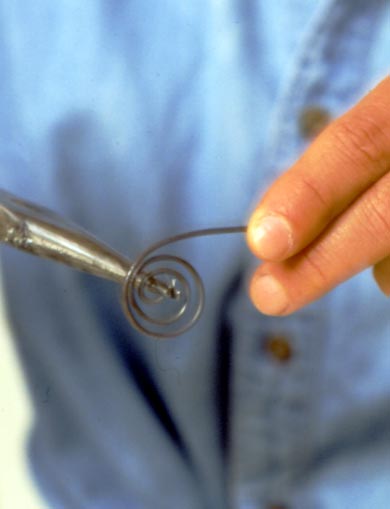
1. Use a wire cutter to cut six pieces of wire, varying the lengths from 12 to 16 inches.
2. Grip the end of a wire with the wire cutters and curl the wire around the wire cutter three times to create a curlicue to hold a photo.
3. Using pliers, bend the straight end of the wire to double it for additional stability (otherwise the wire will fall over when inserted into the soil).
4. Repeat steps 2 and 3 for all wires. Place the pot of ivy into the urn. Insert each wire into the soil, arranging the wires so the heights vary and wire pieces are fanned out. Insert a photo into each curlicue, and press wire together to firmly hold photo in place.
Copyright © www.100flowers.win Botanic Garden All Rights Reserved