

 Susan Valladao; Carved by Mike Valladao
When it comes to pumpkin carving, the idea is to have fun. We’ve got tips on carving the best pumpkin as well as how to pick a good pumpkin for carving!
With these tips from the Almanac and a little imagination, the pumpkin-carving possibilities are endless!
Look for one that is a little misshapen. Inspect it for soft spots (especially the end opposite the stem). Reject a pumpkin that has soft spots; they will cause it to deteriorate quickly. Remember, your pumpkin doesn’t have to sit on its base; in fact, that’s often its weakest spot.
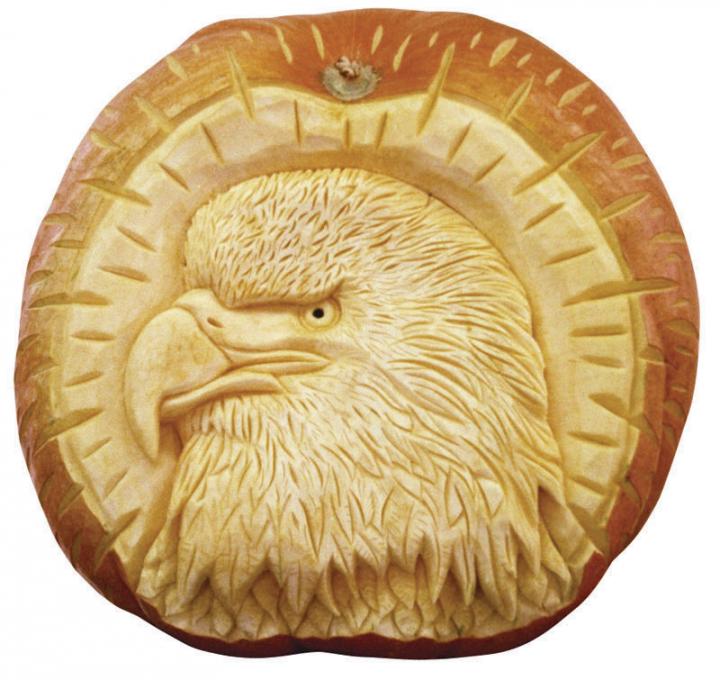
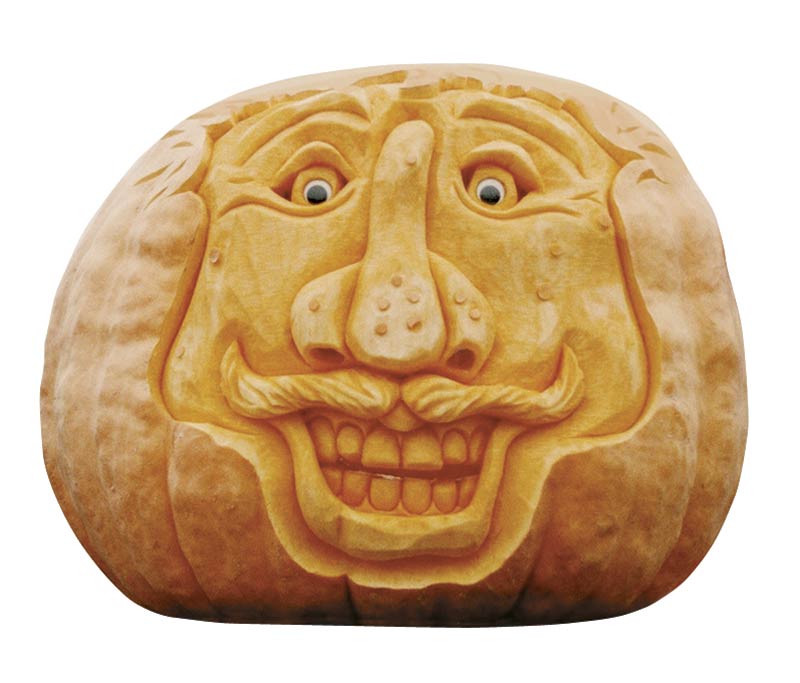
Let the pumpkin guide the shape of the face: An elongated pumpkin should have an elongated face. A fat and happy pumpkin should have a fat and happy face.
Carved by “Farmer Mike” Valladao; Photo by Susan Valladao.
There are two reasons for hollowing: (1) If the inside is going to be exposed (through the mouth, etc.), it looks better if it is hollowed neatly. (2) If you plan to light the pumpkin from the inside, it must be hollow. You can hollow it out from a hole in the back instead of the top, so that the look of the face isn’t affected. If you’re illuminating with a candle, you need to hollow from the top to allow the heat and smoke to escape.
Use a water-based marker to outline the face that you want to carve. First, draw a line down the center to establish symmetry. Then sketch the nose, the approximate center of the face. Once you’re satisfied with the details, trace over the lines using a permanent marker.
For carving, basic kitchen implements, such as a paring knife or a steak knife with a standard—not serrated—blade that’s not going to bend, work well. You can also use a standard jigsaw blade. Otherwise, improvise: Use a melon-ball cutter to make circles, for example.
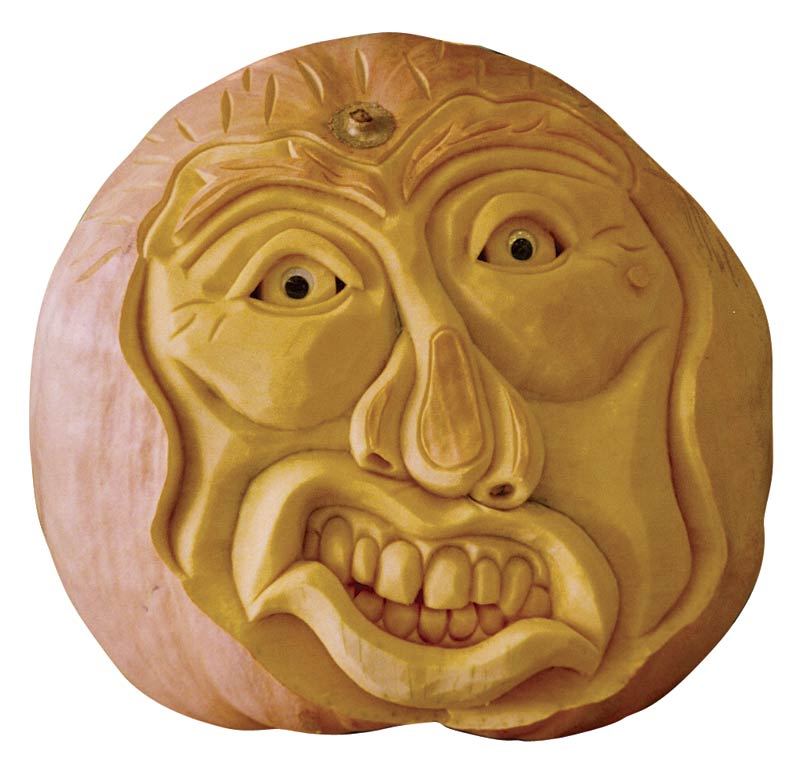
Carved by “Farmer Mike” Valladao; Photo by Susan Valladao.
To achieve a three-dimensional appearance, carve the entire pumpkin. Exaggerate the features. (If you aren’t sure what teeth really look like or how the gum line works, smile and look in the mirror.) If the pumpkin is frowning, carve wrinkles under the mouth. To add character, carve a lot of “crow’s feet” lines around the eyes.
Consider using the stem as the nose and inserts such as radishes for the eyes, or cut eyeballs from the back of the pumpkin and hold them in place with toothpicks.
Use two hands at all times: one to control the blade and the other to control the pressure with which you cut (and thus the depth).
Take care not to jab the blade into the pumpkin; you don’t want to cut all the way through the rind—except to determine its depth. The thickness of the rind will vary, not only from pumpkin to pumpkin, but also within one pumpkin. To determine your pumpkin’s average depth, cut a core sample where you want an eye or a nostril to be. Keep that piece nearby as a reminder of how deep you can safely cut.
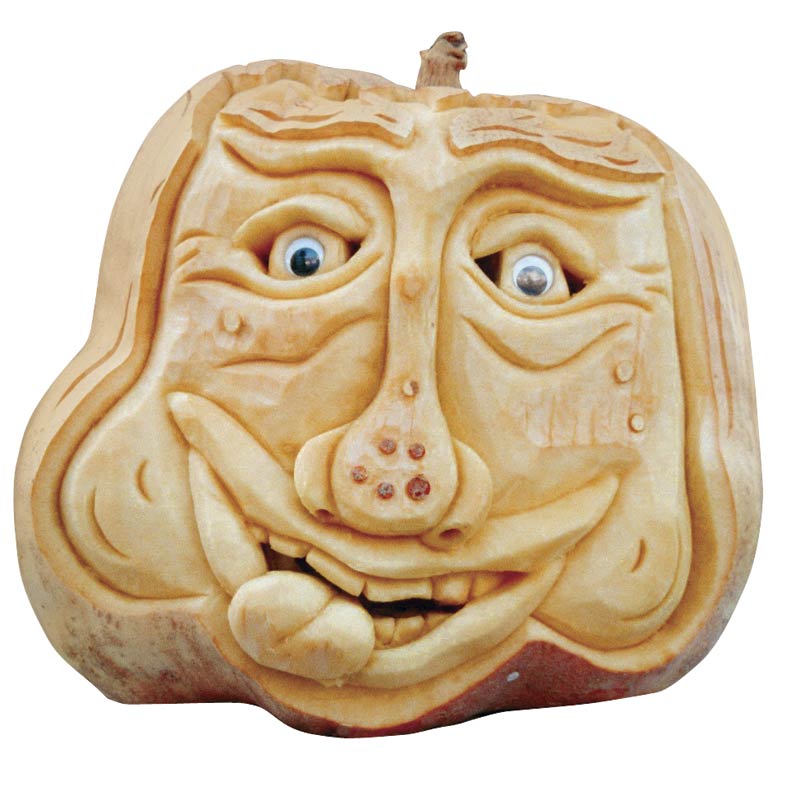
Carved by “Farmer Mike” Valladao; Photo by Susan Valladao.
Pumpkins, which are actually a fruit, not a vegetable, are 90 percent water, so after carving they usually last only three days to a week. A jack-o’-lantern with a surface carving will last longer than one that is cut all the way through. Putting a candle or other light inside will shorten its life span, as the heat that results can “cook” the pumpkin and reduce its longevity to a matter of hours.
For a bright, shiny finish, spray Armor All on the pumpkin and rub it in. Paint will not preserve a pumpkin. However, if you decide to paint your pumpkin for decoration, use a water-based latex paint and wait at least an hour after carving so that the cuts you have made in the pumpkin have a chance to dry.
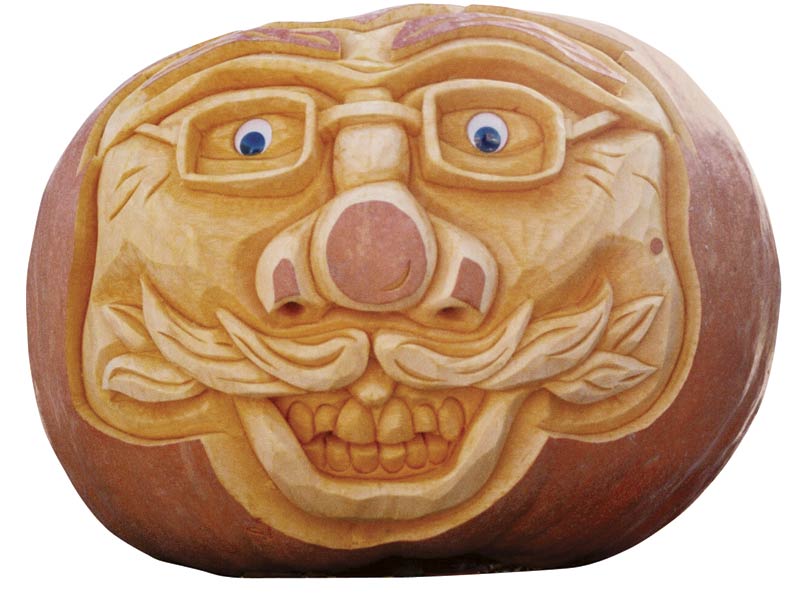
Carved by “Farmer Mike” Valladao; Photo by Susan Valladao.
Hope you enjoyed carving a pumpkin. How did it go? Please share below.
Find more seasonal ideas on our Halloween page!
Copyright © www.100flowers.win Botanic Garden All Rights Reserved