

If you properly prepare your garden soil before you start to plant, you'll save yourself endless hours and considerable expense in trying to make up for deficiencies later.
Of course, there are plants for just about every soil condition, and you can simply choose plants to fit the ground in which you are working. However, you may find that the range of available plants suited to your existing soil conditions is exceedingly limited. There's a lot you can do to improve the overall quality of your soil, and starting with good soil will greatly broaden you plant choices.
To find out the type of soil in your garden, and determine whether you need to improve it before planting, conduct four basic soil tests.
continue reading belowStart by seeing how well the soil drains after a heavy rainstorm (or after you have doused it with water from a hose or bucket). If the water seeps down at a steady rate, your soil has good drainage, and it may be sandy. Sandy soil provides lots of room for roots to move about, but it tends to contain few nutrients for plants because in the porous structure they wash away with the drainage water.
If the soil holds puddles for a long time, it's probably heavy and contains clay. Clay soil is loaded with nutrients, but its dense structure can be so unyielding that roots barely penetrate it. If your soil is either very sandy or heavy with clay, improvements are in order to make the soil hospitable to garden plants.
For the second test, turn over some soil with a spade or trowel and see if you can find earthworms in it. These wonderful creatures are a necessity in a low-maintenance garden. Their digestive enzymes chemically alter soil components in a plant's favor, and their burrowing activities significantly improve soil drainage and aeration. Consider yourself lucky if your soil already contains lots of earthworms; if not, you'll want to improve your soil to attract them.
Next test aspects of your soil's fertility. You can buy a soil testing kit from a local garden center or hardware store, but be sure to buy a good one. The very cheap ones are less informative and less reliable. An alternative is to have your soil tested by your local county cooperative extension. You can also have the soil tested by a private laboratory.
Home test kits allow you to test your soil for two factors: pH and key nutrients. The pH scale describes the degree of acidity or alkalinity of the soil. An extremely high (alkaline) or low (acid) pH affects the ability of a plant to absorb essential mineral nutrients from the soil.
The majority of plants grown in North America flourish in soils with a pH ranging between 6 and 7, which is mildly acid to neutral. You can make modest adjustments in pH, but not major alterations. If you live in the Southwest and your soil is strongly alkaline, you won't be able to lower the pH enough to grow azaleas, which thrive in acidic soil. But you can bring your highly alkaline soil closer to neutral. To raise the pH of acid soil, add ground limestone from a local garden center or hardware store, or wood ashes from a fireplace or stove (this is called "sweetening the soil"). To lower the pH of alkaline soil, use powdered sulfur, acid peat moss, or an acid fertilizer. Or mulch your garden with acid-laden pine needles or oak leaves, which will lower the pH as they decompose.
The three major nutrients your plants need are nitrogen, phosphorus, and potassium. Nitrogen is important for leaf and stem growth, phosphorus plays a key role in root development and seed formation (and is thus important for flowering), and potassium enhances plant vigor and resistance to disease.
Adding compost can improve clay or sandy soil, fertility, and add nutrients.
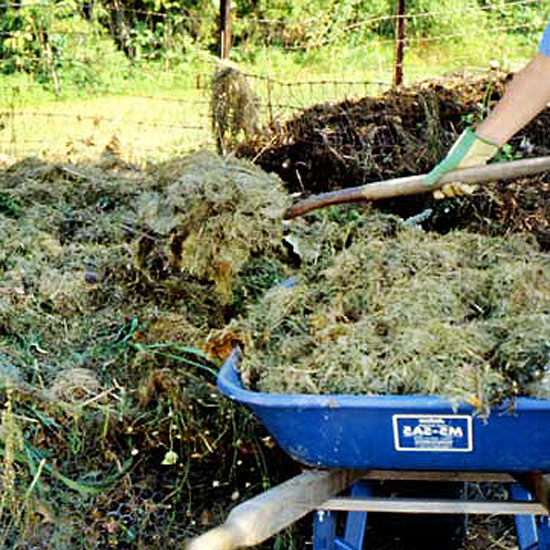 Step 1. Alternate layers of
"wet" and "dry" materials.
Step 1. Alternate layers of
"wet" and "dry" materials.
1. Alternate layers. Build a compost pile from alternating layers of "wet" material (green plant matter, fruit and vegetable peels, coffee grounds) and dry plant debris.
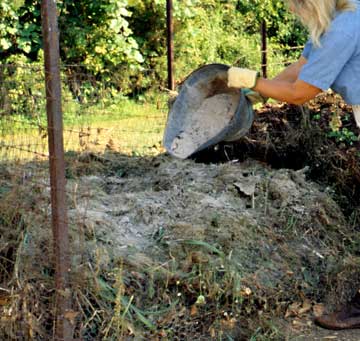 Step 2. Determine the pH you'll
need, depending on how you intend
to use the compost.
Step 2. Determine the pH you'll
need, depending on how you intend
to use the compost.
2. Adjust for pH. Sprinkle wet layers with wood ashes (for potassium and to lower pH) or lime (to raise pH) and livestock manure, or blood meal (a slaughterhouse by-product), or garden soil.
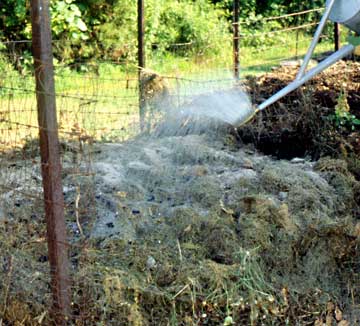 Step 3. Moisten the compost pile
regularly.
Step 3. Moisten the compost pile
regularly.
3. Spray compost with water. Spray the compost pile with water until it is as moist as a squeezed-out sponge. Moisten the pile whenever it gets dried out.
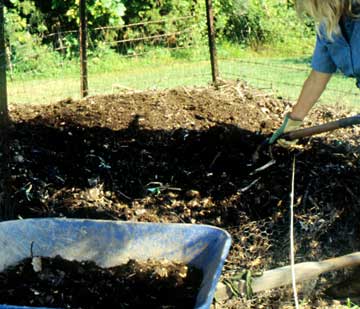 Step 4. Turn compost once a week.
4. Turn the pile. Turn the compost once a week, moving material from the outer edges of the pile into the center. The compost is ready to use once it is dark brown and crumbly.
Copyright © www.100flowers.win Botanic Garden All Rights Reserved