



Experienced gardeners rely on heavy-duty molded plastic edging to create crisp, lasting bed boundaries. Sold in rolls of 4- to 6-inch-tall flat plastic at garden centers and mail-order suppliers, this edging installs easily and saves countless hours of grass and weed removal.
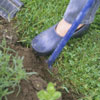
Step 1: Cut the Bed Edge First, trim the bed's edge cleanly using a spade or specialized bed-edging tool (designed with a sharp, curved blade). Remove enough soil to accommodate the edging—about 3 inches deep.
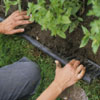
Step 2: Install the Edging Cut the edging to fit your bed dimensions, working in manageable sections. Invest in high-quality edging; cheaper versions deteriorate within a few years. Press the edging into place, backfill soil on both sides, and allow the top to extend 1 inch above soil level to prevent water and soil runoff.
Once your beds are established, learn how to use cover crops to improve soil health.
Topsoil vs. Garden Soil: Which for Flower Beds?
Don't Soil Your Chances: Understand Your Garden Soil
9 Reasons to Garden in Raised Beds
Garden Edging Guide: Materials, Styles, and Smart Choices for Defining Spaces
Know Your Soil Type: Sand, Clay, or Loam for Better Watering
Growing Your Own Romaine for the Freshest Caesar Salad
Your September Garden Checklist: Planting, Prep, and Maintenance
Using Sugar in Flower Beds: Safe for Plants, Great for Soil
Growing Better Tomatoes: Soil Prep, pH, and Raised Beds
Soil Mixes for Raised Beds on Concrete: Do You Need Ground Soil?
Planting Your Garden: From Bare Ground to Thriving Beds
Your Cheshire Garden Store Guide: Building a Thriving Organic Garden
Raised Bed Tomato Cultivation: Soil Preparation and Planting Methods
Copyright © www.100flowers.win Botanic Garden All Rights Reserved