

A trellis is an essential if you want to grow some of the most exciting climbing plants – roses, clematis, things like that. Don’t skimp on construction. Any plant growing well will soon get heavy enough to pull a flimsy trellis down. So build it really solidly. We show the construction of a wooden trellis, bur you can use plastic covered mesh if you prefer. The fall brings a busy-harvest time in the vegetable plot and from any fruit trees or bushes.
Needs list: trellis materials; 3 pressure-treated softwood posts 7 ft 6 in long; nine battens 4ft 6 in long; six battens 2 ft long – all 2 in by 1 ft; expanding (or rigid) softwood trellis; about 6 in mesh, 3 panels 4 ft 6 in by 5 ft; 1 pkt 2 in brass screws; 1 gal creosote; 1 x 28 lb bag cement/sand mix; 4 pieces old pipe 2 ft long; 1 climbing rose; 1 clematis plant.
Time budget: 8 hours in 2 weeks
Autumn’s giving way to winter, stripping the last leaves off the trees. Day/night length roughly equal, starts many plants into dormancy: day length matters here as much as temperature. But already the garden is starting on its way to next year’s flowers, with bulbs swelling underground.

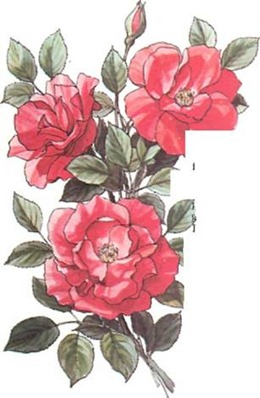
Traditionallv roses are everyone’s favourite plant: certainly in Britain they outsell all other woody plants by something like ten to one. Many people will tell you, ‘If you haven’t got roses, you haven’t got a garden’. In a small space garden, optimize your wall space: go for climbing roses. These flower prolifically on young wood growing from an old wood framework. Rambling roses grow from the base every year. Both are suitable. Literally hundreds of varieties are available: some of the best are ‘Handel’, ‘Golden Showers’, ‘Parkdirektor Riggers’, all climbers; ‘Dorothy Perkins’, ‘Felicite et Perpetue’ (ramblers). Check your local garden centre for varieties for your area.
You’re right in the harvesting season now for most vegetables. Pole beans will keep producing till first frost. Don’t wait for other vegetables to grow too big. Most taste best if you pick them when they are two-thirds the size the catalogues say they’ll grow to. Carrots, radishes, lettuces are typically tastier if picked young. Keep picking beans and they’ll keep on producing. If you manage to crop more tomatoes than you can eat at once, pickle the surplus ones. Salt down or deep freeze surplus beans. Don’t harvest potatoes till the haulms (tops) have died right down. Put all vegetable waste in the compost bin, including spent plants. Material at the bottom of the bin should be peaty and odourless by now. Dig it out, use it as a mulch, turn the rest, keep adding to the top. Even better, start a second bin once the first is full. Use them alternate years. Gives best results in the end. If you’re getting interested in which bugs are friends and which are foes, borrow books from your local library, read up on the subject.
The trellis you make now will be a permanent asset not only to your garden but to your property and its value – provided you make it well. So make it well, and it will serve you well. No skimping or short-cuts here please. First, dig your post holes at least 2 ft deep. Ours are 4 ft. 6 in. apart – a spacing we suggest you follow.
Put crocks in the bottom of the hole. Stand 1 non-glazed clay land drain pipe upright in the bottom of each hole. Next creosote the part of the post that will be in the ground. Hammer in thick nails all round the part to be buried. Insert prepared poles one by one into the upright land-drain pipes in the holes.
Check that all posts are vertical from all directions: use spirit level, plumb line.
Wedge the post in its pipe, and the pipe in its hole, using rubble. Nail temporary struts from fence to hold post in position. Prepare strong cement/sand mix, pour into pipe and into hole round pipe. Tamp down, top up, tamp again, level off, leaving the cement/sand mix slightly shouldered up against the post as a watershed. Leave 1 week to set. Creosote posts.
Then fit horizontal battens, 3 per bay, each 4 ft. 6 in. long. Countersink battens into posts if you can: looks better, lasts longer. Fix battens to posts with 2 in. screws. Fix trellis panels to battens using 1/2 in. screws. If using a plastic-covered wire trellis fix to the battens with heavy duty plastic-coated wire. Finally, as an optional extra, cap the trellis: sheds rain, keeps trellis in good shape longer. If you’re putting the trellis on the shed, don’t use posts, start at the battens stage.
Plant a rose at the foot of one post, a honeysuckle at the foot of one post, a wisteria at the foot of another, and Clematis montana or its pink form at the foot of the third, always planting into a well-prepared hole. Keep neat for best effect. Only re-creosote the trellis when the plants are dormant. Creosote on the leaves can kill.
Two Hour Gardening Project: Stage 26 Climbing Plants and Pergolas
Two Hour Gardening Project: Stage 25 Getting To Know Your Garden
Two Hour Gardening Project: Stage 24 Propagation and Growing Herbs
Two Hour Gardening Project: Stage 21 Making Christmas Present Plants
Two Hour Gardening Project: Stage 20 Tubs and Container Gardening
Two Hour Gardening Project: Stage 18 Choosing Shrubs for the Garden
Two Hour Gardening Project: Stage 17 Fan Trained Fruit Trees
Copyright © www.100flowers.win Botanic Garden All Rights Reserved