

After admiring them for years, I've started adding irises to my garden. They didn't look like much the first year or two as they settled in, and I wondered how long I would have to be patient with them. But this spring, some of them began blooming in earnest, and I realized I wanted to grow more and more of these wonderful flowers!
(Editor's Note: This article was originally published on September 10, 2007)
Bearded Irises are tough plants and easy to grow, for all their beauty. I’ve asked many expert growers for advice, and I’ve learned there is no “one true way” to grow irises. But one truism emerged about their culture: Bearded Iris rhizomes hate to be wet! Plant them shallowly, keep them relatively dry, and they’ll thrive.
A great way to find planting tips for your area is to contact a local chapter of the American Iris Society. Local chapters often hold rhizome sales, a great way to pick and choose new irises. Some iris cultivars simply do better than others in a given area. Local growers can tell you which ones increase quickly or re-bloom well for them.
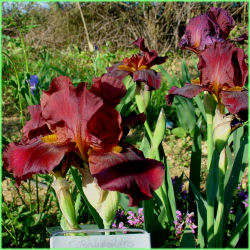 IB Iris 'Red Zinger' from DGer "JoanJ"
Take advantage of the late season iris sales! Check the DG Classifieds, and go to Garden Watchdog to search the "Plants: Iris" categories for a list of retailers. Irises need 4 to 6 weeks to start growing before first frost, so time your purchases accordingly. July and August are generally good months to divide iris, if you know somebody with extras to share.
These step by step instructions are for planting Bearded Irises of all sizes, from Tall Bearded Iris (TB) to Miniature Iris. Other kinds of irises have different culture requirements. See the resource "sticky" thread on the Iris Forum for more information.
1. Choose which rhizomes to plant. A rhizome will only bloom once in its life. Its energy then goes into producing daughter rhizomes that bloom in their turn. Larger rhizomes can be cut away from the mother rhizome and planted on their own. They will bloom in a year or two. Planting a mother rhizome with nubs and little rhizomes attached will give you a blooming clump in a few years.
2. Disinfect new rhizomes. This will help prevent rot and kill any iris borers. Add 1 cup household bleach to 1 gallon of water. Soak rhizomes for 10 minutes, rinse well, and lay out to dry. It's OK to wait days or even weeks before planting, but sooner is better. Some people trim old roots; others use them to anchor the rhizome in its new spot.
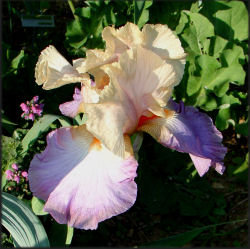 First bloom on TB 'Loudon Charmer'
from my local AIS chapter
3. Pick a location. Irises prefer dry conditions and need excellent drainage. Full sun is best, although many older and heirloom varieties will still bloom well in partial shade. Some people have dedicated iris beds; others mix irises with other plants that don't need or want a lot of water. As long as the iris is in a sunny spot where its rhizome can stay dry, all will be well.
4. Prepare the soil. Bearded irises will grow in sandy or clay soils but not in soggy soil. For better drainage, plant in hills or raised beds and add amendments like compost and sand. Some people recommend starting bearded irises in pots; others pooh-pooh this as an unnecessary extra step. But if you're still digging their bed when your new irises arrive, then potting them might be the best way to go.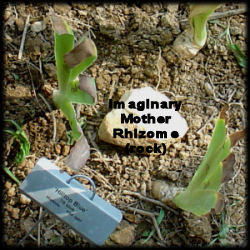 5. Consider placement. Irises should be spaced 18 to 24 inches apart. Planting so all rhizomes run in the same general direction looks better and helps to keep clumps spaced out as they increase. When I have several rhizomes of the same cultivar, I like to plant them as a clump. For a natural look, let them angle away from one another a little, as though they grew from the same imaginary mother rhizome.
6. Plant the rhizome. Do not bury the rhizome! It may look like a tap root, but if you plant it deeply, the iris will die. Some people plant irises with the rhizome just barely covered with soil; others swear as much as half of the rhizome should be showing above the ground. Some people plant at ground level; others raise up mounds of dirt and plant irises in hills, like cucumbers. Some people mulch in between clumps or hills of iris; others leave bare dirt in their iris beds but put down a pre-emergent herbicide such as Preen. Any of these options work just fine.
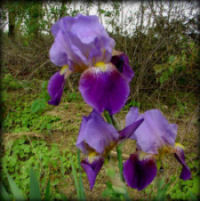 Purple TB iris from DGer "nminmd"
7. Water in the new iris. Continue to water two or three times a week until you see new growth, and then let the rain do your watering. A few time release fertilizer pellets can be added when you plant, but many advise against fertilizing new irises. Polymer moisture crystals (such as Soil Moist or Watersorb) can be used sparingly when you plant to soak up any extra water.
8. Avoid winter "heaving." If you’re planting late in the season, a rock on top of the rhizome will help keep the new rhizomes in place during freeze-thaw cycles. Last year, I laid Christmas tree branches across the bed of new irises until early spring. If rhizomes do heave up out of the ground, just push them down again and tamp the soil down around them.
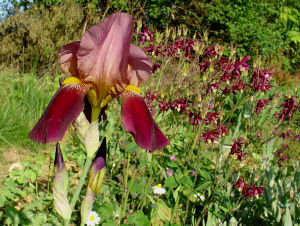 TB Iris 'Indian Chief' and columbines
Plant your bearded iris shallowly, in a sunny spot with good drainage, so the rhizome can dry out quickly after a rainstorm. By keeping some basic planting principles in mind, you will figure out what works best for irises in your garden. Like so many garden topics, there is no "one true way" to grow irises. So pick a way, and give them a try!
Whether you plant one rhizome or one hundred, add some iris magic to your garden!
Special thanks to mitchf and avmoran for their input.
Copyright © www.100flowers.win Botanic Garden All Rights Reserved