Can you ever imagine earning good money by growing worms? This is very much possible, as homemade worm castings are considered one of the richest fertilizers.
Worm farming business, which was earlier limited to a small domain, has now developed into a full-fledged one. Initially, this business was mainly based on the supply of earthworms to anglers. It was a seasonal business as fishing was mainly done during the months of June, July, August, and September.
Now things have changed, as a more eco-friendly business has emerged. This business is more concentrated on growing worms for selling vermicompost, which is a mixture of harvested vermicasts and decomposed vegetable and food waste and bedding materials. Started as a small scale business at homes to cater the individual needs of compost, now commercial worm farming is a widespread, large-scale business.
How to Start a Worm Farming Business
If you are not experienced in worm composting, you have to gain a basic understanding about growing worms. Once you obtain the necessary information, you can think of starting the business. It is always better to go for small investments, during the initial stages. Once you catch up with the business, you may expand your network. Collect the supplies, needed for a worm composting system. To get started, you need two large plastic containers, soil, and a few good worms.
- The most important among these supplies is the right type of earthworms, which may vary with the requirement of your customers. The most commonly used ones are red worms or tiger worms, which are mainly used for making vermicompost. Even anglers use these worms, but larger worms, like mammoth Canadians are preferred as bait for fish.
- You can buy some live worms from local nurseries or fishing supply stores. You may also buy them online. However, make sure that your worm bins are ready, as you get the earthworms. If the conditions are suitable, the number of worms may double in 12 months. So, keep this in mind while deciding the number of worms to buy.
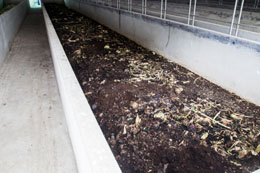
- You can make your own worm farming bins using large, sturdy plastic containers. Drill some holes in the bottom of the containers. Drill from inside, so that there is no flaring in the inside portion. Such flaring inside the containers may cause harm to the worms. These holes are necessary for drainage, as water retention is not good for the worms as well as the composting process. The holes should not be too big. Punching holes with an ice pick will be perfect.
- The next step is setting up the perfect atmosphere for earthworm farming. If the plastic containers have lids, keep them below the containers to prevent water leakage. Add shredded newspaper and peat moss to the container. The shredded newspaper should be soaked previously, and must be wet before adding to the container, so that the worms can easily chew the soft paper. Use only newsprint and avoid papers of glossy magazines.
- As your bin is ready with the bottom layer, you have to add organic material. You can use any organic material, like food scraps, wood shavings, manure, cardboard, and newspaper. However, refrain from adding meat, bones and onions. Food scraps should be cut into one-inch pieces.
- In case of wood shavings, avoid using painted or varnished ones. If you want to add manure, never use cat or dog manure, but you can feed the worms with small quantities of manure from rabbits or horses. Cardboard boxes can be fed, after shredding and soaking. Add some soil too.
- Now, your worm bin is ready, and you can add the worms. Make sure to follow the instructions of the worm dealer. The next step is to cover the opening (top portion) of the container with a cotton cloth. Fasten the cloth to the rim of the container, and water it gently to ensure that the worms are in a moist environment. You should keep the worm bin moist, as dryness will affect the worms negatively. Water daily according to the humidity levels at your place.
- Another important factor is maintaining the temperature levels. These worms like a temperature that ranges between 55 to 77° F. Too much cold or extreme heat can kill them. It is always better to keep the bin, where there is less vibration.
- You must feed the worms daily. You may feed them with organic household waste, like leftover food, vegetable and fruit peels, powdered egg shells, coffee grounds, etc. One pound of worms need half a pound of food every day.
- Now, you can leave the worms to do their work. Make sure that the bin is in a sheltered place, where there is no direct sunlight or frost. The moist, dark atmosphere of the worm bin is ideal for their feeding and breeding. You can harvest the vermicompost, if there is no or few uneaten scrap items left in the worm bin. Even though, there are many methods to harvest the compost, small scale ones can be done manually. Try to separate as many worms and the small yellow-shaped eggs or cocoons from the compost. Return the worms and cocoons to the worm bin and you can sell the vermicompost.
You have to find buyers for the vermicompost and worms. Once you are settled with the business, you can invest more and reap more profits. Setting up a worm farm is an easy task as worm farming supplies are also readily available. You can set up one in your backyard or the garage, and start your worm farming business.

