

The first step in building a raised bed is site selection. You want a location that has full sun; that means a minimum of 6 hours per day, preferably more if possible.
After you have selected a site you need to choose material from which to frame your bed.
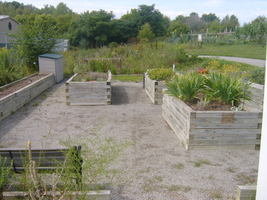
You have a vast selection of materials to choose from. I was fortunate to have a friend who owned a large farm. Each spring before plowing he had to clear the field of large stones; he would pile them up and give me a call. I had an endless supply of field stone to use for our raised beds. They are decorative as well as functional. Cement block as well as wood also makes an excellent raised bed.
Pressure treated lumber is probably the most economical type of lumber to use that will last the longest. Prior to 2005 pressure treated lumber contained arsenic. Since that time it is no longer permitted; if you use pressure treated lumber older than that don’t grow vegetables in that bed. This will eliminate possibility of some of the harmful substances being absorbed by the veggies.
Cedar and Red Wood are also good choices although red wood can be a bit pricy.
If using lumber there are corner brackets available from home centers, and catalogs that makes joing the corners very easy.
.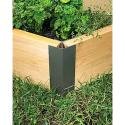
Metal Corner Brackets
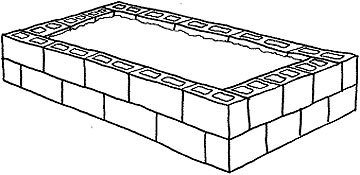
Cement block is also an inexpensive material from which you can construct a raised bed.
As far as the size of your raised bed, you can build them as large as you want. The most important factor to consider is that you will need to be able to reach into the bed to harvest and weed etc. The most recommended width is 48 inches wide and as long as you desire. This will enable you to reach across the bed from either side.
After completing your bed, you will need to fill it with a planting medium. I prefer to use a mixture of 50% top soil and 50% compost, I mix these together and they make an excellent planting media. I also mulch with compost to retain moisture and deter weeds.
A couple of “extras” that I have added to one of my raised bed.
A hoop house. This bed is framed with landscape timbers. I drilled holes into the timbers and inserted 1 inch PVC pipe into the holes. I placed 3 of these pipes along the length of the bed. Over the pipes I placed a heavy 6 mil piece of plastic, (visqueen). I place stones on the plastic to secure it to the ground. This is an excellent way to extend you growing season. After the weather warms I remove the plastic and pipes.
I leave the bed covered all winter; I can get a jump start on planting my tomatoes in April here in zone 6 as the soil has been warmed inside the hoop house.
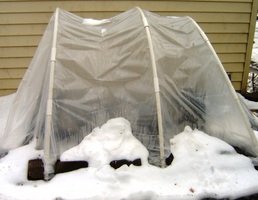
Even though there is snow outside, the soil is
warm inside.
Watering, my hoop house bed is approximately 4X10 feet. In order to water, I took some ¾ inch PVC pipe, a 360 degree sprinkler head, and a quick connect garden hose fitting and built an in ground watering system. Before planting in the spring I bury the pipe 3-4 inches below the soil surface making sure the sprinkle head is in the center of the bed. When I’m ready to water, snap your garden hose onto the quick connect fitting and you’re ready to go. No worry about moving sprinklers from bed to bed. The pipe can easily be cut or added to if you need to move it to another location. PVC pipe is easily glued together and also easer to lengthen by using PVC couplings. PVC pipe and fittings are very inexpensive.
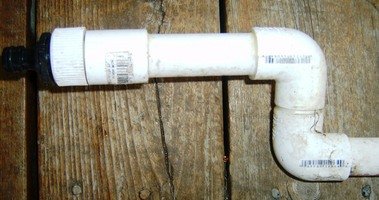

PVC pipe and fittings makes watering very easy
Raised beds are also an excellent solution to folks with disabilities who like to garden. They can be built to a height which is reachable from a wheelchair or motorized scooter.
Raised beds makes gardens accesible th those
with disablities from a wheelchair.
There you have it, raised beds are limited by only your imagination, and you can tailor them to fit your particular needs. Have fun building you raised beds.
Copyright © www.100flowers.win Botanic Garden All Rights Reserved