


By Dave Whitinger
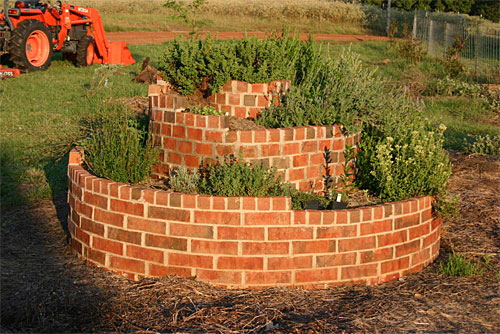
Our herb spiral
WHEN VISITORS come up our driveway, one of the first things they see is our herb spiral, which is prominently situated. They always ask us for details: What is this? and, Why is this bed in the shape of a spiral? It's always fun for me to explain the thinking behind this innovative garden design.
Imagine a long garden row, about 25 feet long. Then, take that row and coil it around and upward into a spiral. This spiral now has the length of a row, but only occupies a circular space about 6 feet wide.
Unlike a flat garden, an herb spiral is in three dimensions. The high spots get the most sun and have the best drainage, making it ideal for plants — such as oregano or rosemary — that thrive in sunny, well-drained sites. The bottom of the spiral, of course, is the right place for plants that like more moisture and some shade, such as comfrey. Plants planted along the eastern side of the spiral will get shade after noon, while the plants on the west side will take the brunt of the afternoon sun.
Tender perennials can be planted along the south side, where — throughout the winter — the sun will shine all day.
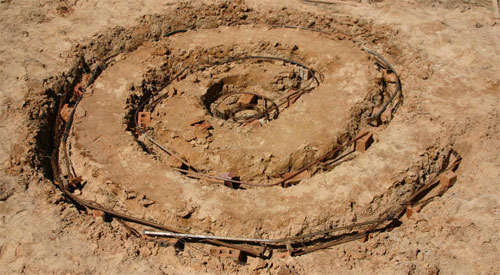
Foundation of the herb spiral, filled with metal rebar and broken bricks, ready for pouring the concrete foundation. If you live in an area with cold winters — zone 5 and colder — you will need to make a deeper foundation. Contact a local landscaper and ask about best practices in your area.
To make our herb spiral, we prepared the area by first completely leveling the site. Then, we dug a 6" trench in the shape of the spiral.
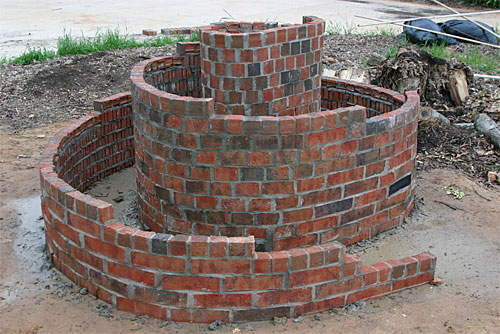
Brickwork is complete
Into this trench we ran rebar (reinforcing steel), placed on old bricks. Then, we mixed and poured bagged concrete to create the foundation. With the foundation in place, we mixed mortar and laid the bricks, row by row, until we had the shape we wanted. Working a couple hours a day, it took two weeks to make our herb spiral.
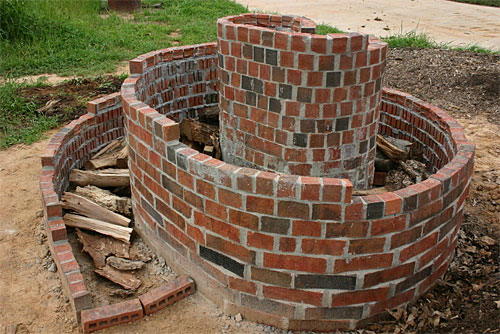
Consistent with the philosophy of hugelkultur, chunks of wood fill the base of the herb spiral. These will decay over time and provide organic matter.
Having completed the bricklaying, it's time for the fun part: filling it with a growing medium. Being a fan of hugelkultur, I chose to fill the bulk of the bed with old wood that will rot over time and provide a huge amount of organic matter.
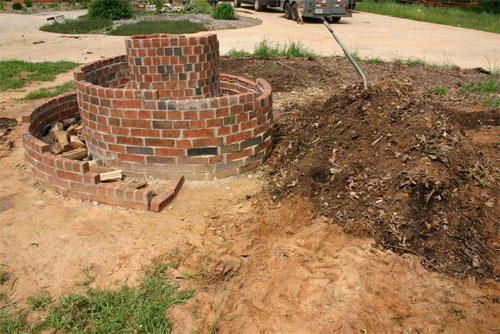
Mix good topsoil with organic matter to fill the spiral.
The rest of the bed is filled with any other organic matter: leaves, grass clippings, shredded wood chips, compost, old manure, good topsoil, etc.
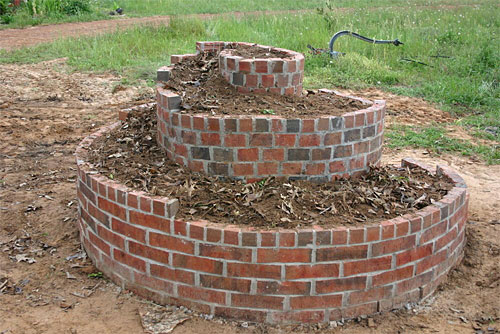
Herb spiral filled with soil
And here is the finished herb spiral, ready for planting.
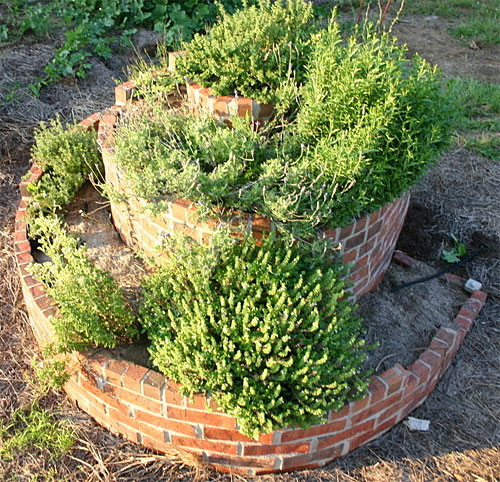
The spiral is exactly 25 feet long so a 25-foot soaker hose is perfect. When we want to water, we connect the garden hose to the soaker hose. Works great. Because herbs are generally drought-tolerant, we don't have to water very often. With the Snip-n-Drip Soaker System, you can cut the soaker hose it to fit your spiral perfectly.
We love our herb spiral. In addition to herbs, we use it to grow vegetables: spinach, lettuce, brassicas, carrots, peppers, eggplants and so on. Because it's such a beautiful garden, we are happy to have it right next to the house, where it is close to the kitchen, whenever we need fresh herbs.

Dave Whitinger
Dave Whitinger is a Texas gardener who — along with his wife and six children — maintains a 90-acre ranch with animals and numerous large gardens. He is the creator of several web sites, most notably Dave's Garden and All Things Plants. In 2007, he sold Dave's Garden. For the past couple of years he's been busy building his new gardening web site, All Things Plants.
Copyright © www.100flowers.win Botanic Garden All Rights Reserved