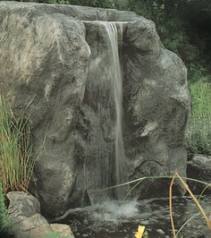


There is a wide range of pre-formed waterfall and cascade units that can be used as an addition to a pool. Some are quite attractive, but others are awful. The worst are made from plastic or fibreglass and have an artificial rock edging. Not only are these ugly, but the fake rocky edge also makes them extremely difficult to install so that they look natural.
 Some pre-formed waterfall units are single structures, while others comprise a series of separate sections with varying shapes that provide some flexibility in the final design. None is easy to install so that the finished appearance is convincing, unless they are liberally planted or disguised by carefully positioned rocks. However, they do have the virtue of being watertight, something that is often difficult to achieve with other forms of construction.
A waterfall must be installed on a slope, so some form of mound or soil profiling will be essential. This should be tall enough to permit the installation of the pre-formed units and broad enough to accommodate their length. The soil should have been allowed to settle for some months before installation takes place, since the waterfall must have a sound base that will not sink To obtain the right effect, and to ensure that water both remains and flows in all the right places, accurate levelling of the units, in both planes, is critical.
Place the units in position and mark around them. Start with the lower unit, for it is essential that the position of the final drop is directly over the pool. Carefully excavate an area that matches the outline and contours of the unit, allowing enough extra room for a layer of sand. Repeat the process for the remaining units until you reach the top of the waterfall.
Spread a generous layer of sand in and around the excavation for each unit so that it can be firmly bedded. This will be much better than using the soil, as the sand is finer and permits much greater accuracy when levelling. Soil can be used to finish off around the unit.
Position the lower moulding first, making sure that it is secure. The second and any subsequent units can be added next, taking care to position the lip of each directly over the moulding below, otherwise splashes and seepage will occur.
Given the unsightly appearance of most pre-formed waterfall units, it is worth trying to disguise the edges. Those of very simple form are easier to deal with, for soil can be brought up to the edge and rocks placed strategically around the rim, pockets of soil being incorporated to allow planting.
It is also possible to disguise the floor of each unit by covering it with well washed pebbles. The flow created by a standard submersible pump is unlikely to cause any disruption to this layer, and the effect of water tumbling over the stones will be very pleasing.
Pre-formed waterfall units can also be very effective if the ground is terraced. This offers a splendid opportunity for creating a cascade.
As an alternative to an irregular land form or a rock garden, build a simple low rock wall at the edge of the pool. This can be constructed with pointed mortar joints or simply laid dry. Either way, pockets can be incorporated to allow for planting, which will soften some of the harshness of the raw stone immediately after construction.
Backfill behind the wall with soil and, if desired, create a further wall and water drop. However, if you do this, something rather larger than the traditional cascade unit will have to be used beneath the lip of the upper unit. Otherwise, water will splash everywhere.
Take great care when positioning the unit that its lip projects just beyond the face of the wall. This will prevent any possibility of the water splashing and scouring any of the planting pockets created.
Copyright © www.100flowers.win Botanic Garden All Rights Reserved